LastPass Keeps Logging Out? Here’s Why & How to Fix It
Experiencing frequent logouts from LastPass can be frustrating, but understanding why lastpass keeps logging out is the first step to solving the problem. The LastPass browser extension, a key component of the service, can sometimes trigger unexpected logouts due to conflicting settings or cache issues. These persistent interruptions often connect with issues with multi-factor authentication (MFA), leading to a cycle of re-authentication demands. Addressing settings within your password manager setup will reduce the frequency of the lastpass keeps logging out issue.
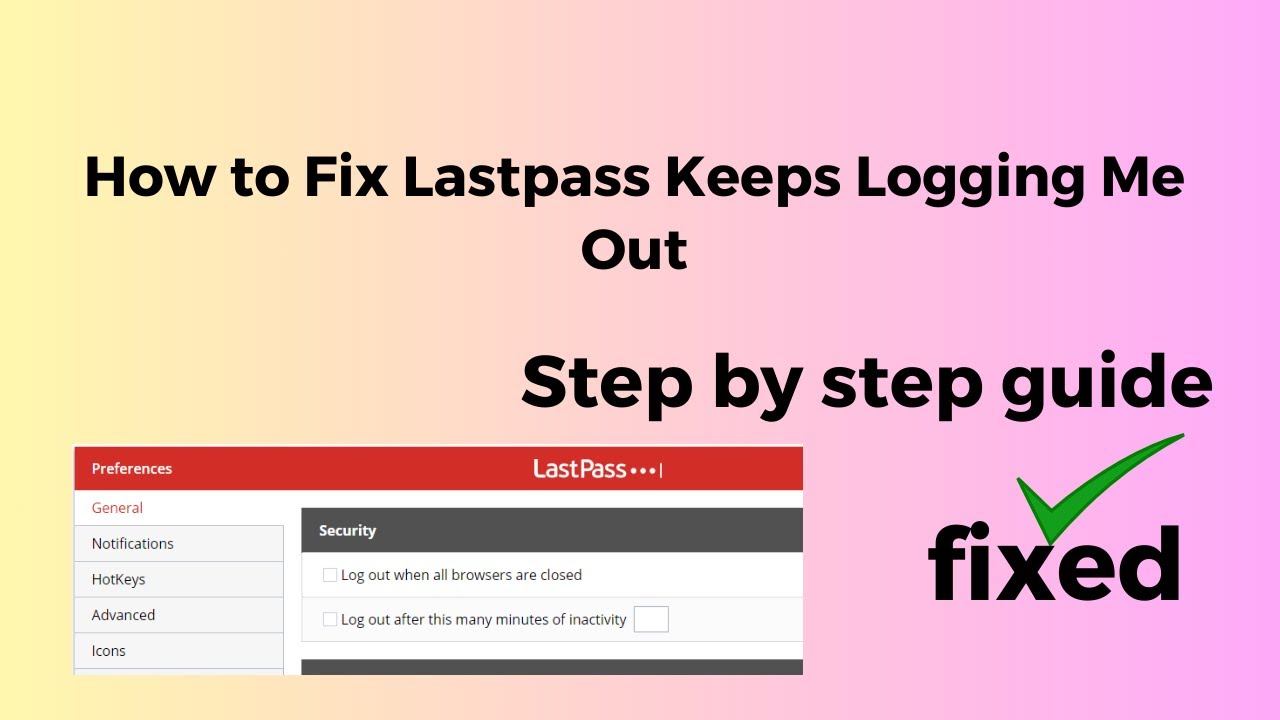
Image taken from the YouTube channel Wealth Quint , from the video titled How to Fix Lastpass Keeps Logging Me Out .
In today’s digital landscape, where we juggle countless online accounts, password managers have become indispensable tools. Among these, LastPass stands out as a leading solution, trusted by millions to securely store and manage their login credentials.
However, even the most reliable tools can sometimes present frustrating issues. One recurring complaint among LastPass users is the seemingly unexplained and frequent logouts. It’s an annoyance that disrupts workflow, compromises convenience, and raises concerns about the overall user experience.
The Frustration of Frequent Logouts
Imagine being in the middle of an important task, only to find yourself abruptly logged out of LastPass. Suddenly, all your saved passwords are inaccessible, forcing you to scramble for alternatives or repeatedly enter your master password. This is a common scenario for many LastPass users.
This constant need to re-authenticate not only breaks the flow of work but also undermines the very purpose of using a password manager in the first place – to simplify and streamline the login process.
Unlocking the Mystery: Diagnosing the Root Causes
Why does this happen? What triggers these seemingly random logouts? The reasons behind LastPass’s frequent logouts can be varied and complex, stemming from a combination of factors related to account settings, browser configurations, extension issues, and even multi-factor authentication (MFA).
Our Objective: Providing Solutions and Enhancing Your LastPass Experience
This article aims to shed light on the most common causes of frequent LastPass logouts and provide actionable solutions to address them. We will delve into the intricacies of session timeout settings, browser extension behavior, cookie management, and MFA configurations, offering practical guidance to help you regain control over your LastPass experience.
By understanding the underlying reasons and implementing the suggested fixes, you can minimize disruptions, enhance security, and enjoy a smoother, more reliable password management experience with LastPass.
In light of the frustration surrounding unexpected logouts, it’s time to explore some of the underlying mechanisms within LastPass itself. Understanding these internal controls is key to tailoring the experience to your specific needs and usage patterns.
Understanding Session Timeout and Account Settings
One of the most common culprits behind frequent LastPass logouts is the session timeout setting. This feature, designed for security, automatically logs you out after a period of inactivity. While intended to protect your data, it can become a nuisance if the timeout is too short.
The Role of Session Timeout
The session timeout setting in LastPass dictates how long you can remain logged in without any activity. Activity is generally defined as interacting with the LastPass extension or vault.
If the set time elapses without interaction, LastPass will automatically log you out, requiring you to re-enter your master password (or use MFA if enabled) to regain access to your passwords.
This is a security measure meant to prevent unauthorized access to your vault if you leave your computer unattended.
However, for users who frequently switch between tasks or have longer periods of inactivity, a short timeout can lead to constant interruptions.
Modifying Session Timeout Preferences
Fortunately, LastPass allows you to adjust the session timeout settings to suit your individual needs. Here’s how to find and modify them:
-
Log in to LastPass: Access your LastPass vault either through the browser extension or the LastPass website.
-
Navigate to Account Settings: In the web vault, click on your email address in the lower-left corner and select "Account Settings" from the dropdown menu. You can also access account settings from the LastPass browser extension, by clicking the LastPass icon, then "Account Options", then "Account Settings".
-
Find Session Timeout Settings: Look for the "Session Length" section. This section allows you to configure how long LastPass should keep you logged in before requiring re-authentication.
-
Adjust the Timeout: You’ll typically see options for different timeout durations, ranging from minutes to hours, or even setting it to "Keep me logged in until manually logged out".
Select the option that best balances security with your desired level of convenience. Keep in mind the security implications of longer timeout periods, especially on shared devices.
-
Save Your Changes: Be sure to save your changes after adjusting the timeout setting.
Other Relevant Account Settings
Beyond session timeout, several other account settings can influence your login experience.
- Trusted Devices: LastPass allows you to mark certain devices as "trusted." When logging in from a trusted device, you may be prompted less frequently for your master password or MFA, streamlining the login process.
- Security Email Alerts: Enabling email alerts for unusual login activity can help you monitor your account for suspicious behavior and promptly address any potential security breaches.
- Inactive Account Settings: LastPass has an option to either delete data or notify a trusted contact after a specified period of account inactivity. This setting does not directly affect the frequency of logouts during active sessions but is another area of control within account settings.
By carefully reviewing and adjusting these settings, you can optimize your LastPass experience. Strike the right balance between robust security and a seamless, uninterrupted workflow.
In light of the frustration surrounding unexpected logouts, it’s time to explore some of the underlying mechanisms within LastPass itself. Understanding these internal controls is key to tailoring the experience to your specific needs and usage patterns. Now, let’s shift our focus from account settings to the unsung hero of your LastPass experience: the browser extension. Often taken for granted, this small piece of software is your direct interface with the password vault, and its health is crucial for smooth operation.
Troubleshooting Browser Extension Issues
The LastPass browser extension is your gateway to seamless password management, but when it falters, so does your entire experience. A malfunctioning extension can lead to a host of problems, including frequent logouts, incorrect autofill, and even the inability to access your vault altogether. Understanding the common culprits behind these issues and knowing how to address them is essential for maintaining a frustration-free LastPass experience.
Identifying Potential Problems
Several factors can contribute to browser extension issues. Here are some of the most common:
-
Conflicting extensions: Other browser extensions can sometimes interfere with LastPass, causing unexpected behavior.
-
Corrupted installation: The extension files themselves might become damaged, leading to malfunctions.
-
Outdated version: Using an older version of the LastPass extension can cause compatibility issues and security vulnerabilities.
-
Browser updates: Sometimes a browser update can cause compatibility issues with extensions.
Updating the LastPass Extension: A Step-by-Step Guide
Keeping your LastPass extension up-to-date is crucial for ensuring optimal performance and security. The update process is usually straightforward, but here’s a detailed guide:
-
Check for Updates: Most browsers will automatically update extensions in the background. However, you can manually check for updates in your browser’s extension management section.
-
Navigate to Extension Settings:
- Chrome: Type
chrome://extensionsin the address bar and press Enter. - Firefox: Type
about:addonsin the address bar and press Enter. - Safari: Go to Safari > Preferences > Extensions.
- Edge: Type
edge://extensionsin the address bar and press Enter.
- Chrome: Type
-
Enable Developer Mode (If Necessary): In some browsers like Chrome, you may need to enable "Developer mode" to force an update.
-
Update the Extension: Look for an "Update" button or a similar option for the LastPass extension. Click it to initiate the update.
-
Restart Your Browser: After the update is complete, restart your browser to ensure the changes take effect.
Reinstalling the Extension: A Fresh Start
If updating doesn’t resolve the issue, reinstalling the LastPass extension is the next logical step. This process ensures a clean slate and can often fix problems caused by corrupted files.
-
Remove the Extension:
- Follow the steps in the previous section to access your browser’s extension management page.
- Locate the LastPass extension and click the "Remove" or "Uninstall" button.
-
Restart Your Browser: Close and reopen your browser to completely remove the extension.
-
Download the Latest Version: Visit the official LastPass website and download the latest version of the browser extension for your specific browser.
-
Install the Extension: Follow the on-screen instructions to install the extension. Grant any necessary permissions when prompted.
-
Log In to LastPass: Once the installation is complete, log in to your LastPass account through the extension.
Troubleshooting Common Extension Errors
Even after updating or reinstalling, you might still encounter problems. Here are some troubleshooting steps for common extension-related errors:
-
Extension Not Responding: If the extension appears frozen or unresponsive, try disabling and re-enabling it from your browser’s extension management page.
-
Autofill Issues: If the extension isn’t autofilling passwords correctly, make sure that the correct website entry is saved in your LastPass vault and that the autofill feature is enabled in the extension settings. Also, ensure that you are on the correct URL for the website. Slight variations in the URL can prevent LastPass from recognizing the site.
-
Conflicts with Other Extensions: Temporarily disable other browser extensions to see if they are interfering with LastPass. If disabling a specific extension resolves the issue, consider removing it or finding an alternative.
-
Clear Browser Cache and Cookies: As we’ll discuss in the next section, clearing your browser’s cache and cookies can resolve various extension-related issues. Corrupted or outdated cache data can sometimes interfere with the extension’s functionality.
In light of the frustration surrounding unexpected logouts, it’s time to explore some of the underlying mechanisms within LastPass itself. Understanding these internal controls is key to tailoring the experience to your specific needs and usage patterns. Now, let’s shift our focus from account settings to the unsung hero of your LastPass experience: the browser extension. Often taken for granted, this small piece of software is your direct interface with the password vault, and its health is crucial for smooth operation.
Clearing Cookies and Cache for Optimal Performance
Just like any other website or web application, LastPass relies on your browser to store temporary data in the form of cookies and cached files. While these elements are designed to enhance your browsing experience, over time, they can accumulate and potentially interfere with LastPass’s ability to function smoothly. Think of it as digital clutter that can slow things down and cause unexpected hiccups.
The Impact of Cookies and Cache on LastPass
Cookies, small text files stored by websites, remember your preferences and login information. If these cookies become corrupted or outdated, LastPass might struggle to recognize your login status, leading to those dreaded frequent logouts.
Cached data, on the other hand, comprises images, scripts, and other website resources stored locally on your computer. While intended to speed up page loading times, a large cache can sometimes contain outdated or conflicting files that prevent LastPass from operating correctly. Imagine trying to assemble a puzzle with a few wrong pieces—that’s essentially what’s happening when outdated cached data clashes with LastPass.
Browser-Specific Instructions for Clearing Cookies and Cache
Fortunately, clearing your browser’s cookies and cache is a relatively straightforward process. Here’s a guide for some of the most popular browsers:
Chrome
- Click the three vertical dots (Menu) in the top-right corner of the browser.
- Select "More tools" and then "Clear browsing data."
- In the "Time range" dropdown, choose "All time."
- Check the boxes next to "Cookies and other site data" and "Cached images and files."
- Click "Clear data."
Firefox
- Click the three horizontal lines (Menu) in the top-right corner of the browser.
- Select "Settings."
- Click "Privacy & Security" in the left sidebar.
- In the "Cookies and Site Data" section, click "Clear Data."
- Check the boxes next to "Cookies and Site Data" and "Cached Web Content."
- Click "Clear" and then "Clear Now."
Safari
- Click "Safari" in the menu bar and select "Preferences."
- Click the "Privacy" tab.
- Click "Manage Website Data."
- Click "Remove All" and then "Done."
- To clear the cache, enable the "Develop" menu by going to "Safari" > "Preferences" > "Advanced" and checking "Show Develop menu in menu bar."
- Then, click "Develop" in the menu bar and select "Empty Caches."
Edge
- Click the three horizontal dots (Menu) in the top-right corner of the browser.
- Select "Settings."
- Click "Privacy, search, and services" in the left sidebar.
- Under "Clear browsing data," click "Choose what to clear."
- In the "Time range" dropdown, choose "All time."
- Check the boxes next to "Cookies and other site data" and "Cached images and files."
- Click "Clear now."
The Importance of Regular Maintenance
Clearing your cookies and cache shouldn’t be a one-time event. Regularly clearing your browsing data, perhaps once a month or even more frequently if you experience persistent issues, can help prevent these problems from recurring. Think of it as a routine tune-up for your browser, ensuring that LastPass has a clean and stable environment to operate in. While it might seem like a small task, it can have a significant impact on the overall performance and reliability of your LastPass experience.
Managing Multi-Factor Authentication (MFA) Challenges
While Multi-Factor Authentication (MFA) significantly enhances your LastPass security, it can ironically be a source of login frustrations. The very mechanism designed to protect your account can sometimes lead to unexpected logouts and authentication challenges. Let’s delve into how MFA might contribute to these issues and, more importantly, how to navigate them effectively.
The Double-Edged Sword of MFA
MFA adds an extra layer of security by requiring a second verification method beyond your password. This might involve a code from an authenticator app, a push notification, or even a biometric scan.
However, this increased security can introduce complications. If your second factor isn’t readily available or properly configured, it can trigger frequent logouts or prevent successful logins altogether.
Troubleshooting Common MFA Issues
Fortunately, many MFA-related logout problems have straightforward solutions. Here’s a breakdown of the most common culprits and how to address them:
Verifying Authenticator App Codes
Authenticator apps, such as Google Authenticator or Authy, generate time-sensitive codes that you use to verify your identity.
It’s crucial to ensure that the time on your phone or device is synchronized correctly. If the time is off, the codes generated by the app will be invalid, leading to login failures.
Most operating systems have an option to automatically synchronize the time; make sure this setting is enabled.
Ensuring Backup Codes Are Accessible and Up-to-Date
When setting up MFA, LastPass provides you with backup codes to use if you lose access to your primary authentication method.
Treat these backup codes like gold. Store them in a safe, secure location, both digitally and physically.
Periodically review and regenerate your backup codes to ensure they are still valid and accessible. If you suspect your backup codes have been compromised, immediately generate new ones.
Checking for Device Trust Issues
LastPass often allows you to "trust" devices, so you don’t have to enter an MFA code every time you log in from that device.
However, if LastPass is having trouble recognizing a trusted device, it might repeatedly prompt you for MFA, potentially leading to logouts if the process fails.
Try clearing your browser’s cookies and cache (as discussed in the previous section) and then logging in again to re-establish trust.
You can also review your trusted devices within your LastPass account settings and remove any that are no longer in use or are causing problems.
The Importance of MFA, Despite the Inconvenience
While MFA can sometimes be frustrating, its security benefits far outweigh the occasional inconvenience. It provides a critical shield against unauthorized access to your LastPass vault, protecting your sensitive information from potential threats.
By understanding how MFA works and proactively troubleshooting common issues, you can strike a balance between robust security and a smooth, hassle-free LastPass experience. Don’t disable MFA out of frustration; instead, take the time to address the underlying problems and reap the long-term rewards of enhanced protection.
When we consider the various factors that can cause unexpected logouts from LastPass, it’s easy to overlook the role your mobile app plays. While seemingly independent, the LastPass mobile app, especially when running in the background, can indeed influence your desktop sessions. Let’s explore how this happens and what you can do to maintain a seamless experience across all your devices.
Mobile App Considerations: Background Activity and Synchronization
The LastPass mobile app is designed for convenience. It keeps you logged in, allowing for quick access to your passwords on the go. But this constant background activity and the app’s synchronization mechanisms can, under certain circumstances, lead to unexpected logouts on your computer.
How Background Activity Impacts Desktop Sessions
The LastPass mobile app periodically synchronizes your vault with LastPass servers. This ensures that any changes you make on your phone, such as adding a new password or editing an existing one, are reflected across all your devices.
This synchronization process, while essential, can sometimes trigger a re-authentication request on your desktop.
Think of it like this: the mobile app is constantly "checking in" with the LastPass servers, and this check-in can inadvertently signal to your desktop browser that your session needs to be re-verified.
This is more likely to occur if there are network inconsistencies or if the app is struggling to maintain a stable connection to the LastPass servers.
Managing App Settings for Optimal Performance
Fortunately, you can manage the LastPass mobile app’s settings to minimize potential conflicts with your desktop sessions.
Here’s how:
-
Background Refresh: Some operating systems and device manufacturers have aggressive battery-saving features that can interfere with LastPass’s background synchronization. Ensure that LastPass has the necessary permissions to run in the background without restrictions. Consult your phone’s settings for app-specific battery optimization options.
-
Synchronization Frequency: While you can’t directly control the synchronization frequency in LastPass, be mindful of your network connectivity. A weak or intermittent connection can lead to repeated synchronization attempts, potentially triggering more frequent logouts on other devices.
-
Notifications: Consider enabling LastPass notifications on your mobile device. This can provide insights into when the app is synchronizing and help you identify potential issues.
Ensuring Consistent Synchronization Across All Devices
Consistent synchronization is key to a smooth LastPass experience. Here are some tips to ensure your devices are always on the same page:
-
Regularly Open the App: Even if you don’t actively use the LastPass mobile app every day, open it periodically to force a synchronization. This ensures that your vault is up-to-date and reduces the likelihood of discrepancies.
-
Verify Data Integrity: Occasionally, log in to the LastPass website and compare your stored passwords with those on your mobile app and browser extension. This can help you catch any synchronization errors early on.
-
Update Promptly: Always update the LastPass app and browser extension to the latest versions. Updates often include bug fixes and performance improvements that can enhance synchronization reliability.
By understanding how the LastPass mobile app interacts with your other devices and by actively managing its settings, you can significantly reduce the frequency of unexpected logouts and enjoy a more seamless password management experience.
How do these background processes and synchronization affect your desktop experience? It’s a balancing act between convenience and control, one that requires a bit of fine-tuning to get just right. Let’s shift our focus now to another crucial aspect of maintaining a secure and stable LastPass experience: your account security settings.
Reviewing Account Security Settings
Your LastPass Account Settings are the central command for managing your security preferences and login behavior. Regularly reviewing these settings is a proactive step in preventing unauthorized access and maintaining control over your account. This is more than just a formality; it’s about ensuring you’re aware of who has access and how they’re accessing your vault.
Checking for Unusual Activity
One of the first things you should do when reviewing your account settings is to check for any unusual activity. LastPass maintains a log of login attempts and successful logins, including the IP address, date, and time of each event.
Pay close attention to login attempts from unfamiliar locations or devices. A sudden spike in login attempts, especially from different geographic regions, could indicate a potential breach.
If you notice anything suspicious, immediately change your master password and consider enabling additional security measures, such as two-factor authentication.
Enabling Alerts for Suspicious Logins
LastPass offers the option to receive alerts when a login occurs from a new or unrecognized device. Enabling these alerts is a simple yet effective way to stay informed about potential unauthorized access.
You can usually configure these alerts to be sent via email or push notification to your mobile device. Prompt alerts empower you to take immediate action if a suspicious login occurs. This feature acts as an early warning system, allowing you to quickly investigate and secure your account.
Revoking Access to Unrecognized Devices
Within your Account Settings, you’ll find a list of devices that have been granted access to your LastPass vault. This includes computers, smartphones, and tablets where you’ve previously logged in.
Regularly review this list and revoke access to any devices you no longer recognize or use. This is especially important if you’ve recently lost a device or suspect that your account may have been compromised.
Removing a device from the trusted list prevents it from accessing your vault, even if someone has your master password. This adds an extra layer of security and helps ensure that only authorized devices can access your sensitive information. Regularly pruning this list is a core security practice.
How do these background processes and synchronization affect your desktop experience? It’s a balancing act between convenience and control, one that requires a bit of fine-tuning to get just right. Let’s shift our focus now to another potential solution when LastPass isn’t behaving as expected, sometimes a fresh start is what it needs.
Reinstalling the Browser Extension: A Step-by-Step Guide
Sometimes, the simplest solutions are the most effective. If you’ve tried adjusting settings and clearing data but LastPass is still logging you out frequently, or exhibiting other strange behavior, the browser extension itself may be the culprit. A clean reinstall can often resolve underlying issues caused by corrupted files, conflicting software, or incomplete updates.
This section will provide a comprehensive, step-by-step guide to properly uninstalling and reinstalling the LastPass browser extension. By following these instructions carefully, you can ensure a clean installation and potentially resolve persistent problems.
Uninstalling the LastPass Extension
The first step is to completely remove the existing LastPass extension from your browser. The process varies slightly depending on which browser you’re using:
Chrome
-
Type
chrome://extensionsin the address bar and press Enter. -
Locate the LastPass extension.
-
Click the "Remove" button.
-
Confirm the removal by clicking "Remove" again in the pop-up window.
Firefox
-
Type
about:addonsin the address bar and press Enter. -
Select "Extensions" in the left sidebar.
-
Find the LastPass extension.
-
Click the three dots next to the extension.
-
Select "Remove."
-
Confirm the removal if prompted.
Safari
-
Open Safari’s Preferences (Safari > Preferences).
-
Click on the "Extensions" tab.
-
Locate the LastPass extension in the list.
-
Uncheck the box next to "LastPass" to disable it.
-
To completely remove it, select the LastPass extension and click the "Uninstall" button. Follow any on-screen prompts.
Edge
-
Type
edge://extensionsin the address bar and press Enter. -
Find the LastPass extension.
-
Click the "Remove" button below the extension.
-
Confirm the removal by clicking "Remove" again in the confirmation dialog.
Downloading the Latest Version
Once you’ve uninstalled the existing extension, the next step is to download the latest version from the official LastPass website. Always download directly from LastPass to avoid potentially harmful or compromised versions.
-
Visit the LastPass website: https://www.lastpass.com/
-
Navigate to the "Download" section. This is usually found in the footer of the website or by searching "LastPass Download."
-
The website should automatically detect your browser and operating system. If not, manually select the correct version.
-
Click the download button to begin downloading the LastPass extension installer.
Installing the LastPass Extension
After downloading the latest version, follow these steps to install the LastPass extension:
-
Locate the downloaded installer file (usually in your "Downloads" folder).
-
Double-click the installer file to begin the installation process.
-
Follow the on-screen instructions.
-
The installer will typically ask for permission to install the extension. Grant the necessary permissions.
-
Once the installation is complete, the LastPass icon should appear in your browser’s toolbar.
-
Click the LastPass icon and log in with your master password.
-
You may be prompted to enable certain features or grant additional permissions. Review these carefully and enable the features that you want to use.
By following these steps, you should have a fresh, clean installation of the LastPass browser extension. This can often resolve issues that were causing frequent logouts or other problems. If problems persist after reinstalling the extension, further troubleshooting steps may be necessary.
When to Escalate: Knowing When to Contact LastPass Support
Even after diligently implementing the various troubleshooting steps outlined, you might still find yourself grappling with persistent LastPass logout issues. It’s crucial to recognize when your efforts have reached their limit and when seeking professional assistance becomes the most effective course of action. Don’t spin your wheels endlessly when the experts are available to help.
Recognizing Persistent Problems
How do you know when you’ve exhausted your DIY options? Here are some telltale signs that it’s time to contact LastPass Support:
-
Consistent Logouts Despite Troubleshooting: If you’ve methodically worked through all the recommended solutions – adjusting settings, reinstalling the extension, clearing data – and the problem persists, it indicates a deeper, potentially account-specific issue.
-
Unexplained Error Messages: Encountering cryptic error messages within LastPass, especially if they lack clear explanations or solutions online, often points to a server-side problem or a bug requiring expert attention.
-
Account-Specific Anomalies: If you suspect your account might be compromised (unusual login activity, password changes you didn’t initiate), immediate contact with support is paramount.
-
Sync Issues Across Devices: If your LastPass vault isn’t reliably synchronizing across multiple devices despite a stable internet connection, it could indicate a problem with your account or the LastPass service itself.
Navigating the LastPass Support Channels
LastPass offers various support channels to assist users facing difficulties. Understanding these options can help you find the quickest path to resolution.
Official LastPass Support Website
The official LastPass support website is your first stop for comprehensive documentation, FAQs, and troubleshooting guides. You can access it at https://support.lastpass.com.
-
Knowledge Base: This section contains articles covering a wide range of topics, from basic setup to advanced troubleshooting. Use the search bar to find answers to specific questions.
-
Contact Support Form: If you can’t find a solution in the knowledge base, you can submit a support ticket through the contact form. Be prepared to provide detailed information about your issue, including error messages, browser versions, and the troubleshooting steps you’ve already taken.
LastPass Community Forums
The LastPass community forums can be a valuable resource for connecting with other users and finding solutions to common problems. You can access the forums at https://community.lastpass.com.
-
Search Existing Threads: Before posting a new question, search the forums to see if other users have encountered a similar issue and found a resolution.
-
Engage with the Community: Don’t hesitate to ask questions or share your own experiences. The LastPass community is often a helpful and supportive environment.
The Importance of Detailed Information
When contacting LastPass Support, providing comprehensive information is critical for a swift and effective resolution. Include the following details in your support request:
-
Description of the Issue: Clearly explain the problem you’re experiencing, including how often it occurs and any specific triggers.
-
Browser and Operating System: Specify the browser (e.g., Chrome, Firefox, Safari) and operating system (e.g., Windows, macOS, iOS, Android) you’re using.
-
LastPass Version: Indicate the version number of the LastPass browser extension or mobile app.
-
Troubleshooting Steps Taken: List all the troubleshooting steps you’ve already attempted, along with the results.
-
Error Messages: Include the exact text of any error messages you’ve encountered.
By providing these details upfront, you’ll help the support team understand your issue more quickly and provide more targeted assistance.
Don’t Hesitate to Reach Out
While self-troubleshooting is often effective, there’s no shame in seeking professional help when needed. LastPass Support is there to assist you with complex issues and ensure a smooth and secure password management experience. If you’ve exhausted your troubleshooting options and are still experiencing problems, don’t hesitate to contact them for assistance.
LastPass Login Woes: Your FAQs Answered
Here are some common questions related to frequent LastPass logouts and how to address them.
Why does LastPass keep logging out so often?
LastPass might be logging you out frequently due to browser settings, extension issues, or your account’s security configuration. Aggressive cookie clearing by your browser or security software can trigger the need to re-login. Account inactivity settings can also cause LastPass keeps logging out after a period of time.
How can I stop LastPass from constantly logging me out?
Start by checking your browser’s privacy settings to ensure cookies are enabled for LastPass. Disable any browser extensions that might interfere with LastPass. Also, review your LastPass account settings, specifically the inactivity timeout, and adjust it to a longer duration if desired. Addressing these areas usually helps prevent LastPass keeps logging out.
Is LastPass logging out frequently a sign of a security problem?
While frequent logouts can be annoying, they aren’t necessarily a sign of a security breach. However, it’s always wise to ensure you have a strong master password and multi-factor authentication enabled. If you suspect unauthorized access, change your master password immediately.
What if I’ve tried everything and LastPass still keeps logging out?
If you’ve exhausted troubleshooting steps like checking your browser settings and LastPass configurations, consider contacting LastPass support directly. They might be able to identify specific issues with your account or offer more tailored solutions to stop LastPass keeps logging out. They can assess your setup in detail.
Hopefully, you’ve got a handle on why lastpass keeps logging out and how to fix it! Now go forth and enjoy a more seamless and secure online experience. We hope you found this helpful!