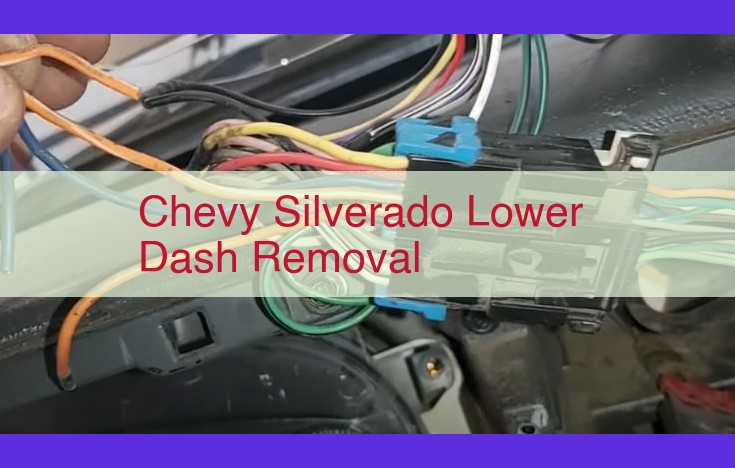
Comprehensive Guide To Accessing And Repairing The Chevy Silverado’s Lower Dash Safely
To access the Chevy Silverado’s lower dash, disconnect the battery first. Remove the knee bolster, steering column trim, center console, and glove box. Remove the lower dash bezel, instrument cluster, and radio. If needed, remove the heater core or air conditioning evaporator for repairs.
Safety First: Disconnecting the Battery
Before embarking on any electrical component work, it’s imperative to disconnect the battery for your own safety. Neglecting this crucial step could result in electrical shocks or short circuits, potentially leading to severe injuries or damage to your vehicle.
To disconnect the battery safely, follow these steps with utmost care:
- Park your vehicle on a level surface, engage the parking brake, and turn off the engine.
- Locate the battery, which is usually found under the hood.
- Identify the negative terminal of the battery, which is typically marked with a minus (-) sign and is often black in color.
- Using a wrench or socket, loosen the nut on the negative terminal.
- Carefully remove the negative terminal cable from the battery post.
- Secure the negative terminal wire away from the battery post to prevent any accidental contact.
Remember, disconnecting the battery not only ensures your safety but also prevents unexpected electrical malfunctions during your work. Always prioritize safety and follow these steps diligently to avoid any potential hazards.
Unveiling the Knee Bolster: A Step-by-Step Guide
In the realm of automotive maintenance, one often encounters obstacles that require careful navigation. One such hurdle is the knee bolster, an often-overlooked yet crucial component that guards against knee injuries in the event of a collision. However, when it comes to accessing the lower dash for repairs or upgrades, removing the knee bolster becomes a necessary step.
Before embarking on this task, it’s imperative to disconnect the battery to prevent any electrical mishaps. Once the power is safely off, it’s time to tackle the knee bolster.
Locating the Knee Bolster
The knee bolster is typically situated below the steering wheel, providing a cushioned barrier between the driver’s knees and the dashboard. It is typically made of plastic or a combination of materials and secured with bolts or screws.
Step-by-Step Removal
- Begin by gathering the necessary tools, such as a screwdriver, socket wrench, and flashlight.
- Inspect the knee bolster and identify the fixing points. These are usually bolts or screws located along the edges or underneath the bolster.
- Carefully remove the bolts or screws using the appropriate tool. Avoid overtightening or stripping the bolts.
- Once the bolts are removed, the knee bolster should be gently lifted and pulled towards you. Be cautious not to damage any attached wires or components.
- Disconnect any electrical connectors that may be attached to the knee bolster.
- Set aside the removed knee bolster in a safe location for reinstallation later.
Additional Tips
- Use a flashlight to illuminate any hidden areas or connectors.
- Take your time and avoid using excessive force.
- If you encounter any resistance, do not force it. Double-check the removal points and ensure everything is disconnected.
- Carefully store the bolts or screws in a safe place to prevent losing them.
- Reconnect all electrical connectors securely before reinstalling the knee bolster.
Accessing the Lower Dash: Removing the Steering Column Trim
As we embark on this automotive adventure, we encounter a crucial step in our quest to access the enigmatic lower dash: removing the steering column trim. This seemingly innocuous piece of plastic holds the key to unlocking a world of electrical and mechanical connections.
The steering column trim conceals a multitude of wires, switches, and other gizmos that govern the intricate symphony of your vehicle’s electrical system. By carefully disassembling this trim, we gain unfettered passage to these vital components, allowing us to diagnose issues, perform repairs, or customize our ride to our heart’s content.
To navigate the process of removing the steering column trim, we need to approach it with a delicate touch and unwavering patience. Here’s how it’s done:
Safety First: Disconnecting the Battery
Before embarking on any electrical work, it’s paramount to sever the lifeblood of your car’s electrical system: the battery. Disconnect the negative terminal, ensuring that no stray electricity can disrupt your作業.
Removing the Steering Column Trim
Now, let’s focus on the removal of the steering column trim. Begin by locating the trim’s retaining screws, which are usually hidden behind small plastic covers. Using the appropriate screwdriver or socket, gently unscrew these fasteners.
With the retaining screws removed, don’t yank the trim off just yet! It’s still held in place by a few sneaky clips. Use a plastic trim removal tool or a flat-head screwdriver wrapped in a cloth to carefully pry the trim loose from its anchor points.
Tip: Avoid using metal tools for this task, as they can scratch or damage the trim.
Disconnect and Remove
Finally, we reach the moment of truth. With the trim unclipped, carefully lift it upwards and off the steering column. Be mindful of any wires or connectors that may be attached to the trim, and disconnect them gently.
Now, you have achieved access to the lower dash, a realm of electrical connections and hidden components. Proceed with caution, and remember to reconnect everything in reverse order when you’re done!
Removing the Center Console for a More Spacious Workspace
If you’re planning to tackle any major repairs or modifications to your dashboard, you’ll likely need to remove the center console to gain ample workspace and better access to your vehicle’s electrical components.
Why Remove the Center Console?
The center console often houses various controls, switches, and storage compartments. Removing it clears up valuable space and allows you to reach areas of the lower dash that are otherwise obstructed. By providing unhindered access, you can work more efficiently and with greater precision.
Step-by-Step Removal Instructions:
1. Safety First: Disconnect the Battery
Before beginning any electrical work, it’s crucial to disconnect the battery. This prevents any accidental short circuits that could damage your electrical system. Locate the battery, loosen the negative terminal bolt, and pull off the cable.
2. Remove the Console Trim
Grasp the trim piece surrounding the gearshift lever and gently pull it upward. Carefully detach the trim from any clips or tabs that hold it in place. Once the trim is removed, you’ll have access to the console mounting bolts.
3. Unscrew the Mounting Bolts
Locate the bolts that secure the center console to the floor of your vehicle. Using a socket wrench or screwdriver, unscrew these bolts and set them aside.
4. Carefully Lift the Console
With the bolts removed, gently lift the center console straight up and out of its mounting position. Avoid pulling or prying excessively, as this could damage the console or its wiring.
5. Disconnect Electrical Connectors
Once the console is lifted, you may need to disconnect any electrical connectors that are attached to it. These connectors typically have a locking mechanism or retaining clip that you need to release. Carefully unplug the connectors one by one.
6. Remove the Console Completely
Once all electrical connections are disconnected, you can remove the center console from the vehicle completely. Store it in a safe place for reinstallation later.
By following these steps, you can effectively remove the center console and create a more spacious workspace for your dashboard repairs or modifications. Remember to reconnect the battery and reinstall the console once you’re finished working.
Glove Box Removal: Uncovering the Lower Dash
In the realm of automotive repairs, uncovering the lower dash is often crucial for accessing vital components. Amidst the myriad obstacles that stand in your way, the glove box emerges as a formidable opponent, concealing the dash’s secrets from your prying eyes. But fear not, dear reader, for we shall embark on a literary journey to unveil the mysteries of glove box removal, empowering you with the knowledge to tackle this automotive challenge with ease.
Imagine your glove box as a stubborn guardian, protectively shielding the lower dash from your tinkering hands. Its latches and screws act as intricate puzzles, designed to deter the uninitiated. But with our trusty guide by your side, you will possess the wisdom to outwit this enigmatic obstacle.
To begin, let us delve into the anatomy of the glove box. Typically situated on the passenger side of your vehicle, it serves as a convenient repository for various trinkets and documents. However, when it comes to automotive repairs, its presence becomes a hindrance, obstructing your access to the lower dash.
To dismantle this barrier, meticulous attention to detail is paramount. Commence by opening the glove box and emptying its contents. Next, meticulously scrutinize its interior, searching for any concealed screws or latches that may be holding it in place. Armed with the appropriate tools, gently release these fasteners, taking care not to damage the surrounding trim.
With the screws undone, it is time to finesse the glove box’s release. Cautiously pull it towards you, guiding it out of its snug confines. Should you encounter any resistance, do not force it. Instead, re-examine your previous steps, ensuring that all fasteners have been properly disengaged.
Once the glove box has been successfully removed, you will be rewarded with a newfound expanse of visibility, exposing the hidden depths of the lower dash. This newfound access will prove invaluable as you progress through your automotive repairs, empowering you to reach vital components with newfound ease.
So, dear reader, embrace the challenge of glove box removal. With our guidance, you will conquer this automotive enigma, unlocking the secrets of the lower dash and paving the way for successful repairs. Remember, it is in the overcoming of obstacles that true automotive mastery lies.
Removing the Lower Dash Bezel for Unrestricted Component Access
Accessing the lower dash is crucial for various maintenance and repair tasks. One essential step in this process is removing the lower dash bezel, which encloses and protects the dashboard components.
The lower dash bezel is typically made of plastic and is designed to conceal the wiring, connectors, and other components beneath the dash. Removing it allows you to access these components for troubleshooting, repairs, or upgrades.
Procedure for Removing the Lower Dash Bezel:
-
Prepare for Safety: Before commencing any作業, disconnect the battery to prevent electrical hazards.
-
Remove the Screws: Locate the screws securing the lower dash bezel. They are usually concealed behind trim panels or accessible from the underside of the dash. Carefully unscrew all the screws and set them aside.
-
Disconnect Electrical Connectors: Some models may have electrical connectors attached to the bezel. Gently disconnect these connectors to avoid damage.
-
Release the Clips: The bezel is typically held in place by plastic clips. Use a trim removal tool or a flathead screwdriver to carefully pry these clips loose, working around the perimeter of the bezel.
-
Gently Pull the Bezel: Once all the clips are released, gently pull the bezel towards you to detach it from the dash. Be cautious not to apply excessive force, as this could damage the bezel or surrounding components.
-
Inspect and Clean: Before reinstalling the bezel, inspect it for any damage or loose parts. If necessary, clean the bezel and surrounding surfaces to ensure proper fitment.
Additional Tips:
- Use a flashlight to locate screws or clips that may be hidden in dark areas.
- Be patient and avoid rushing the process to prevent damage.
- Refer to your vehicle’s service manual for specific instructions and precautions.
Instrument Cluster Removal: Unlocking the Lower Dash
Importance of Instrument Cluster Removal
To gain access to the lower dash connections, removing the instrument cluster is a crucial step. This cluster displays essential information such as speed, fuel level, and engine temperature, but it also conceals wiring and components necessary for further repairs.
Detailed Removal Guide
- Disconnect the Battery: Ensure safety by disconnecting the battery before any electrical work. This prevents accidental shorts or electrical damage.
- Locate Screws: Identify the screws securing the instrument cluster. They are typically located around the cluster’s perimeter, hidden by trim or plastic covers. Remove these screws carefully.
- Disconnect Wiring: Gently grasp the instrument cluster and pull it forward slightly to expose the wiring harnesses connected to the back. Disconnect these harnesses by pressing on the release tabs and pulling them free.
- Unclip Cluster: Once the wiring is disconnected, carefully unclip the instrument cluster from the dashboard. It may be held in place by tabs or clips. Use a plastic pry tool to release these tabs gently, avoiding damage to the cluster or dashboard.
- Remove Cluster: Slide the instrument cluster out of the dashboard and set it aside in a safe place. It is now detached from the vehicle’s wiring and ready for further repairs or replacements.
Removing the Radio for Lower Dash Wiring Access: A Detailed Guide
In the realm of DIY automotive repairs, accessing the lower dash wiring often requires the removal of obstacles, and one of these obstacles is the radio. Its presence can hinder your ability to reach and manipulate the necessary connections. Therefore, knowing how to remove the radio without causing damage is crucial.
Before embarking on this task, disconnecting the battery is essential for safety reasons. Once that’s taken care of, let’s delve into the steps involved in removing your radio:
- Gather your tools: You’ll need a Phillips screwdriver and potentially a trim removal tool.
- Identify the radio trim: Locate the plastic trim panel surrounding the radio. It may be held in place by screws or clips.
- Remove the trim panel: Carefully use the trim removal tool or a flat-head screwdriver to pry the trim panel loose from its clips or screws.
- Disconnect the electrical connectors: Behind the trim panel, you’ll find the electrical connectors attached to the radio. Gently press the release tabs on the connectors and pull them straight out.
- Remove the mounting bolts: Locate the four mounting bolts that hold the radio in place. Use the Phillips screwdriver to unscrew the bolts completely.
- Pull the radio out: Once the bolts are removed, carefully pull the radio out of the dashboard. Be mindful of any wires or connectors that may still be attached.
- Disconnect the antenna cable: The radio’s antenna cable is usually connected at the back of the unit. Locate the cable and detach it by pressing the release button if there is one.
By following these steps diligently, you can successfully remove your radio, granting you unobstructed access to the lower dash wiring for your automotive repairs.
Heater Core Removal for Repairs or Replacement
If you’re experiencing heating issues in your vehicle, it may be time to inspect your heater core. The heater core is a component of your vehicle’s heating system that transfers heat from the engine coolant to the air inside the cabin, keeping you warm during chilly days. Over time, heater cores can become clogged with debris or develop leaks, affecting their ability to efficiently provide warmth.
Function and Location
The heater core is typically located within the dashboard of your vehicle, behind the center console. It’s a small, rectangular box with tubes that allow coolant to flow through it. As coolant circulates through the heater core, it absorbs heat from the engine and releases it into the air that passes over its surface. This warm air is then distributed throughout the cabin through the vehicle’s air vents.
Removal Instructions
Safety First:
- Before you begin, disconnect the negative terminal of your battery to prevent any electrical hazards.
Step 1: Access the Heater Core
- Remove the center console to provide access to the heater core. Disconnect any electrical connectors or cables attached to the console.
- Unbolt or unclip the lower dash panel to expose the heater core.
Step 2: Disconnect Coolant Hoses
- Locate the two coolant hoses connected to the heater core. Use a wrench or pliers to loosen the hose clamps and carefully detach the hoses.
Step 3: Unmount the Heater Core
- The heater core is typically held in place by mounting brackets or bolts. Locate these fasteners and remove them to release the heater core.
- Gently pull the heater core out of its housing, being mindful of any remaining coolant that may spill.
Step 4: Inspect and Repair/Replace
- Once removed, inspect the heater core for any damage or clogging. If the core is damaged or severely clogged, it will need to be replaced.
- If repairs are possible, flush the heater core with a cleaning solution to remove any debris or buildup.
Step 5: Reinstallation
- Insert the repaired or new heater core into its housing and secure it with the mounting brackets or bolts.
- Reconnect the coolant hoses and tighten the hose clamps.
- Reinstall the lower dash panel and the center console.
Step 6: Reconnect Battery and Test
- Reconnect the negative terminal of your battery.
- Start your vehicle and turn on the heater to check if it’s functioning correctly.
By following these steps, you can successfully remove the heater core in your vehicle for repairs or replacement, ensuring a cozy and comfortable cabin during the winter months.
Air Conditioning Evaporator Removal for Repairs or Replacement
- Explain the role and location of the air conditioning evaporator.
- Outline the procedure for removing the air conditioning evaporator for repairs or replacement.
Air Conditioning Evaporator Removal for Repairs or Replacement
Your air conditioning system’s backbone is the evaporator. It’s a crucial component that transforms liquid refrigerant into a cool, gaseous state, enabling the system to remove heat and humidity from the air inside your vehicle.
Function and Location
The evaporator is typically tucked away behind the dashboard, concealed by other components. Its intricate coils absorb heat from the air circulating through it, effectively lowering the temperature inside the car.
Removal Procedure
Removing the air conditioning evaporator for repairs or replacement requires careful attention and adherence to specific steps. Here’s a detailed guide to help you through the process:
- Safety First: Begin by disconnecting the battery to avoid any electrical hazards.
- Access the Evaporator: Remove the dashboard components that obstruct access, such as the lower dash bezel, glove box, and center console.
- Disconnect Connections: Gingerly detach all electrical connections and refrigerant lines connected to the evaporator.
- Extract the Evaporator: Carefully maneuver the evaporator out of its housing. It may require some wiggling and patience to avoid damaging it or the surrounding components.
- Inspect and Service: Once the evaporator is removed, you can assess its condition and perform necessary repairs or replacement. Ensure that the coils are clean, the fins are not bent, and all connections are intact.
Reassembly
After servicing the evaporator, reassembly follows the reverse order of disassembly. Reattach all connections, carefully insert the evaporator into its housing, and reconnect the dashboard components.
Tips for Success
- Keep the work area clean and organized to prevent debris from entering the system.
- Use the correct tools and follow recommended torque specifications to avoid overtightening or damaging components.
- If you encounter any difficulties, do not hesitate to consult a qualified mechanic for assistance.
- Once the system is reassembled, recharge the refrigerant to ensure optimal performance.
By carefully following these steps, you can successfully remove and service the air conditioning evaporator to restore your vehicle’s cooling system to its peak efficiency.