How To Check Transmission Fluid: A Step-By-Step Guide For Proper Maintenance
To check transmission fluid, park on a level surface with the parking brake engaged. Locate the transmission dipstick and remove it. Wipe it clean, reinsert it, and pull it out again to read fluid level. Markings on the dipstick (“Min” and “Max”) indicate the appropriate range. Add fluid through the dipstick tube if needed, monitoring level to avoid overfilling. Recheck level and inspect for leaks. Fluid color and smell can indicate fluid condition. Healthy fluid is reddish and has no burnt odor, while dark, cloudy fluid may require attention.
Safety Measures for Transmission Fluid Level Inspection
- Emphasize the importance of parking on a level surface and engaging the parking brake to prevent accidents.
Safety Measures for Transmission Fluid Level Inspection
Ensuring your transmission operates smoothly and efficiently requires regular fluid level inspections. Safety is paramount during this process, and it begins with parking your vehicle on a level surface. This prevents the fluid from shifting within the transmission, giving you an accurate reading.
Next, engage the parking brake. This simple step holds your vehicle firmly in place, eliminating any risks of accidents. With these safety measures in place, you can proceed with the fluid level inspection with confidence.
Locating the Transmission Dipstick: An Essential Guide
Introduction:
Maintaining the health of your vehicle’s transmission is crucial, and checking its fluid level is a vital part of that. However, before you can check it, you need to find the transmission dipstick. This guide will provide clear instructions on how to locate the dipstick, ensuring a hassle-free process.
Finding the Dipstick:
The transmission dipstick is typically a thin, bright-colored rod located in the engine bay. Its handle is usually painted red, yellow, or orange for easy identification.
To find it, first pop the hood and identify the engine. The transmission dipstick is often located near the back or side of the engine, close to the firewall (the barrier between the engine and the passenger compartment).
Vehicle-Specific Locations:
The specific location of the transmission dipstick may vary depending on the make and model of your vehicle. Here are some general guidelines:
- Front-wheel drive vehicles: The dipstick is usually located in the front left corner of the engine bay, near the battery.
- Rear-wheel drive vehicles: The dipstick is typically found in the rear of the engine bay, near the transmission pan.
- All-wheel drive vehicles: The dipstick may be located in either the front or rear of the engine bay, depending on the vehicle’s design.
Tips for Success:
- Check your vehicle’s owner’s manual for specific instructions.
- If you have difficulty finding the dipstick, refer to online forums or consult with a mechanic.
- Ensure that your vehicle is parked on a level surface to get an accurate fluid level reading.
Checking Fluid Level Accurately: A Step-by-Step Guide
Inspecting your transmission fluid level is a crucial part of maintaining your vehicle’s health. By following these precise steps, you can ensure an accurate reading and prevent potential transmission issues.
1. Preparation:
- Park your vehicle on a level surface and engage the parking brake to prevent accidents.
- Allow the engine to cool for several minutes before checking the level. Hot fluid can expand and give an incorrect reading.
2. Locating the Dipstick:
- Open the hood and locate the transmission dipstick. The dipstick is usually color-coded red or yellow and has a loop or handle at the end.
- If you have trouble finding the dipstick, consult your vehicle’s owner’s manual for specific instructions.
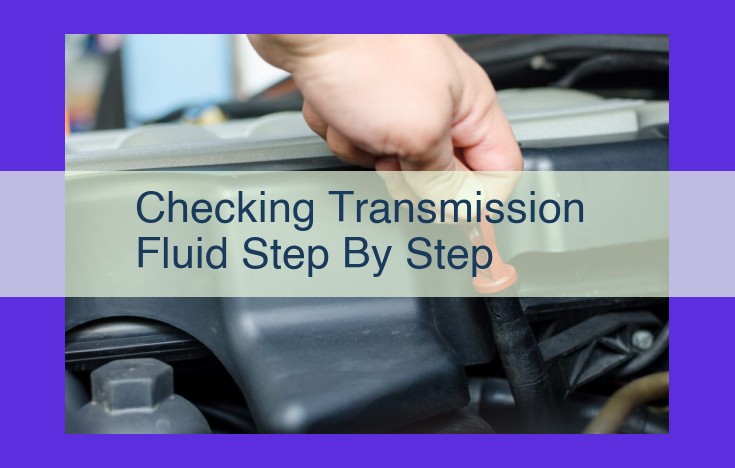
3. Measuring the Fluid Level:
- Grasp the dipstick and remove it from its tube.
- Use a clean rag or paper towel to wipe clean the dipstick.
- Reinsert the dipstick fully into the tube.
- Pull the dipstick out again and hold it horizontally.
4. Interpreting the Reading:
- The minimum and maximum fluid levels will be marked on the dipstick by notches or hash marks.
- The fluid level should be between these marks. If it’s below the “Min” mark, you need to add fluid. If it’s above the “Max” mark, you may have overfilled it.
Interpreting Fluid Level Indicators
When checking your transmission fluid level, you’ll encounter markings on the dipstick labeled “Min” and “Max”. These markings are crucial in determining the appropriate fluid level range for your vehicle.
“Min” Indicator:
The “Min” mark indicates the minimum acceptable fluid level. If the fluid level falls below “Min”, your transmission may experience insufficient lubrication, leading to premature wear and potential damage. It’s essential to add transmission fluid promptly if it’s below “Min”.
“Max” Indicator:
The “Max” mark, on the other hand, represents the maximum allowable fluid level. Overfilling your transmission can cause foaming, aeration, and excessive pressure buildup. Foaming reduces the fluid’s ability to lubricate and cool, while excessive pressure can damage transmission components. Avoid adding fluid beyond the “Max” mark.
Proper Fluid Level Range:
The ideal transmission fluid level is typically between the “Min” and “Max” marks. Maintaining the fluid within this range ensures optimal lubrication and cooling, preventing premature wear and extending the lifespan of your transmission.
Adding Transmission Fluid Responsibly
Ensuring the optimal performance of your vehicle’s transmission requires maintaining the correct fluid level. Adding transmission fluid responsibly involves following specific steps to prevent overfilling and potential damage.
Step 1: Gather Materials
Before embarking on this task, gather the necessary tools and materials:
- Transmission fluid: Purchase fluid specifically designed for your vehicle’s transmission.
- Funnel: A funnel helps pour fluid into the dipstick tube without spilling.
- Rags: Clean rags are essential for wiping the dipstick and funnel.
Step 2: Locate the Dipstick Tube
The dipstick tube is typically located on the side of the transmission or engine. Consult your vehicle’s owner’s manual for specific instructions on locating the dipstick tube.
Step 3: Add Fluid Gradually
Using the funnel, slowly pour the transmission fluid into the dipstick tube. Monitor the fluid level regularly, checking the dipstick every few ounces. Avoid overfilling, as excessive fluid can lead to foaming and transmission damage.
Step 4: Check Fluid Level Accurately
Once you have added fluid, reinsert the dipstick fully into the tube. Allow it to sit for a few moments, then pull it out and check the fluid level. Make sure it falls within the Min and Max markings on the dipstick.
Step 5: Monitor Fluid Level Consistently
Drive your vehicle for a short distance and recheck the fluid level. If necessary, add small amounts of fluid until the dipstick indicates the correct level. Regularly monitor the fluid level to ensure it remains within the recommended range.
By following these steps, you can safely and effectively add transmission fluid to your vehicle. Remember to consult your owner’s manual for specific instructions and to avoid overfilling, which can compromise your transmission’s performance.
Rechecking Fluid Level and Vigilant Leak Inspection
After diligently adding the appropriate amount of transmission fluid, it’s crucial to recheck the level. This ensures you haven’t overfilled, which could lead to costly transmission damage. Use the dipstick technique outlined earlier to verify the correct level.
Once the level is right, it’s time for a thorough inspection of the undercarriage. Look for any signs of leaks around the transmission pan, dipstick tube, and other connections. Transmission fluid leaks can be small at first, but they can quickly escalate and cause significant problems. Inspect the ground where you parked for any fluid spots that may indicate a leak.
If you detect any leaks, regardless of size, do not ignore them. Even a minor leak can lead to a loss of fluid that can compromise transmission performance. Address the leak as soon as possible to prevent further damage.
Remember, regular transmission fluid checks and inspections can help you stay ahead of potential problems before they become major and expensive repairs.
Evaluating Transmission Fluid Condition
When inspecting your transmission fluid, it’s crucial to assess its color and smell. These attributes can indicate the health of your fluid and potential issues with your transmission.
Fluid Color
- Red or Pink: Healthy fluid, typically found in newer vehicles.
- Dark Brown: Aged fluid that needs to be changed soon.
- Black: Severely burnt or contaminated fluid, requiring immediate attention.
- Metallic Sheen: Presence of metal particles, indicating internal transmission wear.
Fluid Smell
- Sweet or Mild: Healthy fluid.
- Burnt Odor: Excessive heat or friction within the transmission, requiring fluid change and potential repair.
- Rotten Smell: Contamination with water or other fluids, necessitating immediate repair.
Action to Take Based on Fluid Condition:
- Healthy fluid: No action required, continue monitoring.
- Aged fluid: Schedule a fluid change per manufacturer’s recommendation.
- Burnt or contaminated fluid: Consult a mechanic for immediate diagnosis and repair.
- Metallic sheen: Seek professional attention for transmission inspection and repair.
- Rotten smell: Avoid driving and contact a mechanic promptly to prevent further damage.
Remember, regular transmission fluid inspection and maintenance are crucial for ensuring the longevity and performance of your vehicle’s transmission.