Diy Toyota Tacoma Center Cap Installation Guide: Enhance Aesthetics And Wheel Performance
Installing Toyota Tacoma center caps enhances aesthetics and improves wheel function. Remove existing caps with a pry bar or pliers. Clean and align new caps. Use a mallet to gently tap them into place. Secure caps with pressure or locking mechanisms. Ensure proper alignment and fit to prevent dislodging. This DIY project adds style and protects Tacoma wheels.
- Define wheel center caps and their significance in improving the appearance and durability of Toyota Tacomas.
- Explain the importance and benefits of installing Toyota Tacoma center caps.
Wheel Center Caps: Enhancing the Appearance and Durability of Your Toyota Tacoma
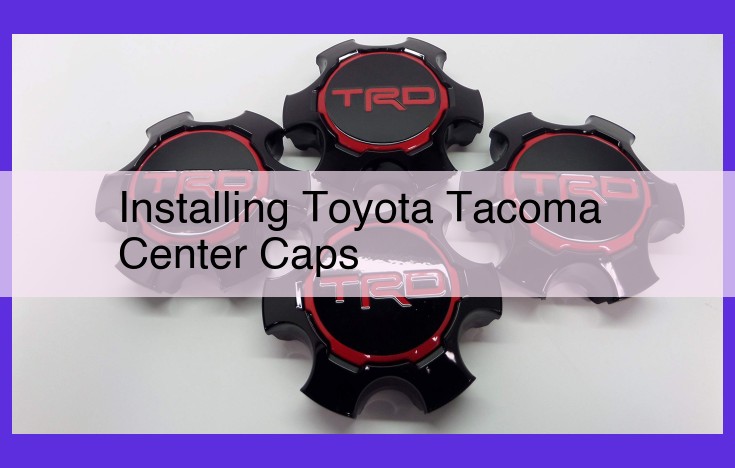
Wheel center caps are small, yet essential components that play a significant role in the visual appeal and overall performance of your Toyota Tacoma. They often feature the Tacoma logo or other designs, instantly enhancing the vehicle’s aesthetics and making them stand out on the road.
Beyond their decorative purpose, center caps also serve a practical function. They protect your wheel hubs from dirt, debris, and other external elements that can cause rust and corrosion. This, in turn, extends the lifespan of your wheels and enhances their functionality.
Importance and Benefits of Installing Toyota Tacoma Center Caps
Installing center caps on your Tacoma offers several key benefits:
- Enhanced aesthetics: As mentioned earlier, center caps instantly upgrade the appearance of your vehicle, giving it a more polished and customized look.
- Protection: The caps prevent dirt and debris from entering the wheel hub, protecting it from potential damage.
- Wheel stabilization: By providing a snug fit, center caps help stabilize the wheel, preventing any unwanted movement or wobbling during high-speed driving.
- Improved performance: By eliminating dirt accumulation in the wheel hub, center caps enable smoother wheel rotation, resulting in improved fuel efficiency and handling.
Understanding the Interplay of Wheel Components
Hubcaps, rims, tires, and lug nuts work in harmony with center caps to enhance the performance and aesthetics of your Toyota Tacoma’s wheels. Hubcaps, or wheel covers, adorn the outer perimeter of the wheel, concealing the lug nuts and adding a touch of style. Rims, also known as wheels, provide the structural support for the tires and are responsible for transferring power from the engine to the ground. Tires, of course, provide traction and cushion the ride. Lug nuts, the unsung heroes, securely fasten the wheel to the vehicle’s hub.
Center caps play a crucial role in completing the ensemble, protecting the hub from dirt and moisture while enhancing the overall appearance. They come in various designs and colors, allowing you to customize your Tacoma to reflect your unique style.
DIY Center Cap Installation: A Breeze With the Right Guidance
Installing center caps is a straightforward task that can be easily accomplished as a DIY project. By following the clear instructions provided in this guide, you can confidently transform your Tacoma’s wheels without the hefty cost of professional installation. Remember, meticulous execution is key to ensuring a secure and visually appealing result.
Tools and Materials for Installing Toyota Tacoma Center Caps
To embark on the journey of installing center caps on your Toyota Tacoma, gather the necessary tools that will empower you to remove the old ones and prepare the new ones for a seamless fit. Let’s dive into the essentials:
Removal of Existing Center Caps
- Pry Bar: Gently pry off the old center caps using a plastic or metal pry bar. Wedge the bar between the cap and the rim, applying even pressure to avoid scratches.
- Screwdriver: For stubborn caps, carefully insert a flathead screwdriver into a small gap and twist gently to loosen the cap.
- Pliers: If the caps are particularly tight, use pliers to grip the edges and pull them off. Avoid using excessive force, as pliers can dent the caps.
Preparation of New Center Caps
Before installing the new center caps, take these crucial steps to ensure a perfect fit:
- Clean the New Caps: Wipe the center caps with a clean cloth to remove any dirt or debris.
- Measure and Align: Measure the diameter of the new caps and align them with the corresponding Toyota Tacoma wheels. This ensures a snug fit and prevents any rattling.
- Double-Check Alignment: Before installation, double-check the alignment of the new caps to avoid any uneven spacing or crooked positioning.
Installation Process
Alignment and Placement
Installing Toyota Tacoma center caps is a relatively straightforward task that can be completed in a few simple steps. First, you’ll need to remove the existing center caps by using a pry bar or screwdriver to gently pry them off. Once the old center caps are removed, it’s time to prepare the new ones. Clean them thoroughly and measure their diameter to ensure they’ll fit snugly.
Next, it’s time to align and place the new center caps. Start by positioning them over the wheel hubs and aligning them with the tire valves. Ensure that the center caps are evenly spaced and level. This step requires precision to ensure a seamless fit and prevent any wobbling or rattling while driving.
Use of a Hammer or Mallet
Once the center caps are aligned, it’s time to use a rubber mallet to gently tap them into place. Use a light touch and avoid hitting the center caps too hard. If they don’t fit easily, check the alignment and ensure there are no obstructions. The goal is to secure the center caps without damaging them or the wheel hubs.
Securing the Center Caps
To ensure that the center caps stay in place, apply even pressure around their edges. Some center caps have locking mechanisms, which you can engage to prevent dislodging. Once the center caps are securely fastened, visually inspect them to ensure they’re properly seated, aligned, and free of any damage or looseness.
Securing Your Center Caps: Keeping Your Tacoma Wheels in Place
When it comes to securing your Toyota Tacoma center caps, there are two main methods you can use:
-
Pressure-Fit Caps: These caps are designed to fit snugly against your wheel’s hub, staying in place through pure pressure. Simply align the cap and press it on until it fits firmly.
-
Locking Mechanisms: Certain center caps feature built-in locking mechanisms that prevent them from being easily removed. These mechanisms may involve keys or special tools to engage the lock, providing additional security.
After installing your center caps using pressure or locking mechanisms, it’s crucial to perform a visual inspection to ensure they are:
-
Properly Aligned: Check that the logo or design on the cap is facing the correct direction and is level with the wheel.
-
Evenly Spaced: Make sure that the gaps between the center caps and the lug nuts are consistent all around the wheel.
-
Securely Attached: Inspect the center caps for any signs of movement or looseness. If you detect any issues, gently re-adjust or tighten the caps accordingly.
Regularly checking the security of your center caps is essential to prevent them from falling off or becoming damaged while driving. If you notice any loose or missing center caps, replace them promptly to maintain the aesthetic appeal and optimal performance of your Tacoma’s wheels.