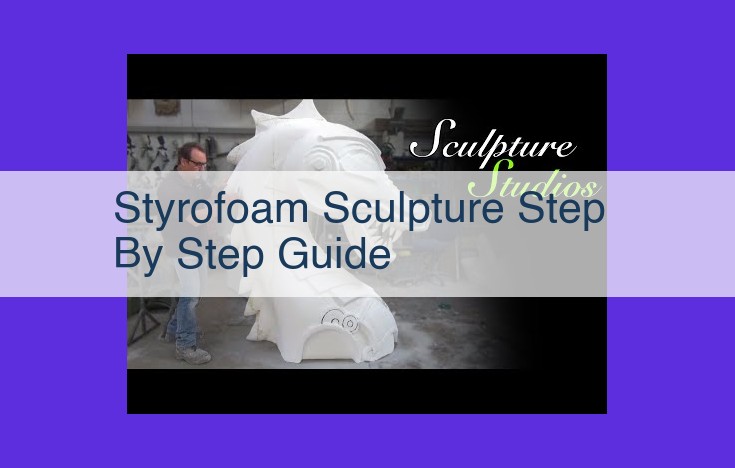
The Ultimate Guide To Wood And Styrofoam Carving: Master The Art Of Sculptural Creation
- Gather Styrofoam (bead, extruded, expanded), wood, and other materials. 2. Use sharp tools (knives, chisels, saws) for precise carving. 3. Ensure safety (gloves, glasses, sharp knives). 4. Plan design (sketch, CAD). 5. Carve using various techniques (relief, intaglio, 3D). 6. Sand and finish (sanding tools, finishes like varnish, paint). 7. Display effectively (frames, pedestals, lighting).
Materials for Crafting Styrofoam Masterpieces
Embark on an artistic journey with Styrofoam, a versatile material that transforms into captivating sculptures. Understand the nuances of different Styrofoam types to select the perfect canvas for your vision.
- XPS (Extruded Polystyrene): Dense and durable, ideal for outdoor sculptures or projects requiring structural integrity.
- EPS (Expanded Polystyrene): Lightweight and easy to carve, perfect for intricate designs and indoor displays.
- Beadboard (Expanded Polystyrene Beadboard): Smooth surface, suitable for painting or creating textured effects.
Incorporate additional materials like wood, stone, and paper to enrich your sculptures with depth and texture. Wood provides stability, stone brings an earthy touch, and paper adds delicate accents. The possibilities are endless!
Essential Tools for Styrofoam Carving: The Sculptor’s Armory
Embarking on the artistic adventure of Styrofoam carving requires an arsenal of tools tailored specifically to this unique medium. Sharp, precise instruments are the key to achieving clean cuts and intricate details that bring your visions to life.
Knives
Exacto knives, with their razor-sharp blades, are indispensable for intricate and detailed work. Their maneuverability allows for precise cuts and sculpting of fine features.
Utility knives, with their sturdy blades, are ideal for larger cuts and shaping the overall form of your sculpture. Their versatility makes them a must-have for any carver.
Chisels
V-gouges are essential for creating sharp, clean edges and grooves. Their V-shaped profile enables precise carving and shaping.
U-gouges are perfect for carving concave surfaces and curves. Their U-shaped blade provides a smooth, rounded finish.
Flat chisels are versatile tools for carving flat surfaces and removing excess material. Their sharp edges allow for clean, straight cuts.
Saws
Hot wire saws are indispensable for cutting large pieces of Styrofoam or creating intricate shapes. Their heated wire melts the Styrofoam, providing precise and clean cuts.
Jigsaw is an electric saw that allows for intricate cuts and curved lines. Its versatility makes it a valuable tool for complex designs.
Gouges
Spoon gouges are designed for carving concave surfaces and rounded shapes. Their spoon-shaped blade provides a smooth, even finish.
Ball gouges are perfect for carving spherical and cylindrical shapes. Their rounded blade allows for precise and controlled carving.
Files
Sandpaper in various grits is essential for smoothing and refining the surface of your sculpture.
Rasps are coarse files that quickly remove large amounts of material, while files are finer and used for detailed work and finishing.
In conclusion, these essential tools are the sculptor’s weapons of choice when it comes to Styrofoam carving. By mastering the use of these tools, you can unlock the full potential of this versatile medium and create stunning works of art that will captivate and inspire.
Safety Precautions for Styrofoam Sculpture
- Outline the necessary safety precautions to take when working with Styrofoam, including wearing gloves, safety glasses, and using a sharp knife.
- Explain the potential hazards of Styrofoam particles and the importance of minimizing exposure.
Safety Precautions for Styrofoam Sculpture: A Guide to Safe Carving Techniques
When embarking on the exciting journey of Styrofoam sculpture, it’s crucial to prioritize your safety to create intricate masterpieces without compromising your well-being. Before picking up a sharp knife or diving into the art, heed these essential safety measures.
- Gloves: Styrofoam particles can be abrasive, causing skin irritation. Wear a pair of sturdy gloves to protect your hands.
- Safety Glasses: Carving Styrofoam generates fine particles that can irritate your eyes. Protect them with a pair of safety glasses for clear vision and reduced exposure.
- Sharp Knife: Using a sharp knife ensures clean cuts and minimizes particle dispersion. Keep your knives well-maintained for precise carvings.
Beyond these basic precautions, there are additional hazards to be aware of when working with Styrofoam.
- Styrofoam Particles: Inhaling or ingesting Styrofoam particles can be harmful to your respiratory and digestive systems. Minimize exposure by carving in a well-ventilated area and wearing a dust mask if necessary.
- Static Electricity: Rubbing or scraping Styrofoam can create static electricity, which can attract dust and particles. Use a damp cloth to wipe the surface regularly to reduce static buildup.
- Fire Hazard: Styrofoam is highly flammable. Keep your carving area away from open flames, heat sources, and sparks. Use a wet carving sponge to prevent heat buildup friction
By following these safety guidelines, you can safely explore the art of Styrofoam sculpture and create stunning masterpieces without jeopardizing your health. Remember, safety is not just a precaution but a creative canvas that allows you to push the boundaries of your art with confidence.
Styrofoam Sculpture: Bringing Vision to Life
Plan Your Masterpiece: The Path to Success
Before embarking on the transformative journey of Styrofoam carving, meticulous planning is the key to unlocking your sculptural masterpiece. Let your imagination soar, but ground it with a solid design that will guide your every stroke. Sketching and drawing are invaluable tools, allowing you to visualize your ideas and refine them on paper.
Elevate your design process further with computer-aided design (CAD) tools. This powerful technology empowers you to create detailed, three-dimensional plans, ensuring precision and accuracy from the very beginning. By investing time in meticulous planning, you lay the foundation for a breathtaking sculpture that will bring your vision to life.
Carving Techniques for Styrofoam
Embark on a journey of artistic expression as you delve into the versatile world of Styrofoam carving. Master the intricacies of different carving techniques to transform this ordinary material into extraordinary works of art.
Relief Carving:
Imagine your creation emerging from the depths of Styrofoam like a mural come to life. Relief carving allows you to carve shapes and designs onto the surface of Styrofoam, creating a three-dimensional illusion. Simply guide your sharp knife along the outlines of your chosen design, carefully removing layers of material to reveal the desired form.
Intaglio Carving:
For a more delicate and intricate effect, try intaglio carving. This technique involves carving into the Styrofoam surface, creating recessed areas that contrast with the raised portions of your design. Use a gouge or chisel to gently remove material, working with precision and patience to achieve intricate patterns and details.
Three-Dimensional Carving:
Unleash your imagination and create sculptures that transcend the two-dimensional realm. Three-dimensional carving allows you to carve Styrofoam into freestanding objects, giving them form and depth. Start with a block of Styrofoam and gradually shape it using knives, chisels, and other tools, removing excess material until your desired sculpture emerges.
Step-by-Step Instructions:
Materials:
- Sharp carving tools (knives, chisels, gouges, files)
- Styrofoam block
- Protective gloves and safety glasses
Instructions:
- Plan your design: Sketch or visualize your sculpture before starting to carve.
- Prepare your tools: Ensure your tools are sharp and in good condition.
- Secure your Styrofoam: Clamp or hold the Styrofoam firmly in place for stability.
- Start carving: Use your chosen technique to remove material carefully, following your design plan.
- Smooth and refine: Use files and sanding tools to smooth rough edges and refine the details of your sculpture.
- Finish and display: Apply finishes such as paint, varnish, or wax to protect and enhance your artwork. Display it proudly for all to admire.
Sanding and Finishing for Styrofoam Sculpture: A Guide for Creating a Refined Masterpiece
As you bring your Styrofoam sculpture to life with meticulous carving, it’s time to embark on the final steps that will transform your creation into a polished work of art. Sanding and finishing are crucial for achieving a smooth, refined surface that accentuates the intricate details you’ve sculpted.
The Power of Sanding
Sanding plays a vital role in preparing your Styrofoam sculpture for the perfect finish. Fine-grit sandpaper will gently remove any imperfections, smoothing rough edges and creating a uniform texture. Start with a coarser grit and gradually work your way to finer grits as you refine the surface.
Finishing Touches: A World of Possibilities
With the canvas of your sculpture now smooth, it’s time to unleash your creativity with a variety of finishes. Varnish provides a protective layer, safeguarding your sculpture from wear and tear while enhancing its color and depth. Paint offers endless possibilities to change the hue and texture of your creation, allowing you to match any décor or artistic vision. For a more natural look, stain can add rich tones and highlight the grain of the Styrofoam. Finally, wax bestows a soft sheen and water resistance, enhancing the beauty and durability of your sculpture.
Displaying Your Masterpiece: The Grand Finale
Once you’ve completed the sanding and finishing process, it’s time to showcase your Styrofoam masterpiece to the world. Frames elegantly border your sculpture, accentuating its beauty and creating a refined presentation. Pedestals elevate your work, giving it a sense of grandeur and drawing attention to its intricate details. Shelves provide a versatile display option, allowing you to arrange multiple sculptures together or create a captivating gallery wall.
Proper Lighting: Illuminating Your Creation
Lighting plays a critical role in highlighting the depth and texture of your sculpture. Natural light from windows or skylights provides even illumination, showcasing your masterpiece in its true form. Artificial light can be used to create dramatic effects, casting shadows and accentuating certain features. By carefully considering the placement and angle of your lighting, you can enhance the visual impact of your sculpture and captivate viewers.
Displaying Your Styrofoam Sculpture: Enhancing Its Visual Impact
When it comes to putting the finishing touches on your Styrofoam sculpture masterpiece, the way you display it can significantly enhance its visual appeal and make it a captivating focal point in any space.
Choosing the Right Frame, Pedestal, or Shelf
The frame, pedestal, or shelf you select serves as a foundation for your sculpture, complementing its design and drawing attention to its intricate details. Consider the following tips:
- Frames: For smaller sculptures, frames can create a polished and refined look. Choose frames that match the style and shape of your piece.
- Pedestals: For sculptures with a three-dimensional presence, pedestals elevate them, providing a stable base and making them easier to admire from all angles.
- Shelves: Shelves offer a practical and versatile way to display multiple sculptures, creating a gallery-like atmosphere in your home.
Lighting
Proper lighting can dramatically transform the way your sculpture appears. Here are some lighting considerations:
- Natural Light: Place your sculpture in a well-lit area where natural light can illuminate its contours and textures.
- Artificial Light: Use spotlights or directional lighting to create dramatic effects. Experiment with different angles and intensities to highlight specific features of your artwork.
- Backlighting: Backlighting can create a halo effect around your sculpture, adding depth and mystery.
Placement
The placement of your sculpture within a room can significantly impact its visual impact:
- Focal Points: Position your sculpture at a focal point in the room, where it will immediately draw the attention of visitors.
- Negative Space: Surround your sculpture with ample negative space to allow viewers to fully appreciate its form and details.
- Contrast: Create contrast by placing your sculpture against a contrasting background or using adjacent objects to enhance its visual presence.
By following these tips, you can transform your Styrofoam sculpture into a stunning display that showcases its beauty and captivates the imagination of all who behold it.