Mastering The Art Of Drawing A Winking Expression: A Comprehensive Step-By-Step Guide
To draw a simple wink, start by defining the curved eye shape. Raise the lower eyelid slightly to create the illusion of a wink. Angle the eyelashes upwards to emphasize the wink and align them with the upper eyelid curvature. Draw the iris and pupil, ensuring they are partially obscured by the lowered eyelid. Create the crease line to add depth and shape. Use darker shades to create depth and lighter shades to enhance the iris and pupils. Finally, refine the overall shape and erase unnecessary lines to complete the wink expression.
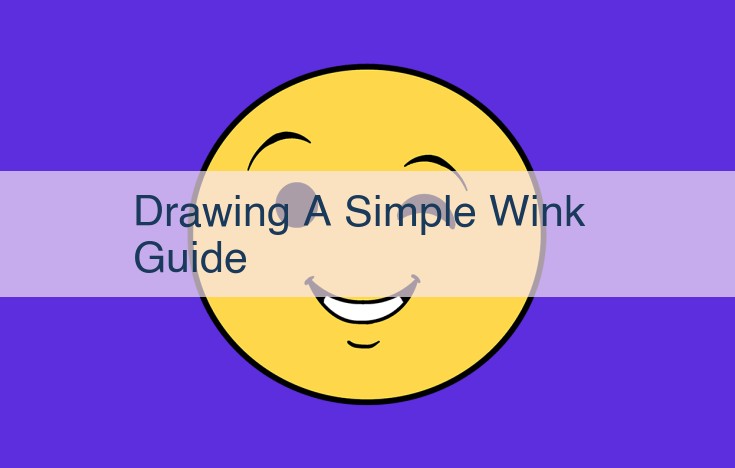
Drawing a Winking Eye: A Step-by-Step Guide
Step into the realm of expressive art and embark on a journey to capture the playful charm of a winking eye. This comprehensive guide will walk you through each meticulous step, empowering you to recreate this captivating expression with ease.
Defining the Eye Shape: The Essence of a Wink
The very essence of a wink lies in the curved line and elongation that form the upper eyelid. This subtle yet crucial detail conveys the playful intent behind the closed eye. Imagine a graceful crescent moon, gently arching upwards from the inner corner, its elongated tail extending beyond the outer edge of the eye. This curvature is the foundation upon which the entire expression rests.
Positioning the Lower Eyelid: Creating the Illusion of a Wink
When you want to convey a mischievous or playful expression through your drawings, capturing the delicate movement of a wink is crucial. The lower eyelid plays a vital role in this, and positioning it correctly can make all the difference.
Slightly Raise the Lower Eyelid
The key to creating a convincing wink is to slightly raise the lower eyelid. This subtle movement hints at the eye’s closure while maintaining the overall shape. Avoid lifting the eyelid too high, as this can make the expression appear forced or unnatural.
Follow the Natural Curve
As you raise the lower eyelid, pay attention to its natural curvature. The eyelid should curve upwards slightly, following the shape of the eye. This curvature helps to convey the sense of an eye gently being closed.
Create a Narrow Gap
The space between the upper and lower eyelids is essential for a believable wink. Leave a narrow gap between the two eyelids to suggest that the eye is partially closed. This gap should be consistent along the entire length of the eyelid, creating a cohesive and nuanced expression.
Avoid Angularity
When drawing the raised lower eyelid, it’s important to avoid sharp angles. The curve should be soft and fluid, mimicking the delicate movement of a natural wink. Angular lines can make the expression appear stiff or unnatural.
By carefully positioning the lower eyelid, you can create the illusion of a playful or mischievous wink. Remember to raise the eyelid slightly, follow its natural curvature, create a narrow gap, and avoid angularity. These subtle nuances will bring life to your drawings and convey the intended expression effortlessly.
Angle the Eyelashes for a Captivating Wink
When it comes to capturing the essence of a wink, the angle of the eyelashes plays a crucial role. It’s no coincidence that the most alluring winks boast lashes that curl upwards, nearly touching the upper eyelid. This angle not only accentuates the wink but also creates an expressive look.
Just as a raised eyebrow conveys surprise, curved eyelashes telegraph a playful and coquettish message. The upward curve mimics the natural shape of the upper eyelid, creating a subtle yet irresistible wink. It’s as if the eyelashes are conspiring with the rest of the eye to convey a secret message.
Moreover, aligning the eyelashes with the curvature of the upper eyelid intensifies the wink. This ensures that the lashes complement rather than compete with the eye’s natural shape, resulting in a harmonious and captivating expression. By carefully positioning the eyelashes at the perfect angle, you can create a wink that is both subtle and unforgettable.
Draw the Iris and Pupil: Capturing the Wink’s Subtlety
When drawing the iris and pupil, commence by sketching a small circle for the pupil. Position this circle slightly offset from the center of the eyeball, aligning it with the slanted upper eyelid. Next, draw a larger circle around the pupil to create the iris. Choose a color that complements the character’s eye color and apply it to the iris, leaving a small highlight for the reflection.
With the lowered eyelid partially obscuring the iris, it’s important to subtly depict the curve of the eyelid intersecting the iris. To achieve this, carefully erase the portion of the iris that would be covered by the eyelid, blending the edge to create a natural transition. This creates the illusion of the eyelid resting gently on the eye.
Creating the Illusion of Depth: The Crease Line
As you embark on your artistic journey to capture the elusive wink expression, the crease line emerges as a pivotal element in adding depth and dimension to the eye. This line, strategically placed above the eyelid, acts as a visual divide, separating the upper and lower sections of the eye and lending it a more realistic appearance.
Imagine a delicate, curved line tracing the upper eyelid’s contour. This line, ever so slightly darker than the surrounding area, mimics the natural crease that forms when the eye is open. It serves to define the shape of the eye, adding a touch of shadow that brings forth its curvature.
The crease line is not merely an aesthetic embellishment; it plays a crucial role in conveying the emotion behind the wink. By creating a subtle division between the upper and lower lids, it enhances the impression of the eye being slightly closed, emphasizing the playful and flirtatious nature of the wink.
Add Shadowing and Highlights
To bring depth and realism to your winking eye, you’ll need to master the art of shadowing and highlighting. Darker shades will bring definition to the eye socket, creating depth, while lighter shades will highlight the iris and pupils.
Start by applying a darker shade to the crease of the eyelid, blending it outwards to create a subtle shadow. This will help define the shape of the eye and give it a more three-dimensional appearance. Next, use a lighter shade to highlight the iris and pupils. This will make them pop and create the illusion of a bright, open eye.
Don’t be afraid to experiment with different shades and intensities to achieve the desired effect. Remember, the goal is to create a natural-looking winking eye. So don’t overdo it with the shadows and highlights, just enough to enhance the features and make it come to life.
Finalizing the Wink: Perfecting the Gesture
As you approach the final stage of your winking masterpiece, there are a few crucial steps left to bring it to life. Remember, the goal is to create a natural and expressive wink that conveys a playful or mischievous message.
Erasing Unnecessary Lines and Refining the Shape
Carefully examine your sketch and identify any stray lines or rough edges. Use an eraser to gently remove these lines, allowing the smooth contours of the eye to emerge. Refine the overall shape of the eye, making sure the curved line of the upper eyelid and the slight raise of the lower eyelid are accurately depicted.
Adding Depth with Shadowing and Highlights
To create a sense of depth and dimension, add darker shades to areas such as the crease of the upper eyelid and the lower lash line. This will give the eye more contour and make the wink appear more three-dimensional. Conversely, use lighter shades to enhance the iris and pupils, creating a bright and engaging focal point.
Completing the Wink Expression
Take a step back and observe your drawing as a whole. Does the wink look natural and convincing? Are there any subtle adjustments you can make to enhance the expression? Consider adding a slight gleam to the pupil or raising the eyebrows ever so slightly. These small details can make a significant difference in conveying the intended emotion.
By following these steps, you can finalize your winking sketch with confidence, creating a captivating expression that will bring joy and amusement to those who view it. Remember, the key is to pay attention to the nuances of the eye shape, the position of the eyelids, and the subtle details that add depth and personality to your artwork.