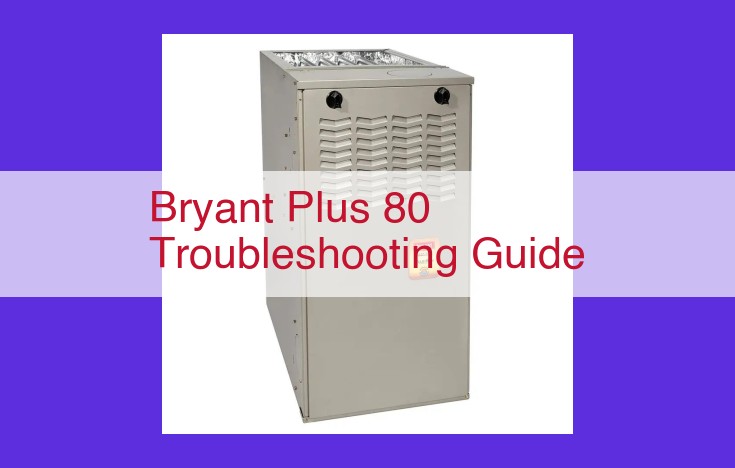
Comprehensive Furnace Troubleshooting Guide: Step-By-Step Solutions
- Resetting the control board
- Troubleshooting the furnace (overheating, insufficient airflow, ignition problems)
- Troubleshooting the thermostat (unresponsive buttons, incorrect temperature readings, communication errors)
- Replacing the blower motor capacitor
- Replacing the igniter assembly
- Troubleshooting the flame sensor
- Cleaning the condenser coils
- Replacing the air filter
- Troubleshooting the gas valve
- Cleaning the drain line
- Checking the refrigerant levels
- Troubleshooting the thermostat
Resetting the Bryant Plus 80 Control Board
- Describe the process of resetting the control board, including safety precautions and step-by-step instructions.
Resetting the Bryant Plus 80 Control Board: A Step-by-Step Guide
Maintaining your Bryant Plus 80 furnace is crucial for a comfortable and efficient home. Sometimes, you may encounter issues that can be resolved by resetting the control board. Here’s a comprehensive guide to resetting the Bryant Plus 80 control board, ensuring you tackle the task safely and effectively.
Before you begin, it’s imperative to take safety precautions. Always disconnect the power supply to the furnace before attempting any electrical work. Once safety measures are in place, follow these step-by-step instructions:
-
Locate the control board: The control board is typically mounted on the inside of the furnace cabinet.
-
Identify the reset button: The reset button is usually a small, red button located on the control board.
-
Press and hold the reset button: Press and hold the reset button for approximately 5 seconds. You may hear a click sound.
-
Release the button: Release the reset button after 5 seconds.
-
Restore power: Turn the power back on to the furnace.
The reset process should now be complete. If the furnace still malfunctions, there may be an underlying issue that requires further troubleshooting or professional assistance.
Troubleshooting Common Bryant Plus 80 Furnace Issues
The Bryant Plus 80 furnace offers comfort and efficiency, but like any appliance, it may encounter issues over time. If you suspect your furnace is underperforming, here’s a guide to help you identify the problem and find potential solutions:
Overheating
Symptoms:
- Unusual noises coming from the furnace
- Strong, burning smell
- Excessive heat radiating from the furnace
Potential Causes and Solutions:
- Dirty air filter: Replace the air filter to improve airflow.
- Clogged air intake or vent: Check for obstructions and clean them as needed.
- Oversized furnace: Contact an HVAC technician to assess the situation and recommend the appropriate furnace size.
Insufficient Airflow
Symptoms:
- Poor or uneven heating throughout your home
- Dust accumulation on vents and registers
Potential Causes and Solutions:
- Dirty blower motor: Inspect and clean the blower motor to restore proper airflow.
- Obstructed ductwork: Have your ducts inspected for leaks or blockages.
- Faulty air handler: This component circulates air throughout the house. Consider replacing it if necessary.
Ignition Problems
Symptoms:
- Furnace starts but doesn’t ignite
- Continuous sparking without ignition
- Gas smell
Potential Causes and Solutions:
- Dirty flame sensor: Clean the flame sensor to ensure proper detection of the flame.
- Damaged igniter: Replace the igniter if it’s faulty.
- Faulty gas valve: Check if the gas valve is opening and closing properly. It may need to be replaced.
Remember, troubleshooting a furnace can involve electrical components and gas connections. If you are not comfortable performing any of the steps described above, always consult a qualified HVAC technician for assistance.
Troubleshooting the Perplexing Bryant Plus 80 Thermostat
Navigating the complexities of your Bryant Plus 80 thermostat can be a daunting task. Like a mischievous gremlin, it may refuse to respond to your commands or display incorrect temperatures, leaving you baffled and frustrated. Fear not, intrepid reader! This comprehensive guide will empower you to decipher the enigma of your thermostat and restore harmony to your home.
Unresponsive Buttons: The Silent Treatment
If your thermostat’s buttons seem to have taken a vow of silence, check the power supply first. A loose wire or faulty connection can cause the thermostat to lose its voice. Next, inspect the buttons themselves. Debris or dirt buildup can render them unresponsive. Gently clean the buttons with a cotton swab and rubbing alcohol.
Incorrect Temperature Readings: A Warped Reality
When your thermostat displays temperatures that are wildly different from the actual room temperature, it’s time to investigate. A faulty temperature sensor may be the culprit, transmitting inaccurate data to the thermostat. Check the sensor for any signs of damage or debris. If all seems well, consider replacing the sensor.
Communication Errors: Lost in Translation
The Bryant Plus 80 thermostat relies on communication between itself and the HVAC system. If this communication breaks down, you may experience erratic behavior or error messages. Ensure that the wires connecting the thermostat to the system are secure and undamaged. Additionally, check the batteries in the thermostat. Low batteries can disrupt communication.
Tips for Success
- Consult the user manual: The manual provides valuable troubleshooting tips and specific instructions for your thermostat model.
- Reset the thermostat: Sometimes, a simple reset can resolve minor glitches. Refer to the user manual for the specific reset procedure.
- Contact a qualified technician: If your troubleshooting efforts prove unsuccessful, don’t hesitate to seek professional assistance. A qualified HVAC technician can diagnose and repair more complex issues.
By following these steps, you can transform your Bryant Plus 80 thermostat from a source of frustration to a reliable companion. Embrace the power of troubleshooting and restore the comfort of your home.
Troubleshooting Your Bryant Plus 80: Replacing the Blower Motor Capacitor
Maintaining a comfortable indoor environment is crucial, and your Bryant Plus 80 furnace plays a vital role. However, like any mechanical device, it can encounter issues, including a faulty blower motor capacitor. Here’s a step-by-step guide to help you diagnose and replace it:
Recognizing a Faulty Capacitor
The blower motor capacitor is a cylindrical component that helps the blower motor start and run smoothly. When it fails, you may notice:
- Loud noises from the furnace: The motor may make a buzzing or humming sound.
- Intermittent or weak airflow: The furnace may not circulate air as effectively.
- Increased energy consumption: A faulty capacitor can lead to higher electricity usage.
Replacing the Capacitor
1. Safety First: Before proceeding, turn off the power to your furnace at the breaker panel.
2. Locate the Capacitor: Open the furnace’s access panel and identify the cylindrical capacitor connected to the blower motor.
3. Discharge the Capacitor: Using a screwdriver with an insulated handle, carefully touch both terminals of the capacitor to discharge any remaining electricity.
4. Remove the Old Capacitor: Using a wrench, disconnect the wires from the capacitor terminals. Note the location and orientation of the wires.
5. Select the Correct Replacement: Choose a capacitor with the same microfarad (µF) rating and voltage as the original. The µF rating determines the motor’s starting torque.
6. Connect the New Capacitor: Reattach the wires to the new capacitor terminals, ensuring the same polarity as before. Tighten the connections securely.
7. Test the Furnace: Turn the power back on and start the furnace. Monitor its performance to ensure it’s operating smoothly and quietly.
Importance of Using the Correct Part
Using the correct capacitor is essential for the optimal performance of your furnace. A capacitor with the wrong µF rating can:
- Overload the motor: A capacitor with too high a µF rating can put excessive strain on the motor, leading to burnout.
- Underwhelm the motor: A capacitor with too low a µF rating may not provide enough starting torque, resulting in poor airflow.
By following these steps and using the appropriate replacement part, you can effectively replace the blower motor capacitor in your Bryant Plus 80 furnace, restoring its proper operation and ensuring a comfortable indoor environment.
Replacing the Bryant Plus 80 Igniter Assembly: A Comprehensive Guide
The igniter assembly plays a crucial role in initiating the combustion process in your Bryant Plus 80 furnace. When faulty, it can lead to frustrating ignition failures, leaving you shivering in the cold. But fear not! Replacing the igniter assembly is a relatively straightforward task with the right guidance.
Symptoms of a Failing Igniter Assembly:
- Repeated ignition failures: The furnace attempts to ignite repeatedly, but the flame never appears.
- No spark or weak spark: During ignition, you may notice a faint or no spark from the igniter.
- Delayed ignition: The furnace takes an unusually long time to ignite.
Identifying the Faulty Igniter:
Before replacing the igniter assembly, confirm that it’s indeed the culprit. Check if there’s power to the igniter by measuring voltage at the terminals. If there’s voltage, and the igniter still doesn’t ignite, it’s likely faulty.
Replacement Procedure:
- Safety Precautions: Ensure the furnace is turned off and the power is disconnected. Allow the furnace to cool completely before proceeding.
- Locate the Igniter Assembly: Open the furnace access panel and identify the igniter assembly, usually located near the gas valve.
- Disconnect the Wires: Carefully disconnect the wires connected to the igniter assembly. Note the position of the wires for proper reconnection.
- Remove the Igniter Assembly: Unscrew the mounting screws and gently pull out the igniter assembly.
- Inspect the Components: Examine the igniter, thermocouple, and wire connections for any damage or corrosion. Replace any damaged components as necessary.
- Install the New Igniter Assembly: Insert the new igniter assembly into place and secure it with the mounting screws. Reconnect the wires in their original positions.
- Test the Igniter: Restore power to the furnace and turn it on. Observe the igniter to ensure that it sparks properly and initiates the combustion process.
Replacing the Bryant Plus 80 igniter assembly is an essential repair to restore the functionality of your furnace. By following the steps outlined in this guide, you can confidently tackle this task and keep your home warm and cozy. Remember to prioritize safety and seek professional assistance if needed.
Troubleshooting the Bryant Plus 80 Flame Sensor
- Explain the purpose and function of the flame sensor. Identify common issues and provide troubleshooting tips.
Troubleshooting the Bryant Plus 80 Flame Sensor: A Comprehensive Guide to Keep Your Home Cozy
The flame sensor is a crucial component in your Bryant Plus 80 furnace, ensuring safe and efficient operation. This small device plays a pivotal role in detecting the presence of a flame, allowing your furnace to ignite and maintain a steady burn. When the flame sensor malfunctions, your furnace may encounter difficulties, leading to a cold and uncomfortable home.
Understanding the Flame Sensor
The flame sensor operates on a simple principle. It detects the presence of a flame by sensing the ionization current created in the combustion process. When the furnace ignites, the flame sensor sends a signal to the control board, confirming the presence of a flame. This signal enables the furnace to continue operating safely and efficiently.
Common Flame Sensor Issues
Like any other component, the flame sensor can develop problems over time. Some of the most common issues include:
- Dirty Flame Sensor: Soot and dust can accumulate on the flame sensor tip, reducing its sensitivity to the ionization current.
- Corrosion: The flame sensor can corrode due to exposure to moisture and heat, affecting its ability to detect the flame.
- Misalignment: The flame sensor must be positioned directly in the flame path. If it becomes misaligned, it may not receive a clear signal.
Troubleshooting Flame Sensor Problems
If you suspect a flame sensor issue, it’s important to troubleshoot the problem promptly. Here are some steps to help you diagnose and fix the problem:
- Check for Debris: Remove the flame sensor and inspect it for any visible soot or debris. Clean it gently with a soft brush or a cotton swab.
- Inspect for Corrosion: If the flame sensor appears corroded, it may need to be replaced. Contact a qualified HVAC technician for assistance.
- Verify Alignment: Ensure that the flame sensor is positioned directly in the path of the flame. Adjust its position if necessary.
Importance of a Functioning Flame Sensor
A properly functioning flame sensor is essential for the safe operation of your Bryant Plus 80 furnace. Without it, your furnace may fail to ignite or shut off prematurely, leaving you without heat. Additionally, a malfunctioning flame sensor can pose safety risks, such as the buildup of unburned gas or the potential for a fire.
Maintaining a functioning flame sensor is crucial for the efficient and safe operation of your Bryant Plus 80 furnace. By understanding common flame sensor issues and troubleshooting techniques, you can ensure that your furnace continues to provide warmth and comfort to your home for many years to come. If you encounter any problems beyond your technical abilities, do not hesitate to contact a qualified HVAC technician for assistance.
Maintaining Optimal Performance: A Guide to Cleaning Your Bryant Plus 80 Condenser Coils
Condenser coils are vital components of your Bryant Plus 80 HVAC system, responsible for releasing heat from the refrigerant and transferring it to the outside air. Regular cleaning of these coils ensures efficient heat transfer, preventing overheating and costly breakdowns.
Neglecting condenser coil maintenance can lead to a myriad of issues, including:
- Reduced cooling capacity: Dirty coils impede heat dissipation, resulting in a decrease in cooling efficiency.
- Increased energy consumption: The system works harder to compensate for reduced heat transfer, consuming more energy.
- Premature system failure: Overheating due to dirty condenser coils can damage the compressor and other components, potentially leading to system failure.
To prevent these problems and maintain the health of your Bryant Plus 80 furnace, follow these simple steps to clean the condenser coils:
Gather your tools: You’ll need a soft brush, a vacuum cleaner with a brush attachment, and a garden hose with a nozzle.
Locate the condenser unit: The condenser unit is typically located outside, usually on a concrete pad or suspended on a wall.
Turn off the power: Safety first! Switch off the power to the condenser unit at the circuit breaker or fuse box.
Remove the protective cover: The condenser coils are protected by a metal or plastic cover. Locate and remove the screws or clips holding it in place.
Brush and vacuum: Gently brush away loose dirt and debris from the coils. Then, use the vacuum cleaner with a brush attachment to remove any remaining dust or particles.
Rinse with water: Connect the garden hose to the nozzle and gently spray water over the coils, being careful not to damage them. Start from the top and work your way down, rinsing thoroughly.
Allow to dry: Once rinsed, leave the condenser coils to air dry completely before replacing the cover.
Restore power: Once the coils are dry, replace the cover and restore power to the condenser unit.
Regular cleaning: For optimal performance, clean the condenser coils at least once a year, especially before the peak cooling season. More frequent cleaning may be necessary in areas with high dust or pollen levels.
By following these steps, you can ensure that your Bryant Plus 80 condenser coils remain clean and efficient, enhancing the comfort and longevity of your HVAC system. Remember, a well-maintained system means fewer breakdowns, lower energy bills, and a more comfortable indoor environment.
Replacing the Bryant Plus 80 Air Filter: A Simple Guide for Homeowners
Maintaining your Bryant Plus 80 furnace is essential for optimal performance and longevity. One crucial aspect of this maintenance is regularly replacing the air filter. A clean air filter ensures clean air circulation throughout your home, reduces strain on the system, and ultimately extends its lifespan.
Why is Air Filter Replacement Important?
Neglecting to replace your air filter can lead to several problems. A dirty filter can:
- Obstruct airflow, causing the furnace to work harder and consume more energy.
- Trap dust, dirt, and allergens, reducing indoor air quality and potentially causing respiratory issues.
- Accumulate moisture, creating a breeding ground for bacteria and mold.
How to Choose the Right Air Filter
Selecting the correct air filter is essential for the efficient operation of your Bryant Plus 80 furnace. Look for filters with the following specifications:
- MERV rating: Measure of filter efficiency. Higher MERV ratings indicate better filtration but may restrict airflow. Choose a filter with a MERV rating appropriate for your home and needs.
- Size: Check your furnace manual or the existing filter for the correct size.
- Type: Options include fiberglass, pleated, and HEPA filters. Pleated filters offer better filtration and longevity compared to fiberglass filters, while HEPA filters are highly efficient but can be more expensive.
How to Replace the Air Filter
Replacing the Bryant Plus 80 air filter is a straightforward process that takes just a few minutes. Here’s a step-by-step guide:
- Turn off the furnace: Locate the power switch on the furnace and turn it off.
- Find the filter access panel: Look for a small access panel on the side or bottom of the furnace.
- Remove the old filter: Grab the old filter by the cardboard frame and carefully pull it out.
- Inspect the filter: Examine the old filter for any signs of dirt, dust, or damage.
- Insert the new filter: Slide the new filter into the slot with the arrow pointing towards the furnace.
- Close the access panel: Securely close the access panel.
- Turn on the furnace: Return to the power switch and turn the furnace back on.
Maintenance Tips
For optimal performance, replace your Bryant Plus 80 air filter once every 30-90 days, especially during periods of heavy use. Regularly checking and cleaning the furnace around the filter area can also help extend its lifespan. By following these simple steps, you can ensure that your furnace operates efficiently and provides you with years of trouble-free heating.
Troubleshooting the Bryant Plus 80 Gas Valve
The gas valve, a crucial component in your Bryant Plus 80 furnace, ensures the safe flow of gas to the burners. However, over time or due to various factors, issues with the gas valve can arise. To keep your furnace operating smoothly, it’s essential to identify common problems and follow the appropriate troubleshooting steps.
Role of the Gas Valve
The gas valve plays a significant role in the operation of your furnace. It regulates the gas supply to the burners, ensuring that the proper amount of fuel is delivered to generate heat. The valve does this by opening and closing in response to signals from the furnace’s thermostat and control board.
Common Problems
Several issues can affect the functionality of the gas valve in a Bryant Plus 80 furnace. Some of the most common problems include:
- Faulty solenoids: Solenoids are electrical devices that control the flow of gas through the valve. If a solenoid fails, it can prevent the valve from opening or closing properly.
- Clogged or dirty valve seat: Over time, dirt or debris can accumulate on the valve seat, obstructing the flow of gas.
- Damaged diaphragm: The diaphragm is a flexible membrane inside the valve that opens and closes to allow gas to flow. It can become damaged due to wear and tear or exposure to excessive heat.
Troubleshooting Steps
If you suspect an issue with the gas valve in your Bryant Plus 80 furnace, it’s crucial to take the following safety precautions before attempting any troubleshooting:
- Turn off the gas supply to the furnace.
- Allow the furnace to cool completely.
- Contact a qualified technician for assistance if you are not familiar with electrical or gas work.
Once you have taken the necessary safety precautions, you can follow these troubleshooting steps:
- Check for power: Ensure that the gas valve is receiving power by testing it with a multimeter.
- Inspect the solenoids: Look for any burnt or damaged wires or terminals on the solenoids.
- Clean the valve seat: Use a soft brush or cloth to gently remove any dirt or debris from the valve seat.
- Replace the diaphragm: If the diaphragm is damaged, it will need to be replaced by a qualified technician.
Safety Precautions
Troubleshooting the gas valve in a furnace can be hazardous if proper safety precautions are not followed. Here are some important safety tips to keep in mind:
- Always turn off the gas supply to the furnace before attempting any work.
- Never attempt to work on the gas valve if you are not a qualified technician.
- If you suspect a problem with the gas valve, contact a qualified technician for assistance immediately.
By following these troubleshooting steps and safety precautions, you can help ensure that the gas valve in your Bryant Plus 80 furnace is operating correctly and safely, providing you with reliable heating throughout the winter months.
Maintaining Your Bryant Plus 80: A Comprehensive Guide to Cleaning the Drain Line
The drain line plays a pivotal role in ensuring the seamless operation of your Bryant Plus 80 furnace. It channels away condensation that accumulates during the combustion process, preventing potential water damage and dampness in your home. Regular cleaning of this drain line is crucial to prevent blockages that can compromise the system’s performance.
Identifying the Drain Line
Locate the drain line near the base of your furnace unit. It’s typically a small, flexible tube made of plastic or rubber that extends outside the furnace. The end of the tube may be connected to a drain pan or a condensate pump.
Troubleshooting Clogs
If your furnace is cycling on and off frequently, it may be a sign of a clogged drain line. Unusual noises, such as gurgling or dripping, can also indicate a blockage. Additionally, moisture buildup around the drain tube or pooling below the furnace unit are telltale signs of this issue.
Step-by-Step Cleaning Instructions
-
Power down the furnace: To ensure your safety, turn off the power to your furnace at the electrical panel.
-
Disconnect the drain line: Locate the junction where the drain line connects to the furnace. Disconnect the tube carefully to avoid spilling any condensate.
-
Remove clogs: Use a pipe cleaner or a wire brush to gently remove any visible clogs from inside the drain line. If the blockage is stubborn, try flushing the line with warm water.
-
Clean the drain port: Once the drain line is clear, inspect the drain port on the furnace. Remove any debris or buildup that may have accumulated around the opening.
-
Reattach the drain line: Reconnect the drain line to the furnace securely. Ensure that the connection is tight and leak-proof.
-
Reset the furnace: Turn the power back on to your furnace and allow it to run for a few minutes to check for leaks.
Maintenance Tips
To prevent future clogs, it’s essential to perform regular maintenance on your drain line:
-
Inspect the drain line periodically: Check the drain line every few months for any signs of damage or clogs.
-
Avoid pouring liquids down the drain: Only condensation from the furnace should be drained through this line. Avoid pouring liquids, such as oils or cleaning solutions, into the drain, as they can cause blockages.
-
Install a condensate pump: If your furnace is prone to frequent drain line clogs, consider installing a condensate pump. This device automatically pumps condensate away from the furnace, reducing the risk of blockages and water damage.
By following these instructions and maintenance tips, you can ensure that your Bryant Plus 80 drain line remains clear and functional, guaranteeing optimal heating performance and a comfortable indoor environment.
Checking the Refrigerant Levels of Your Bryant Plus 80 Furnace
Maintaining proper refrigerant levels is crucial for the efficient and reliable operation of your Bryant Plus 80 furnace. Refrigerant is a vital component that absorbs and releases heat, enabling your furnace to warm your home.
Importance of Proper Refrigerant Levels
- Efficient operation: Optimal refrigerant levels ensure that your furnace operates at peak efficiency, minimizing energy consumption and lowering utility bills.
- Extended lifespan: Adequate refrigerant levels prevent premature wear and tear on your furnace’s compressor, extending its lifespan.
- Consistent comfort: Proper refrigerant levels allow your furnace to effectively distribute heat throughout your home, providing consistent comfort during the cold winter months.
How to Check Refrigerant Levels
Caution: Refrigerant is a hazardous substance, and handling it improperly can be dangerous. It is strongly recommended that you contact a qualified HVAC technician to check your refrigerant levels.
However, if you are comfortable working on your furnace, you can follow these steps to check the levels yourself:
- Gather your tools: You will need a digital manifold gauge set and a refrigerant cylinder with the correct type of refrigerant for your furnace.
- Locate the service valves: The service valves are typically located on the copper lines of your furnace’s outdoor unit.
- Connect the manifold gauge set: Attach the manifold gauge set to the service valves, ensuring that the red hose is connected to the high-pressure side and the blue hose is connected to the low-pressure side.
- Turn on the furnace: Run your furnace for a few minutes to allow the refrigerant to circulate.
- Read the gauges: Observe the pressure readings on the manifold gauge set. The high-pressure side should fluctuate between 175-250 psi, while the low-pressure side should read around 50-65 psi.
Contacting a Qualified Technician
If you detect abnormal refrigerant levels, do not hesitate to contact a qualified HVAC technician. They have the expertise and equipment to safely and accurately adjust your refrigerant levels, ensuring that your furnace operates at its optimal performance.
Remember, maintaining proper refrigerant levels is essential for the efficiency, lifespan, and comfort provided by your Bryant Plus 80 furnace. By following these guidelines or contacting a professional, you can ensure that your furnace delivers reliable warmth and comfort for years to come.
Troubleshooting the Bryant Plus 80 Thermostat
If your Bryant Plus 80 furnace or AC unit isn’t performing as it should, the thermostat may be the culprit. Here’s a guide to help you identify and resolve common thermostat issues:
Unresponsive Buttons
Faulty buttons can prevent you from adjusting the temperature or changing settings. Here’s what to try:
- Check batteries: Replace the batteries if the thermostat is battery-operated.
- Clean buttons: Gently clean the buttons with a soft cloth and rubbing alcohol.
- Inspect wiring: Ensure the wires connected to the thermostat are secure and free of damage.
Incorrect Temperature Readings
Inaccurate readings can result in uncomfortable temperatures. To address this:
- Check sensor positioning: Ensure the thermostat sensor is not blocked by furniture or curtains.
- Calibrate the thermostat: Follow the manufacturer’s instructions to calibrate the thermostat and ensure accurate readings.
- Replace the sensor: If the sensor is faulty, replace it with a new one.
Communication Errors
The thermostat may not be communicating properly with the furnace or AC unit. Try these steps:
- Check power: Verify that both the thermostat and the connected equipment have power.
- Inspect wiring: Ensure all wires are secure and connected properly.
- Reset the thermostat: Remove the batteries or turn off the power at the breaker for a few minutes before turning it back on.
- Contact support: If the communication error persists, contact a qualified HVAC technician for further assistance.
Additional Safety Precautions
- Always turn off power to the thermostat before performing any troubleshooting steps.
- Use caution when handling wires and electrical components.
- If you aren’t comfortable troubleshooting the thermostat yourself, call a certified HVAC technician.