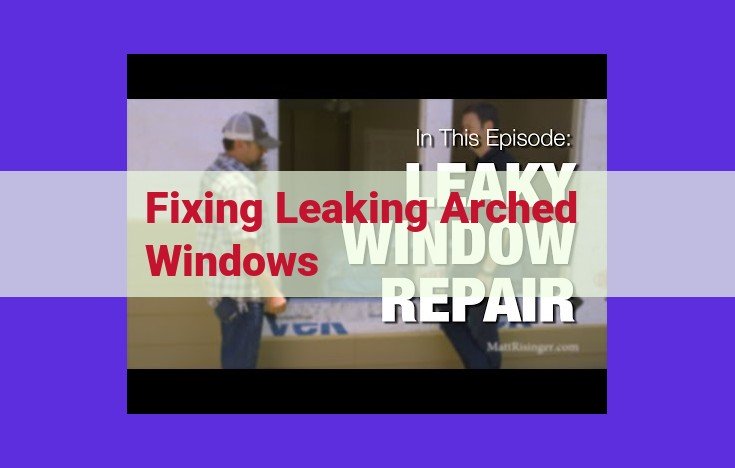
Ultimate Guide To Fixing Leaking Arched Windows: Prevent Damage, Enhance Efficiency
Fixing leaking arched windows requires addressing the source of the leak, which can range from damaged glass to compromised seals. Proper leak detection and safe glass removal are crucial, followed by precise glass replacement and expert glazing techniques. Caulking and waterproofing enhance protection, while proper reinstallation ensures a secure fit. Regular maintenance is essential for optimal performance, preventing damage and restoring window efficiency.
- Describe the prevalence and causes of leaks in arched windows.
- Emphasize the significance of addressing these leaks promptly to prevent further damage.
Leaking Arched Windows: A Comprehensive Guide to Detection and Repair
Imagine the beauty of an arched window, its graceful curve adding an air of elegance to your home. However, when leaks mar this charm, it’s like a cloud over a sunny day. If you’re facing this dilemma, don’t despair! This comprehensive guide will empower you with the knowledge to detect and repair leaking arched windows, restoring their splendor and safeguarding your home.
Recognizing the Silent Culprit: Leaks in Arched Windows
Water leaks in arched windows are no strangers to many homeowners. These sneaky intruders can stem from various causes, such as damaged glass, loose glazing, or compromised seals. Prompt attention is crucial, as leaks can lead to costly structural damage if left unchecked.
Unveiling the Leak’s Hideout
Detecting the leak’s origin is the first step towards a successful repair. Thermal imaging and water testing are valuable tools in this investigation. By carefully examining the window, you can pinpoint the source of the leak, whether it’s a tiny crack in the glass or a less obvious fault in the glazing.
Removing the Damaged Glass: A Delicate Operation
Once the leak’s hideout is revealed, it’s time to safely remove the damaged glass. Remember to prioritize safety with protective gear. Specialized tools and techniques are key to extracting the glass without causing further damage. Handle this step with utmost care to avoid any mishaps.
Precision Engineering: Replacing the Glass
Replacing the faulty glass requires precision. Meticulously measure the opening and cut a new piece of glass to fit snugly. Employ proper adhesives and installation techniques to ensure a secure and durable fit, restoring the window’s integrity.
Glazing: The Weatherproofing Shield
Glazing compound is your ally in sealing the glass to the frame. Carefully apply it to create a watertight barrier. For arched windows, specific glazing techniques are employed to achieve a perfect fit, preventing water infiltration.
Caulking: The Final Line of Defense
Choose the right caulk for the job, considering durability and adhesion properties. Seal any gaps or cracks around the window to prevent water from sneaking in. Apply the caulk precisely and smoothly for optimal protection.
Reinstallation with Precision
Prepare the window frame for a flawless installation. Use appropriate hardware and techniques to securely place the window back in its rightful spot. This step requires precision and care to ensure a snug fit and prevent future leaks.
Waterproofing: The Long-Term Solution
Apply waterproof sealants to the exterior surfaces of the window to enhance its resistance to water penetration. Address any joints or cracks, creating a barrier that keeps the elements at bay, prolonging the window’s lifespan.
Regular TLC: The Secret to Longevity
Like any aspect of your home, regular maintenance is essential for windows, including arched ones. Inspect the windows periodically, check for any signs of leaks or damage, and address them promptly. By following these simple steps, you can enjoy the beauty and functionality of your arched windows for years to come.
Prevent Damage, Restore Efficiency
Timely leak repairs are not just about aesthetics; they play a crucial role in preventing further damage to the window and surrounding structure. Resolving leaks also restores the window’s performance, ensuring energy efficiency and maintaining your home’s comfort.
Embark on this repair journey with confidence, knowing that you possess the knowledge to keep your arched windows leak-free and radiant. By following these steps and seeking professional assistance when necessary, you can restore the charm of your home and enjoy the peace of mind that comes with a secure and dry abode.
Identifying the Elusive Leak in Arched Windows: A Journey of Detection
In the realm of home maintenance, leaking arched windows can be a perplexing conundrum. But fret not, for the path to uncovering the source of these pesky leaks is not as daunting as it may seem. This guide will illuminate the methods for leak detection and guide you through the process of pinpointing the culprit, whether it be damaged glass, loose glazing, or a compromised seal.
Thermal Imaging: A Heat-Seeking Adventure
Thermal imaging is a non-invasive technique that unveils the invisible. By capturing thermal images of your window, this technology detects temperature variations that often indicate the presence of leaks. Hot spots may reveal areas where heat is escaping, suggesting a breach in the window’s insulation or a damaged seal.
Water Testing: A Controlled Downpour
Water testing provides a more direct approach to leak detection. Using a hose or spray bottle, gently spray water onto the exterior surface of the window while monitoring the interior for signs of moisture. Any seepage or water droplets indicate a potential leak point.
Visual Inspection: A Meticulous Examination
A thorough visual inspection can also yield valuable clues. Examine the glass for cracks or chips that could allow water to penetrate. Inspect the glazing around the edges of the window for any gaps or loose spots where water may seep in. Finally, check the seal between the window frame and the wall for any damage or deterioration.
By carefully following these methods, you can pinpoint the source of the leak in your arched window and embark on the path to a watertight restoration.
Safe Removal of Damaged Glass
Ensuring Your Safety
Before embarking on the delicate task of removing damaged glass, it’s imperative to prioritize safety. Don protective gloves, safety glasses, and a dust mask to safeguard yourself from potential hazards.
Specialized Tools and Techniques
For effective glass removal, equip yourself with the following tools:
- Suction cups to grip and pull broken glass fragments.
- Glass pliers specifically designed to handle shattered glass safely.
- Utility knife to cut and remove glass adhesive or glazing compound.
Meticulous Removal
Begin by carefully removing any loose glass pieces with suction cups. Handle them gently to avoid further breakage. Next, use glass pliers to grip and extract larger glass shards. Apply constant pressure while pulling upwards to detach them without causing damage to the window frame.
Thorough Cleanup
Once the main glass pieces are removed, thoroughly clean the window frame using a vacuum cleaner or soft brush. Remove any remaining glass fragments or dust to prepare for the next step.
Replacing the Glass with Precision for Arched Windows
Measuring and Cutting with Meticulous Accuracy
Replacing the damaged glass in an arched window poses unique challenges. To ensure a perfect fit, meticulous measurements are crucial. Using a flexible measuring tape, carefully contour the arch’s curvature and record the exact dimensions. Then, transfer these measurements to a piece of high-quality glass, ensuring precise cutting with a glass cutter or wet saw for optimal accuracy.
Securing the Glass with Proper Adhesives and Techniques
Once the glass is cut to exact specifications, proper adhesives and installation techniques are paramount for a secure and durable bond. Choose an adhesive specifically designed for architectural glass installation that can withstand the stresses and temperature fluctuations of outdoor environments. Apply the adhesive evenly along the edges of the glass, ensuring uniform contact with the window frame. For added stability, use glazing points or clips to hold the glass in place while the adhesive cures.
Tips for Secure and Durable Glass Placement
- Use a two-part epoxy adhesive for a strong and long-lasting bond.
- Apply the adhesive in a continuous bead around the perimeter of the glass.
- Press the glass firmly into the window frame and secure it with glazing points or clips.
- Allow the adhesive to cure completely before using the window.
By following these guidelines, you can confidently replace the glass in your arched window with precision, ensuring a secure and durable installation.
Glazing the Window for Weatherproofing: A Step-by-Step Guide
Once you have replaced the glass with precision, it’s time to seal it to the frame using glazing compound. This compound is crucial for weatherproofing your arched window and preventing water infiltration.
Applying Glazing Compound
- Choose the right glazing compound: Opt for a high-quality glazing compound specifically formulated for arched windows. It should be paintable and flexible to accommodate movement.
- Prepare the frame: Ensure the frame is clean and free of debris. Apply a thin layer of glazing compound to the rebate (the groove where the glass sits).
- Apply the glazing compound: Spread a generous bead of glazing compound around the glass’s perimeter, pressing it firmly into the rebate. Use a glazing knife to shape and smooth the compound.
Glazing Arched Windows
For arched windows, follow these additional steps:
- Support the glass: Use a window prop or suction cups to support the glass during installation.
- Apply compound in sections: Divide the arched window into smaller sections and apply the glazing compound in sections to avoid slumping.
- Smooth the compound: Use a glazing knife to smooth the compound along the arch, ensuring a watertight seal.
By carefully following these steps, you can effectively glaze your arched window and protect it from the elements.
Caulking for Enhanced Protection
When repairing your arched window’s leak, caulking plays a crucial role in further safeguarding the window from water infiltration. Choosing the right type of caulk and applying it correctly is essential for long-lasting results.
Choosing the Right Caulk
Selecting the appropriate caulk depends on the window’s material and your specific requirements. For instance, silicone caulk excels in durability and adhesion, making it suitable for sealing joints around glass, metal, and vinyl windows. Polyurethane caulk, on the other hand, provides excellent flexibility and weather resistance, making it ideal for sealing gaps between different building materials.
Proper Caulking Techniques
Preparing the surface before applying caulk is key. Clean and dry the areas thoroughly, ensuring a strong bond between the caulk and the surfaces. Use a caulking gun to dispense the caulk evenly and smoothly into the gaps or joints.
Pay attention to applying sufficient caulk to fill the void completely. Run your finger, coated with a little water, along the caulk bead to smooth it out and create a neat, watertight seal. Allow the caulk to cure thoroughly according to the manufacturer’s instructions before exposing it to moisture.
Preventing Further Leaks
Proper caulking not only enhances the window’s performance but also prevents the recurrence of leaks. The waterproof seal created by the caulk acts as a barrier, keeping water out of the window’s interior and preventing structural damage.
Remember, regular maintenance and inspection of your arched windows will ensure they remain in optimal condition. By addressing minor issues promptly, you can avoid costly repairs and extend the lifespan of your windows.
Reinstalling the Window with Precision and Care
Once the damaged glass is replaced and securely glazed, it’s time to meticulously reinstall the window into its frame. This crucial step ensures a snug fit, optimal functionality, and long-lasting performance.
Preparing the Window Frame
Before the window is put back in place, the frame must be meticulously inspected and prepared. Thoroughly clean the frame to remove any debris or dirt that may interfere with a secure fit. Check for any damaged or loose components and replace or repair them as needed. Make sure the frame is dry and free of moisture before proceeding.
Securing the Window
Carefully lift the window into position and align it precisely with the frame. Use appropriate hardware, such as screws or nails, to securely fasten the window to the frame. Pay close attention to even spacing and tightening each screw or nail gradually to prevent overtightening.
Ensuring a Watertight Fit
To prevent water infiltration, apply a generous bead of high-quality sealant around the perimeter of the window frame. Use a caulking gun to ensure a consistent and even application. Smooth the sealant with a caulking tool to create a neat and watertight seal.
Professional Assistance: When to Seek
For complex installations or specialized repairs, it’s advisable to seek the assistance of a qualified window professional. Their expertise will ensure that the window is properly installed and functions as intended, maximizing its longevity and performance.
Waterproofing the Window for Longevity
Maintaining the integrity of your arched window is paramount to its longevity and the well-being of your home. Waterproofing plays a crucial role in preventing water penetration and safeguarding the window against damage.
To ensure your arched window withstands the elements, it is essential to apply waterproof sealants to its exterior surfaces. These sealants create a protective barrier that repels water and prevents it from seeping through joints and cracks. Choose high-quality sealants specifically designed for outdoor use, ensuring they are compatible with the window’s materials.
When applying sealants, meticulous attention should be given to areas where water is most likely to infiltrate. Apply a generous bead of sealant around the perimeter of the window frame, paying particular attention to the corners. Additionally, seal any visible gaps between the glass and the frame to prevent water from seeping through.
Regularly inspect your arched window for any signs of wear or damage. If you notice any cracks or gaps in the sealant, promptly reapply to maintain the window’s watertight integrity. By taking these preventive measures, you can extend the lifespan of your arched window, ensuring it continues to protect your home from the elements for years to come.
Regular Maintenance for Optimal Window Performance
Maintaining well-functioning windows is essential to prevent leaks and extend their lifespan. Regular inspections and simple maintenance tasks can save you time, money, and hassle in the long run.
DIY Maintenance Tips
- Clean Windows Regularly: Dirt and debris can accumulate on windows and impede their ability to shed water. Use a mild detergent and a soft cloth to clean the glass, frames, and hardware.
- Check for Loose Screws and Fasteners: Tighten any loose screws or fasteners to ensure a secure fit. Loose parts can allow water to seep in, leading to leaks.
- Inspect Glazing and Caulk: Sealants can deteriorate over time, so inspect the glazing and caulk regularly. Re-apply caulk around the glass and frames as needed to maintain a watertight seal.
When to Seek Professional Assistance
While many window maintenance tasks can be handled by DIY enthusiasts, there are some situations that require professional assistance. If you notice any of the following issues, don’t hesitate to contact a qualified window contractor:
- Cracked or Broken Glass: Replacing damaged glass requires specialized tools and expertise. An experienced contractor will ensure a safe and secure installation.
- Leaking Windows: Water infiltration can damage not only the windows but also the surrounding structures. Professional leak detection and repair are crucial to prevent further damage.
- Complex Repairs: Repairing or replacing window frames, hardware, or moving parts can be challenging. Hiring a contractor with the necessary skills and experience will ensure the job is done correctly.
Benefits of Regular Maintenance
Regular window maintenance offers a multitude of benefits:
- Prevents Leaks: Addressing potential leak sources early on saves you the headache of dealing with water damage.
- Extends Window Lifespan: Proper maintenance helps your windows function optimally for years to come, saving you the expense of premature replacement.
- Improves Energy Efficiency: Well-maintained windows seal tightly, reducing air leaks and improving your home’s energy efficiency.
By incorporating regular maintenance into your home care routine, you can enjoy well-functioning windows that add value to your property for years to come.
Preventing Damage and Restoring Window Efficiency
Leaking arched windows can cause significant damage not only to the window itself but also to the surrounding structure. Prompt repair is crucial to prevent further deterioration and costly repairs down the road.
By resolving leaks promptly, you can restore the window’s performance and ensure its energy efficiency. Leaking windows allow cold air to enter and warm air to escape, increasing your energy bills. Sealing leaks eliminates this issue, improving your home’s insulation and reducing your energy consumption.
Moreover, leaks can lead to mold growth and other moisture-related issues that can affect your health and the integrity of your home. By repairing leaks, you can maintain a healthy indoor environment and preserve the longevity of your windows.