The Ultimate Guide To Silicone Tunnels: Ear Stretching Made Easy And Safe
- Introduction: Silicone tunnels, used for ear stretching, gradually enlarge earlobes as a form of body modification.
- Materials and Preparation: Select a合适的尺寸silicone tunnel and prepare with lubrication and cleaning supplies.
- Tunnel Installation: Lubricate, insert with a gentle twist, and consider using a taper or tool for assistance.
- Aftercare and Maintenance: Clean regularly, treat infections, and stretch gradually.
- Best Practices: Emphasize gradual stretching, preventing tears and infections, and seeking professional guidance.
Silicone Tunnels: A Guide to Ear Stretching
In the realm of body modification, ear stretching holds a unique place, offering a transformative way to express one’s individuality. Silicone tunnels are essential tools in this process, facilitating the gradual expansion of earlobes. Understanding their purpose and the proper techniques for installing them is crucial for a safe and successful stretching experience.
Ear Stretching: An Art Form
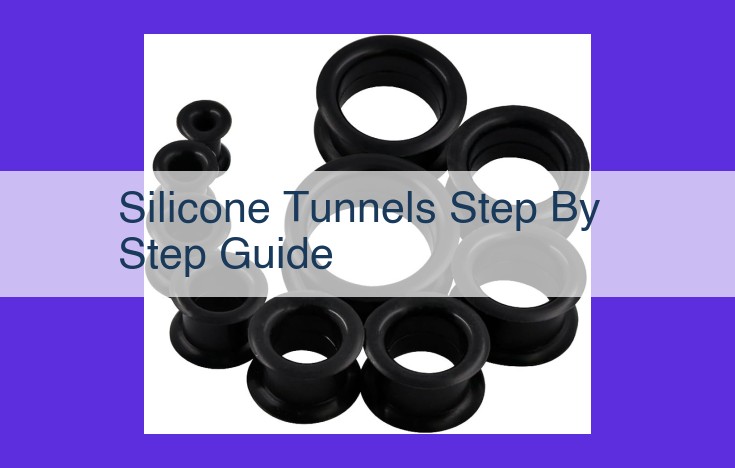
Ear stretching is an ancient practice that involves gradually enlarging piercings in the earlobes. This process allows for the insertion of larger and more decorative jewelry, such as plugs and tunnels. Silicone tunnels are cylindrical inserts that sit within the stretched earlobe, creating a passageway for earrings to pass through.
Materials and Preparation
Before embarking on the tunnel installation process, it’s essential to gather the necessary materials:
- Silicone tunnels in the desired size
- Lubrication (e.g., vitamin E oil, olive oil)
- Saline solution
- Cotton balls or swabs
Step-by-Step Tunnel Installation
-
Lubricate: Apply a generous amount of lubricant to the silicone tunnel and the inside of the earlobe. This will make the insertion smoother and reduce friction.
-
Gentle Twisting: Hold the tunnel perpendicular to the earlobe and apply gentle pressure. Begin a slow, twisting motion while pushing the tunnel into the piercing.
-
Patience and Gradualism: Avoid rushing the process. Be patient and allow the tunnel to gradually slide into place. If resistance is encountered, stop applying pressure and wait a few days before attempting again.
Aftercare and Maintenance
After inserting the tunnels, it’s crucial to maintain proper hygiene:
-
Cleaning: Clean the silicone tunnels and earlobes regularly with saline solution. This will prevent the build-up of bacteria and reduce the risk of infection.
-
Monitoring: Keep an eye on the piercing for any signs of redness, swelling, or pain. If any concerns arise, seek medical attention promptly.
Related Concepts
-
Silicone Tunnels vs. Ear Gauges: While both are used for ear stretching, silicone tunnels are designed to create a passageway for earrings, while ear gauges are solid and decorative pieces that fill the piercing.
-
Risks of Ear Stretching: Although generally safe, ear stretching carries some risks, including tears, infections, and nerve damage. It’s essential to stretch gradually and follow proper aftercare guidelines.
Best Practices and Safety Measures
-
Gradual Stretching: Never stretch your ears too quickly. Allow ample time for each size increase to ensure the piercing remains healthy.
-
Hygiene: Keep your piercing clean to prevent infection. This includes washing your hands before handling the tunnels and earrings.
-
Seek Professional Guidance: If any complications arise during the stretching process, do not hesitate to seek advice from a reputable piercing artist or healthcare professional.
Materials and Preparation: Getting Ready for Silicone Tunnel Installation
Determining the Appropriate Size
The key to successful tunnel installation lies in choosing the correct size. It should be slightly larger than your current earlobe size to allow for gradual stretching. Measure your current piercing with a ruler or specialized ear gauges. Select a tunnel one size up for a comfortable and safe transition.
Essential Supplies
Gather the necessary lubrication to ease the insertion process. Petroleum jelly or water-based lubricant are commonly used. Also, prepare cleaning supplies such as antibacterial soap and saline solution to maintain hygiene.
Step-by-Step Tunnel Installation
Before you begin, ensure that your earlobes are clean and free of any infection or irritation. Gather your silicone tunnel, lubricant, cotton swabs, and sterile gauze.
Step 1: Lubrication
Apply a generous amount of lubricant to the silicone tunnel and your earlobe. This helps the tunnel slide in smoothly and reduces any discomfort.
Step 2: Gentle Twisting Motion
Gently twist the tunnel while inserting it into your earlobe. Avoid using excessive force or pushing straight in, as this can cause tearing or discomfort.
Step 3: Insertion Tools (Optional)
If you feel resistance or discomfort, consider using a taper or insertion tool. These tools help gradually stretch your earlobe, making it easier to insert the tunnel. Always start with a smaller taper and gradually increase the size as you insert the tunnel.
Pro Tip: Take your time and be patient. Ear stretching is a gradual process that requires consistency and care. If you experience any pain or discomfort, stop the process and seek professional guidance.
Aftercare and Maintenance
After successfully installing your silicone tunnels, proper care is crucial to ensure a healthy healing process and preserve the longevity of your earlobes.
Cleaning Routine
Regular cleaning is essential to prevent infections and keep your tunnels and earlobes clean. Use a mild soap and warm water to gently wash the area twice a day. Avoid using harsh chemicals or antibacterial soaps, as these can irritate the skin.
Treating Infections
If you notice any signs of an infection, such as redness, swelling, or discharge, act promptly. Clean the area thoroughly with antibacterial soap and apply a topical antibiotic ointment. If the infection persists or worsens, seek medical attention immediately.
Additional Tips for Aftercare
- Avoid sleeping on your newly stretched ears to prevent pressure and discomfort.
- Moisturize your earlobes with a fragrance-free lotion to keep them hydrated.
- Listen to your body and take breaks from wearing tunnels if you experience any pain or discomfort.
- Regularly inspect your tunnels and earlobes for any signs of damage, such as scratches or nicks.
Understanding the Nuances of Ear Tunnels: Silicone Tunnels vs. Gauges
As you embark on the journey of ear stretching, it’s crucial to understand the distinctions between silicone tunnels and ear gauges. While both adornments create larger ear piercings, they possess unique characteristics.
Silicone Tunnels:
These are flexible, transparent plugs inserted into stretched earlobes. Their main purpose is to maintain the desired size of the lobe, allowing for easy removal when necessary. Silicone tunnels are biocompatible and less likely to cause irritation or allergic reactions.
Ear Gauges:
Gauges are typically made of solid materials like steel, wood, or acrylic. They are non-removable once inserted and act as permanent jewelry. Gauges symbolize a more committed level of body modification as they require a permanent stretch.
Ear Stretching: A Process with Potential Risks
Ear stretching is a gradual process where increasingly larger tunnels or gauges are worn to enlarge earlobes. While intriguing in its aesthetics, it’s essential to approach ear stretching with caution.
- Slow and Gradual Stretching:
Rapidly stretching earlobes can lead to tearing or scar tissue. It’s crucial to allow plenty of time for each stretch, typically several weeks or months, before moving to the next size.
- Proper Lubrication:
Using lubrication when inserting tunnels or gauges is paramount. It reduces friction and minimizes the risk of trauma.
- Hygiene and Aftercare:
Cleanliness is vital to prevent infection. Regularly cleaning tunnels or gauges, as well as pierced lobes, is imperative. Signs of infection include redness, swelling, or discharge. Prompt treatment with antibiotic ointment is advised.
- Risks and Complications:
While generally safe, ear stretching can pose risks, such as:
- **Infection:** _Neglecting proper hygiene_ can lead to _bacterial_ or _fungal infections_.
- **Tearing:** _Excessive force_ or _rapid stretching_ can _tear_ the earlobe.
- **Scarring:** _Damage_ to the earlobe can result in _permanent scarring_.
- **Deformity:** Incorrectly _placed tunnels_ or gauges can cause _deformities_ in the earlobe.
By adhering to these safety guidelines, you can enhance the enjoyment and safety of your ear stretching experience.
Best Practices and Safety Measures
When embarking on the journey of ear stretching, it’s imperative to prioritize safety and follow responsible practices. Gradual stretching is paramount to minimize the risk of tears or injuries. Start with a small size tunnel and gradually increase the diameter over time. Never attempt to stretch too quickly, as this can put excessive strain on the earlobe.
To prevent infections, maintain hygienic practices. Clean your silicone tunnels and earlobes regularly with a mild soap or saline solution. Use a soft cloth to avoid irritation. If you notice any signs of infection, such as redness, swelling, or pus, consult a healthcare professional immediately. Treat the area with antibiotic ointment as directed to prevent further complications.
Remember, ear stretching is a gradual process that requires patience and care. Rushing the procedure can have detrimental effects. Listen to your body and take breaks if you experience any discomfort or pain. With proper precautions and gradual stretching, you can achieve your desired ear size safely and responsibly.