Ultimate Guide To Hardening Cardboard: Transform Ordinary Cardboard Into Durable Masterpieces
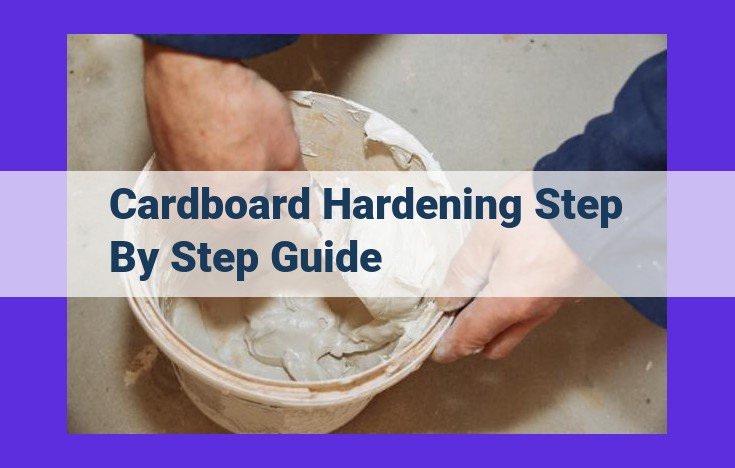
Cardboard Hardening Step-by-Step Guide
- Gather materials (cardboard, ruler, bone folder, glue, sealer).
- Flatten, cut, and score cardboard for crisp folds.
- Fold cardboard along scored lines using a bone folder.
- Apply glue to edges for increased strength (optional).
- Dry cardboard thoroughly.
- Apply sealer for added durability (optional).
- Dry sealer following manufacturer’s guidelines.
The Art of Cardboard Hardening: A Guide to Unlocking Its Hidden Strength
Cardboard, although a humble material, holds great potential when imbued with enhanced rigidity. The process of cardboard hardening transforms this ordinary material into a formidable ally for countless projects. Whether you’re crafting sturdy boxes, building intricate models, or creating durable displays, harnessing the hardened strength of cardboard opens up a world of creative possibilities.
Why Cardboard Hardening Matters
For specific applications, the inherent flexibility of cardboard can prove detrimental. Hardening the material mitigates this weakness, bestowing it with the rigidity essential for:
- Structural integrity: Hardened cardboard can withstand greater weight and pressure, ensuring its creations remain sturdy and functional.
- Precision: By crispening fold lines and eliminating warping, hardened cardboard enables precise and intricate constructions.
- Durability: With enhanced resistance to tearing and bending, hardened cardboard extends the lifespan of your creations.
Embarking on the Hardening Process
With the benefits of hardened cardboard established, let’s delve into the practical steps to achieve this remarkable transformation:
-
Materials: Gather essential tools like a utility knife, ruler, and bone folder, along with cardboard, glue (optional), and a sealer (optional).
-
Workspace: Establish a flat and clean workspace to ensure precision and maintain a tidy environment.
-
Cardboard Preparation: Flatten, cut, and measure the cardboard to your desired specifications.
Gathering Essential Materials for Cardboard Hardening
Embarking on a cardboard hardening adventure requires assembling a trusty toolkit and essential materials. This indispensable arsenal will empower you to transform flimsy cardboard into a robust and unyielding material. Let’s delve into the necessary items that will accompany you on this cardboard metamorphosis journey.
1. Cardboard:
The protagonist of our story, select cardboard that aligns with your project’s demands. Opt for sturdier varieties like corrugated cardboard for projects requiring exceptional rigidity.
2. Scoring Tool:
A sharp scoring tool is the secret weapon for crisp and precise folds. This tool will mark the cardboard’s surface, making it easier to bend without unsightly creases.
3. Folding Tool (Bone Folder or Ruler):
A smooth folding tool will assist in meticulously creasing the scored lines, ensuring sharp and clean folds.
4. Glue (Optional):
Introducing an optional ally, glue can bolster the cardboard’s strength by adhering its edges. Choose a type suitable for cardboard, such as wood glue or white glue.
5. Sealant (Optional):
As a finishing touch, a sealant can shield the hardened cardboard from moisture and enhance its durability. Consider options like polyurethane or acrylic sealants.
6. Measuring Tape or Ruler:
Accuracy is paramount in cardboard hardening. A measuring tape or ruler will ensure precise cutting and shaping of the cardboard.
7. Scissors or Utility Knife:
These sharp tools will help you cut the cardboard to the desired shape and size. Handle them with care to avoid injury.
8. Flat and Protected Work Surface:
A level and protected work surface provides a stable platform for precise cutting and folding. Cover it with a mat or cloth to prevent scratches.
Armed with these indispensable materials, you’re now equipped to embark on the cardboard hardening mission. May your creations stand tall and unwavering!
Creating a Suitable Work Environment
Before embarking on your cardboard hardening journey, it’s crucial to set up a comfortable and conducive work environment. A flat, protected work surface is your fortress of precision and cleanliness, ensuring that your cardboard projects unfold flawlessly.
Imagine a spacious tabletop or sturdy workbench, devoid of distractions. This pristine canvas will allow you to maneuver the cardboard with ease, preventing any unexpected creases or deformations. A flat surface guarantees that your scoring and folding efforts yield crisp and accurate results.
Furthermore, protection is paramount. Shield your work area from potential hazards like spills, debris, or unwanted foot traffic. Lay down a protective mat or utilize a designated workspace to minimize distractions and maintain a clean environment. Embrace the serenity of a well-organized work zone, where you can unleash your creativity without hindrance.
Preparing the Cardboard: A Foundation for Durability
Before embarking on the transformative journey of cardboard hardening, it’s crucial to lay the groundwork with proper preparation. The cardboard you choose should be of sturdy quality, ensuring it can withstand the rigors of the process. Begin by flattening the cardboard, removing any creases or bends that may hinder precise folding later on.
Once flattened, it’s time to cut the cardboard to the desired shape and size. Use a sharp craft knife or scissors to make clean, precise cuts. Measure the cardboard accurately to ensure the final product meets your specifications. Precise measurements will prevent misalignment and ensure a consistent and professional finish.
The final step in preparing the cardboard involves scoring. Using a bone folder or ruler, gently score the cardboard along the fold lines. This technique will create crisp and easy-to-fold creases, guiding the cardboard to fold perfectly along the intended lines. By meticulously following these preparatory steps, you’re setting the stage for a uniform and durable cardboard masterpiece that will elevate your projects to new heights.
Scoring the Cardboard: The Secret to Perfectly Folded Creases
When it comes to hardening cardboard, scoring is an essential step that often goes unnoticed. Think of it as the secret weapon that unlocks crisp and effortless folds. So, what is scoring exactly?
Imagine you’re trying to fold a piece of paper neatly. If you simply fold it without any prep, the crease will be uneven and unsightly. Scoring, however, involves making a shallow cut along the fold line before you fold it. This cut weakens the cardboard along the intended crease, making it incredibly easy to fold with precision.
To score the cardboard, you’ll need a scoring tool, such as a bone folder or a ruler with a sharp edge. Place the tool along the fold line and apply steady pressure as you drag it down the length of the line. The scoring tool will create a fine incision in the cardboard, just enough to weaken it for folding without cutting through it completely.
The key to successful scoring is using the right amount of pressure. Too little pressure, and the cardboard won’t be weakened enough to fold smoothly; too much pressure, and you’ll cut through the cardboard. Practice on a scrap piece of cardboard to find the ideal pressure.
Once the cardboard is scored, you’re ready to fold it along the lines. With your newly weakened creases, the cardboard will fold with ease, resulting in sharp and defined angles. This technique is invaluable for creating sturdy and aesthetically pleasing cardboard projects.
Folding the Cardboard: Precision and Care for Crisp Creases
Once the cardboard is meticulously scored, it’s time to execute the delicate task of folding. This stage demands precision and care to achieve crisp, clean-cut creases that will define the shape and structure of your project.
To prepare, gather a bone folder or a long, straight ruler. These tools will guide your folding process, ensuring sharp and even bends.
Position the scored cardboard on a flat, stable surface. Using your bone folder or ruler, firmly press along each scored line. Apply pressure gradually, moving from the center outwards. This motion will weaken the cardboard’s fibers, making it pliable and ready to fold.
Take your time and be meticulous with each fold. Avoid rushing or applying excessive force, as this can tear the cardboard or create unsightly creases. Instead, fold the cardboard slowly and intentionally, respecting its natural bend.
As you fold, smooth out the crease with your fingers or a soft cloth to remove any bumps or imperfections. This step enhances the crispness and precision of your folds, resulting in a professional-looking finish.
Remember, patience and attention to detail are crucial during the folding process. Each fold you make will contribute to the overall strength and aesthetics of your hardened cardboard creation.
Optional: Gluing the Cardboard for Enhanced Strength
Step 7: Reinforce with Glue
For projects demanding extra durability, gluing the edges of the cardboard is a crucial step to take. Apply a thin layer of strong adhesive, such as wood glue or hot glue, along the inside folds of the cardboard. Remember, precision is key to ensure the glue reaches all the necessary areas. Use a small brush or cotton swab for precise application, taking care not to oversaturate the cardboard.
Step 8: Compress and Cure
Once the glue has been applied, carefully fold the cardboard along the scored lines, pressing the glued edges together firmly. Use a book, heavy object, or clamps to compress the cardboard and maintain even pressure while the glue dries. The drying time varies depending on the type of adhesive used, so refer to the manufacturer’s instructions for specific guidelines.
Step 9: Reinforce with Glue
For optimal strength, consider applying glue to the outer folds of the cardboard as well. This additional layer of adhesive will further enhance the structural integrity of your hardened cardboard. Follow the same principles as in Step 7, ensuring precision and avoiding excess glue.
Remember: Gluing the cardboard is an optional but highly recommended step for projects that require exceptional durability. By reinforcing the edges with glue, you can create a sturdy and long-lasting cardboard structure that meets the demands of your project.
Drying the Cardboard: A Crucial Step for Durable Projects
Once the cardboard is glued, it’s crucial to allow it to dry thoroughly. This ensures that the adhesive bonds properly and creates a strong and durable finish. The drying time will vary depending on the type of glue used.
Proper Drying Conditions:
To achieve optimal drying, choose a well-ventilated area with low humidity. Place the cardboard on a flat surface and allow for ample airflow around it. Avoid drying the cardboard near a heat source, as this can warp the material.
Time Required for Drying:
The drying time will vary based on the thickness of the cardboard and the amount of glue applied. As a general guideline, allow at least 24 hours for complete drying. For thicker cardboard or multiple layers of glue, consider extending the drying time.
Checking for Dryness:
Before moving on to the next step, it’s essential to ensure the cardboard is completely dry. Gently press on the surface to check for any remaining moisture. If it feels damp or soft, allow more drying time. A fully dry cardboard will be firm and rigid.
By following these drying guidelines, you can ensure that the hardened cardboard will be strong, durable, and ready for use in your projects. Remember, patience is key during this step to achieve the best possible results.
Optional: Enhancing Durability with a Protective Sealer
Applying a sealer to your hardened cardboard is a crucial step in protecting it from the elements and ensuring its longevity. A sealer acts as a protective barrier, shielding the cardboard from moisture, dirt, and wear and tear. By adding this additional layer of protection, you can significantly increase the durability of your cardboard creations.
One of the main benefits of using a sealer is its ability to resist moisture. Cardboard, as a porous material, is susceptible to absorbing moisture from the air or spills. This can lead to warping, weakening, and even mold growth. A sealer creates a hydrophobic surface that repels water and prevents it from penetrating the cardboard.
Moreover, a sealer enhances the overall durability of the cardboard. It protects against scratches, dents, and other forms of damage, making it more resilient to everyday use. This is especially important if you plan to use the hardened cardboard for structural or decorative purposes where it may be subjected to handling or wear.
Choosing the Right Sealer
There are various types of sealers available, each with its unique properties. Some common options include:
- Acrylic sealers: These are water-based and offer good protection against moisture and UV rays.
- Urethane sealers: These are solvent-based and provide excellent durability and resistance to abrasion.
- Polyurethane sealers: These are also solvent-based and offer a high level of protection against water, chemicals, and wear.
Consider the specific requirements of your project when selecting a sealer. For instance, if you need waterproof protection, opt for an acrylic or polyurethane sealer. For projects exposed to heavy wear, a urethane sealer may be more suitable.
Applying the Sealer
To apply the sealer, follow these steps:
- Ensure the hardened cardboard is completely dry.
- Use a brush or roller to apply the sealer in even strokes.
- Apply multiple thin coats, allowing each coat to dry before applying the next.
- Refer to the manufacturer’s instructions for specific drying times and any necessary precautions.
- Consider using a spray sealant for larger or more complex projects.
By applying a sealer, you can dramatically extend the lifespan of your hardened cardboard creations. This simple step will help you protect your hard work from the elements and ensure its durability for years to come.
Drying the Sealer:
- Provide instructions on how to properly dry the sealer and the importance of adhering to the manufacturer’s guidelines.
Drying the Sealer: Ensuring Durability and Longevity
After applying the sealer, it’s crucial to let it dry thoroughly to ensure the durability of your project. The manufacturer’s instructions on the sealer will provide specific drying times and conditions that you must adhere to.
Generally, you should allow the sealer to dry in a well-ventilated area at room temperature. Avoid exposing the cardboard to direct sunlight or heat sources, as this can cause the sealer to dry unevenly or crack.
To achieve the best results, follow these tips:
- Use a light, even coat of sealer. Applying too much may cause the sealer to run or bubble.
- Allow each coat to dry completely before applying additional coats. This will help ensure that the sealer penetrates the cardboard evenly.
- Once the final coat of sealer is applied, let it dry for at least 24 hours before handling or using the project. This will give the sealer ample time to cure and reach its maximum strength.
Properly drying the sealer not only protects the cardboard from moisture and enhances its durability but also ensures a professional-looking finish. By following these steps, you can give your cardboard project the strength and longevity it deserves.