Mastering Paint Adhesion Over Pre-Painted Metal: A Comprehensive Guide
Painting over pre-painted metal requires meticulous preparation. Start by cleaning the surface, then apply a compatible primer to ensure strong adhesion. Choose the right paint type, finish, and durability for your needs. Use proper application techniques, including brushing, rolling, spraying, or using an airless sprayer. Allow ample drying and curing time. Factors like bond strength and weathering resistance affect paint adhesion and durability. Color matching involves understanding color theory and creating a sample. Troubleshoot any painting defects to achieve a flawless finish.
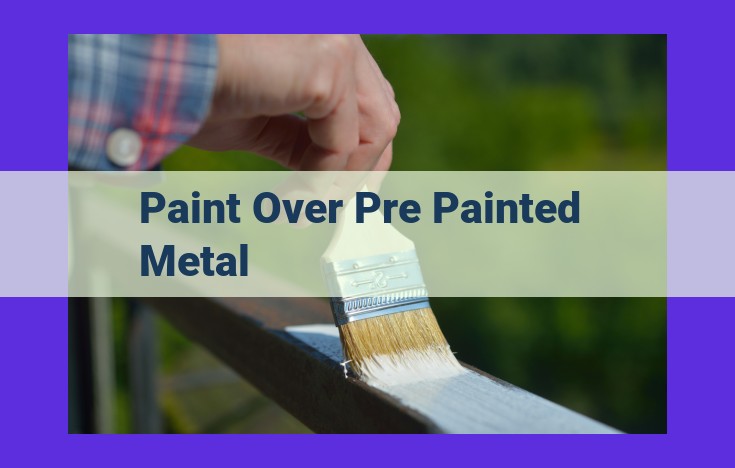
Prep Work: Ready the Surface for Painting
When it comes to painting pre-painted metal, meticulous preparation is the cornerstone of a successful and durable finish. Proper surface preparation ensures optimal adhesion between the paint and metal, preventing peeling, chipping, or premature fading.
Before you grab a brush or roller, take the time to thoroughly clean the surface with a mild detergent and warm water. Remove any dirt, grease, or other contaminants that may hinder the paint’s ability to adhere. Once cleaned, allow the surface to dry completely.
Next, address any surface imperfections such as dents, scratches, or rust. Sanding down these areas with fine-grit sandpaper will create a smooth and even surface. For larger imperfections, consider using a spackling compound to fill in the gaps, allowing it to dry and sand it smooth.
Finally, it’s crucial to prime the metal surface. Primer acts as a bonding agent, enhancing the adhesion of the paint and creating a more uniform finish. Choose a primer specifically formulated for pre-painted metal to ensure compatibility. Always allow the primer to cure completely before painting.
By following these meticulous preparation steps, you’ll create a foundation for a long-lasting and visually appealing finish that will endure the test of time.
Primer Perfection: Choosing the Right Base for Pre-Painted Metal
Embarking on a Painting Journey
Before you delve into the world of transforming your pre-painted metal surface, it’s crucial to establish a solid foundation. Just as a strong house needs a sturdy foundation, so does your painted surface. Enter the unsung hero of successful painting projects: primer.
Understanding the Importance of Primer
Think of primer as the invisible bond, the silent guardian that ensures your paint adheres tenaciously to your metal surface. It acts like a bridge, connecting the paint to the existing finish, filling in imperfections, and enhancing paint adhesion. Without proper priming, your paint may chip, peel, or bubble over time, leaving you with a disappointing result.
Selecting a Compatible Primer
The key to primer perfection lies in compatibility. Choose a primer specifically designed for pre-painted metal. These primers are formulated to adhere exceptionally well to the slick surface of existing paint, creating a firm grip for your subsequent paint coats.
Navigating the Primer Maze
When selecting a primer, consider these factors:
- Oil-based primers: Excellent adhesion, durability, and stain-blocking capabilities. However, they can be challenging to apply and require proper ventilation.
- Water-based primers: Easy to apply, low-odor, and environmentally friendly. They may not provide the same adhesion strength as oil-based primers.
- Enamel primers: Quick-drying, providing a smooth surface for painting. They can be expensive and may require multiple coats.
Ensuring Adhesion Success
To guarantee a strong bond between primer and pre-painted metal, follow these guidelines:
- Sand lightly: Create a slightly rough surface for the primer to grip.
- Clean and degrease: Wipe down the metal surface with a cleaning solution to remove dirt and grease.
- Apply thin coats: Brush or roll on thin, even layers of primer, allowing each coat to dry thoroughly before applying the next.
- Let it cure: Allow the primer to cure according to the manufacturer’s instructions before proceeding with painting.
By choosing the right primer and following these steps, you lay the groundwork for a painting masterpiece that will endure the test of time.
Paint It Right: Choosing the Perfect Type, Finish, and Durability for Your Pre-Painted Metal Surface
When it comes to painting pre-painted metal, selecting the right combination of paint type, finish, and durability is crucial. Your choices will impact the appearance, performance, and longevity of the final paint job.
Paint Type
The type of paint you choose depends on several factors, including the intended use and environmental conditions. Here are some common options:
- Oil-based paints: Durable, resistant to wear and chemicals, but slower to dry and emit strong odors.
- Water-based paints: Quick-drying, low-odor, and easier to clean up, but may not be as durable as oil-based paints.
- Enamel paints: Hard, glossy finish that resists scratches and fading, making them ideal for high-traffic areas or surfaces exposed to moisture.
- Acrylic paints: Versatile, water-based paints that offer a wide range of finishes and colors.
Finish
The finish of your paint determines the texture and sheen of the final surface. Choose from the following:
- Flat finish: No sheen, conceals imperfections well, suitable for walls or ceilings.
- Satin finish: Slight sheen, easy to clean, often used for trim, doors, and kitchen cabinets.
- Semi-gloss finish: Moderate sheen, more durable than satin finish, good for high-traffic areas like bathrooms and hallways.
- Gloss finish: High sheen, reflects light, creates a “wet” look, ideal for doors, furniture, or accent pieces.
Durability
The durability of your paint refers to its ability to resist wear, abrasion, and weathering. Consider the following factors:
- Exposure to the elements: For outdoor surfaces, choose paints with high UV resistance and fade resistance.
- Traffic: High-traffic areas require paints with increased scrub resistance to withstand frequent cleaning.
- Special requirements: Some paints offer specific properties such as fire resistance, antimicrobial properties, or corrosion protection.
Remember, the most effective paint job starts with proper surface preparation and the careful selection of the right paint type, finish, and durability level. By following these guidelines, you can achieve a beautiful and long-lasting finish on your pre-painted metal surface.
Painting Pre-Painted Metal: A Step-by-Step Guide to Application Techniques
Brush: For Small Areas and Intricate Details
Grasping a brush may seem like a rudimentary technique, but it remains a trusted option for small areas and intricate details. The smaller size and precision of brushes allow you to navigate complex designs and tight corners with ease. Apply the paint in thin, even strokes, paying attention to the grain of the metal.
Roller: For Large, Flat Surfaces
If you’re tackling a vast expanse of pre-painted metal, a roller is your ideal companion. Its wide coverage and smooth application make painting large, flat surfaces a breeze. Use a high-quality roller with a nap appropriate for the texture of the metal. Roll the paint on in long, parallel strokes, overlapping slightly with each pass.
Spray Gun: For Efficient Coverage
Harnessing the power of a spray gun unlocks unmatched efficiency for painting pre-painted metal. This method propels tiny droplets of paint onto the surface, ensuring uniform coverage and minimal waste. Choose a spray gun that suits the size and type of project, and practice on a scrap piece of metal before applying it to the actual surface.
Airless Sprayer: For Industrial-Grade Durability
For large-scale industrial applications where durability is paramount, airless sprayers reign supreme. These machines generate a high-pressure stream of paint that penetrates deep into the pores of the metal, resulting in exceptional adhesion and longevity. However, airless sprayers require specialized equipment and training, making them better suited for professional painters.
Drying and Curing: Patience is Key
When it comes to painting pre-painted metal, patience is paramount for achieving an enduring finish that withstands the test of time. Proper drying and curing allows the paint to fully adhere to the surface, ensuring its longevity and preventing premature peeling or cracking.
The drying process begins as soon as the paint is applied. This initial drying phase evaporates the solvents, leaving behind the paint film. However, complete curing is a distinct chemical process that requires more time and can take days or even weeks. During this period, the paint undergoes cross-linking, where its molecules form strong bonds with each other, creating a durable and cohesive finish.
Rushing the curing process can lead to a number of problems, such as:
- Weak adhesion: The paint may not fully bond to the surface, making it more susceptible to peeling or chipping.
- Reduced durability: The paint may be more prone to scratching or fading, as it hasn’t had time to develop its full strength.
- Discoloration: The paint may change color over time, as the chemical reactions involved in curing are not complete.
To ensure optimal paint performance, it’s essential to allow ample drying and curing time. This means avoiding exposure to moisture, extreme temperatures, or heavy traffic during this critical period. By exercising patience and following proper painting procedures, you can ensure a professional-looking finish that will enhance the appearance and longevity of your pre-painted metal surfaces.
Adhesion and Durability: A Lasting Bond
The Key to a Flawless Finish
When painting pre-painted metal, achieving a lasting bond between the new paint and the existing surface is crucial for the longevity and overall success of your project. Factors like bond strength, weathering resistance, and abrasion resistance play a pivotal role in ensuring your paint job withstands the test of time.
Bond Strength: The Foundation of Adhesion
The strength of the bond between the paint and the metal is paramount for preventing peeling, flaking, or chipping. This bond is influenced by the compatibility between the paint type and the primer used. Choosing a primer that adheres well to pre-painted metal and provides a solid base for the new paint is essential.
Weathering Resistance: Standing Up to the Elements
The ability of the paint to resist the elements is essential for maintaining its integrity in various weather conditions. Look for paints with high levels of UV resistance to protect against fading and chalking. Additionally, water resistance is crucial for preventing blistering, cracking, or peeling due to moisture intrusion.
Abrasion Resistance: Protecting Against Wear and Tear
Abrasion resistance ensures that your painted surface can withstand wear and tear without scratching or scuffing. Paints with high abrasion resistance are ideal for areas exposed to frequent contact or potential impact. Consider coatings designed for high-traffic areas or surfaces prone to scratches and dents.
Optimizing Adhesion and Durability: Practical Tips
To maximize the adhesion and durability of your paint job:
- Clean the Surface Thoroughly: Remove any dirt, grease, or other contaminants that may hinder paint adhesion.
- Use a Quality Primer: Apply a compatible primer specifically designed for pre-painted metal.
- Choose the Right Paint: Select a paint type and finish that aligns with the intended use and provides the desired level of resistance.
- Follow Application Instructions Carefully: Adhere to the recommended drying and curing times to allow the paint to fully bond and strengthen.
- Protect the Painted Surface: Consider applying a clear topcoat or sealant to enhance durability and protect against scratches or stains.
By understanding and addressing these factors, you can ensure that your painted pre-painted metal surface exhibits exceptional adhesion and durability, resulting in a long-lasting and visually appealing finish.
Color Mastery: Matching the Perfect Hue for Your Pre-Painted Metal
When it comes to painting pre-painted metal, color matching is crucial for a seamless and visually appealing finish. Imagine transforming your weathered or outdated metal surfaces into vibrant masterpieces that complement your decor. Let’s dive into the art of color matching for pre-painted metal.
Understanding color theory is essential. Primary colors (red, blue, and yellow) cannot be created by mixing other colors. Secondary colors (green, orange, and purple) are made by mixing two primary colors. Tertiary colors are created by mixing a primary and a secondary color.
For successful color matching, it’s important to create a sample. Start by cleaning a small area of the metal surface. Apply a thin coat of white primer and allow it to dry. Once primed, apply a sample of the paint you intend to use and let it dry.
Compare the sample to the original pre-painted surface in natural lighting. Observe the hue, saturation, and value of both colors. Hue refers to the primary color, saturation indicates the intensity, and value describes the lightness or darkness.
If the sample matches the original color perfectly, congratulations! You’ve found your match. However, if there’s a slight discrepancy, don’t worry. You can adjust the hue by mixing in a small amount of a different primary color. To modify the saturation, add a touch of white or black paint. Finally, you can alter the value by adding white to lighten or black to darken.
Remember, patience is key when creating a custom color. Gradually adjust the paint until you achieve the perfect match. By following these tips, you’ll transform your pre-painted metal surfaces into a stunning canvas that reflects your unique style and vision.
Troubleshooting: Addressing Painting Woes
Painting can be a rewarding experience, but sometimes, unexpected problems can arise. Don’t despair! This comprehensive guide will help you identify and resolve common painting defects, leaving you with a flawless finish.
Blisters and Bubbles:
Cause: Moisture trapped underneath the paint film.
Solution: Ensure the surface is completely dry before painting. If blisters or bubbles appear, they can be gently scraped away and the area repainted.
Chipping and Peeling:
Cause: Poor adhesion between the paint and the surface.
Solution: Thoroughly prepare the surface by sanding and removing any loose paint or debris. Use a compatible primer to enhance adhesion.
Cracking:
Cause: Usually occurs when the paint is applied too thickly or when there are drastic temperature changes.
Solution: Apply paint in thin, even coats and allow each layer to dry completely. If cracks appear, they can be filled with a flexible caulk or patching compound.
Fading:
Cause: Exposure to ultraviolet (UV) rays.
Solution: Use paint with a high UV resistance rating. Apply a clear topcoat or sealant for added protection.
Mildew and Mold:
Cause: Excess moisture and insufficient ventilation.
Solution: Clean the affected area with a mildewcide solution. Allow it to dry completely before repainting. Improve ventilation to prevent future growth.
Wrinkling:
Cause: Applying paint too quickly or too thickly, causing the surface to dry unevenly.
Solution: Apply paint in thin, even coats. Allow each layer to dry completely before applying the next.
Yellowing:
Cause: Sometimes caused by certain chemicals in the paint or primer.
Solution: Use a high-quality paint and primer that are specifically designed for surfaces prone to yellowing, such as white or light-colored surfaces.
Remember, proper surface preparation, choosing the right paint and primer, and following application instructions carefully can minimize the likelihood of these painting woes. If you encounter any issues, don’t hesitate to seek professional advice or consult with the paint manufacturer for specific recommendations. With a little patience and problem-solving, you can achieve a beautiful and lasting paint finish.