Step-By-Step Guide To Curing Rosin For Enhanced Adhesion And Reduced Dust
Curing Rosin Step-by-Step Guide
To enhance the adhesion and reduce dust of rosin, a curing process is recommended. Heat treatment, vacuum degassing, cold curing, and UV curing are four popular methods. Essential tools for curing include heat gun, vacuum chamber, parchment paper, and curing box. Curing time and effectiveness vary depending on the method. Cured rosin provides stronger grips, reduced dust, and improved tone quality. To maintain effectiveness, store cured rosin in airtight containers in an appropriate temperature range.
Understanding Rosin and Curing: A Comprehensive Guide
What is Rosin?
Rosin is a natural substance derived from the sap of pine trees. It’s an essential component of stringed instruments, providing the necessary friction between the bow and the strings. Different types of rosin are available for different instruments, including violin, cello, and double bass.
The Curing Process
Rosin curing is a process that enhances its properties, resulting in improved adhesion and reduced dust. Curing removes impurities and volatile components from the rosin, leaving behind a more concentrated and refined substance.
Benefits of Curing Rosin
- Stronger Grip: Curing strengthens the bond between the rosin and the bow hair, resulting in a more secure grip and improved bow control.
- Reduced Dust: Impurities in uncured rosin create dust that can accumulate on the instrument and cause irritation to the musician. Curing removes these impurities, reducing dust and ensuring a cleaner playing experience.
- Enhanced Tone Quality: Cured rosin produces a purer, more focused sound by eliminating interference from impurities. It also reduces the amount of rosin applied to the bow, which can affect the instrument’s tone.
Step-by-Step Rosin Curing Techniques for Musicians
The Art of Rosin Curing
As a musician, you know the importance of a well-prepared bow. Rosin, applied to the bow hair, plays a crucial role in producing the desired sound. However, did you know that curing rosin can significantly enhance its performance?
Benefits of Rosin Curing
- Improved adhesion
- Reduced dust
- Enhanced tone quality
- Stronger grip
Methods of Rosin Curing
There are four main methods of rosin curing:
1. Heat Treatment
Materials: Heat gun, parchment paper
Instructions:
1. Place a thin layer of rosin on parchment paper.
2. Hold a heat gun approximately 6 inches above the rosin and heat it for 5-10 minutes.
3. The rosin will bubble and change color, turning from dark to a lighter amber.
2. Vacuum Degassing
Materials: Vacuum chamber
Instructions:
1. Place the rosin in the vacuum chamber.
2. Close the chamber and turn on the vacuum to create a low-pressure environment.
3. Run the vacuum for 2-4 hours or until all the air bubbles are removed.
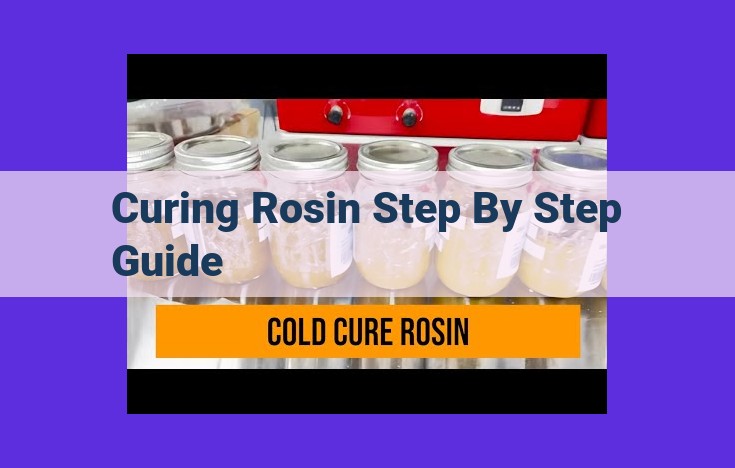
3. Cold Curing
Materials: Curing box
Instructions:
1. Place the rosin inside a curing box.
2. Seal the box and store it in a cool, dark place for 2-4 weeks.
3. The rosin will slowly release gases and harden over time.
4. UV Curing
Materials: UV curing lamp
Instructions:
1. Expose the rosin to UV light for 3-5 minutes.
2. The UV light will cross-link the rosin molecules, strengthening the grip and reducing dust.
Tips
- Use fresh rosin for best results.
- Experiment with different methods to find what works best for your instrument.
- Store cured rosin properly in airtight containers to maintain its effectiveness.
- Remember that rosin curing is an art that takes practice and experimentation. Don’t be afraid to experiment and find the method that suits you best.
Essential Tools for Curing Rosin: A Guide to Enhancing Your Musical Journey
Embarking on the captivating endeavor of rosin curing requires an array of essential tools that will transform this sticky substance into a remarkable enhancer of your musical prowess. Let us delve into the world of these tools, understanding their pivotal roles in crafting a superior rosin that will elevate your performance to new heights.
Heat Gun: The Master of Fire
For those who prefer the heat treatment method, a heat gun stands as the indispensable tool. Its controlled stream of hot air gently melts the rosin, releasing trapped gases and impurities. As the rosin cools, it solidifies into a more robust and adhesive form, ready to grip your bow with unwavering determination.
Vacuum Chamber: A Haven of Airlessness
For vacuum degassing, the vacuum chamber reigns supreme. This enigmatic device removes the air from a sealed container, creating a void that encourages the escape of gases and moisture from the rosin. As the air is slowly reintroduced, the rosin slowly solidifies, resulting in a more robust and refined texture.
Parchment Paper: The Humble Guardian
Unassuming yet essential, parchment paper plays a crucial role in the curing process, protecting the rosin from dust and debris. Its non-stick surface allows the rosin to be easily removed once cured, preserving its pristine form and ensuring optimal performance.
Curing Box: The Time Capsule
The curing box, a humble yet indispensable vessel, provides a controlled environment for the rosin to mature and evolve. Its airtight design prevents external contaminants from disrupting the curing process, allowing the rosin to develop its full potential over time.
Curing Duration and Methods: A Guide to Enhance Rosin’s Performance
When it comes to curing rosin, the duration and method you choose greatly influence its effectiveness. Let’s delve into the recommended curing times and compare the different approaches:
Heat Treatment Method:
- Curing Time: 30-60 minutes
- Effectiveness: Excellent
- Heat treatment involves applying heat to the rosin, typically using a heat gun. This speeds up the curing process, making it ideal for those seeking immediate enhancements.
Vacuum Degassing Method:
- Curing Time: 24-48 hours
- Effectiveness: High
- Vacuum degassing removes air bubbles from the rosin, creating a more consistent and dust-free product. This method requires specialized equipment but offers superior results.
Cold Curing Method:
- Curing Time: 3-7 days
- Effectiveness: Moderate
- Cold curing allows the rosin to cure naturally at room temperature. While it takes longer, this approach preserves the rosin’s natural tone and texture.
UV Curing Method:
- Curing Time: 1-2 hours
- Effectiveness: Limited
- UV curing uses ultraviolet light to accelerate the curing process. It is quick and convenient, but the resulting rosin may not offer the same durability and adhesion as other methods.
Choosing the Right Approach:
The best curing method depends on your needs and preferences. If you’re looking for immediate results and don’t mind using specialized equipment, heat treatment is an excellent option. For those seeking a more natural and consistent rosin, vacuum degassing is highly effective. Cold curing is a good compromise between speed and quality, while UV curing provides a quick and easy solution for temporary use.
Remember: The curing duration should be adjusted according to the amount of rosin being cured. Smaller quantities may require shorter curing times, while larger quantities may need more time to achieve optimal results.
The Marvelous Benefits of Curing Rosin: A Journey to Enhanced Bowing
In the world of stringed instruments, rosin plays a crucial role in bridging the gap between the bow and the strings, allowing musicians to produce beautiful and captivating sounds. However, did you know that curing rosin can further enhance its performance, unlocking a plethora of benefits for both the instrument and the musician?
Curing rosin involves a simple yet transformative process that improves rosin’s adhesion, reduces dust, and enhances tone quality. By subjecting uncured rosin to specific treatments, we can unlock its latent potential and elevate our musical experiences.
Stronger Grips, Enhanced Control:
After the curing process, rosin bonds more effectively to both the bow hair and the strings, resulting in a stronger grip. This enhanced adhesion allows for more precise control over the bow, empowering musicians to execute intricate passages with confidence and precision.
Reduced Dust, Less Hassle:
The curing process also reduces the amount of dust produced by rosin, eliminating the need for frequent cleaning. This lessens maintenance time and allows musicians to focus on their playing without distractions.
Enhanced Tone Quality, Richer Sound:
Finally, cured rosin contributes to a richer, fuller tone quality. By minimizing dust and impurities, cured rosin allows the full sonic spectrum of the instrument to shine through, revealing a more vibrant and expressive sound.
Whether you’re a seasoned professional or a budding enthusiast, understanding and embracing the benefits of curing rosin will undoubtedly enhance your musical journey. So, embark on this simple yet transformative process, and unlock the magic of cured rosin today!
Ensuring the Longevity of Your Cured Rosin: Proper Storage Techniques
Harnessing the benefits of cured rosin requires meticulous attention to its storage conditions. To ensure its continued efficacy and prevent premature degradation, it’s imperative to follow proper storage practices.
Airtight Containers: A Sanctuary for Your Rosin
Cured rosin should reside in airtight containers to shield it from external contaminants and moisture. Exposure to air can lead to oxidation, diminishing the rosin’s adhesive qualities and tonal brilliance. Choose containers made of durable materials like glass or aluminum, ensuring a tight seal that prevents air infiltration.
Cool, Dark Conditions: A Haven for Preservation
Like a precious artifact, cured rosin thrives under cool, dark conditions. Direct sunlight and extreme temperatures can compromise its delicate structure. Avoid storing rosin near heat sources such as radiators or stoves. Instead, opt for a cool, dark cabinet or drawer. The objective is to maintain a stable, temperate environment that fosters its preservation.
Maintaining Optimal Humidity: Striking a Delicate Balance
Humidity plays a pivotal role in rosin’s longevity. Excessively dry conditions can cause the rosin to become brittle, while overly humid environments can promote mold growth. Aim for a moderately humid environment that prevents both extremes. Consider using humidity-control devices, such as desiccant beads, if necessary.
Additional Tips for Rosin Storage
- Regular Inspection: Regularly check your rosin for any signs of deterioration, such as discoloration or mold. If damage is detected, discard the rosin immediately.
- Resealing After Use: After each use, meticulously reseal the rosin container to prevent air exposure. A tight seal is essential to maintain its freshness.
- Avoid Mixed Storage: Store different types of rosin separately to prevent cross-contamination and ensure the preservation of their unique properties.