Glass Pipe Repair Master Guide: Step-By-Step Diy For Broken Pipes
This detailed “Broken Glass Pipe Repair Guide” provides step-by-step instructions for safely repairing damaged glass pipes. It includes essential safety precautions, a comprehensive list of materials and tools, and clear instructions on how to cut, seal, and connect new pipe sections. Additionally, it covers preventing leaks, proper drainage, cleanup, and waste disposal. The guide concludes with helpful tips and considerations, as well as common mistakes to avoid, ensuring a safe and successful repair.
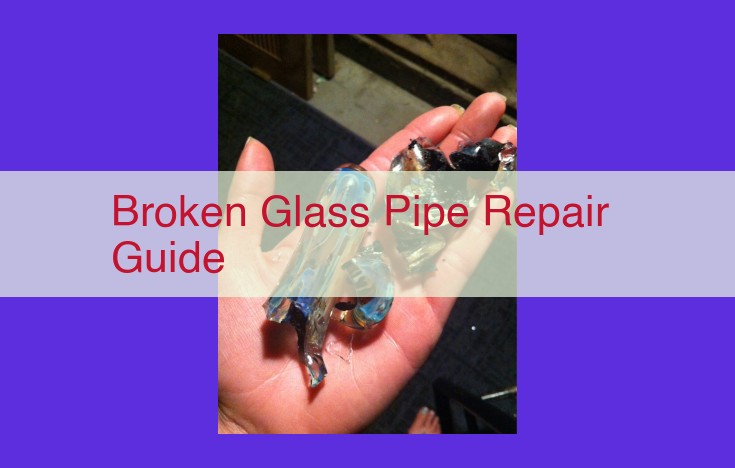
Understanding the Hazards of Broken Glass Pipes
Broken glass pipes can present a hazard to unsuspecting individuals, posing significant risks to health and well-being. They possess sharp and jagged edges that can easily cause lacerations or punctures. Superficial cuts may be the least of one’s worries, as broken glass can potentially penetrate deeper into tissues, leading to puncture wounds and internal damage. Furthermore, broken glass can carry bacteria or other harmful microorganisms that may cause infection if not handled properly.
Beyond the physical dangers, broken glass pipes can also pose inhalation hazards. Glass particles can break off and become airborne, making them easy to inhale. Inhaling these particles can irritate the respiratory tract, cause coughing, and even lead to more serious respiratory issues.
Proper handling of broken glass pipes is crucial to mitigate these risks. Always wear protective gear, including thick gloves and safety glasses. Handle the broken glass carefully, using a broom and dustpan or tongs to collect the pieces. Never attempt to pick up broken glass with bare hands, as this can lead to serious cuts.
It’s equally important to dispose of broken glass pipes properly. Wrap the broken glass securely in newspaper or other thick material before placing it in a designated waste receptacle. Do not put broken glass in regular trash bags, as it can puncture the bag and pose a hazard to sanitation workers. By following these precautions, one can effectively minimize the risks associated with broken glass pipes and ensure a safe environment for all.
Safety Precautions for Pipe Repair: A Guide to Mitigating Risks
When it comes to pipe repair, safety should always be your top priority. Broken pipes can pose significant hazards, and taking the proper precautions can help prevent accidents and injuries.
Before starting any repair work, assess the situation thoroughly. Identify potential risks, such as the location of the broken pipe, the presence of sharp edges, or the potential for water damage.
Wear appropriate personal protective equipment (PPE) to safeguard yourself from harm. This includes gloves to protect your hands from cuts, safety glasses to prevent eye injuries, and a respirator to avoid inhaling harmful fumes.
Ensure proper ventilation in the work area to prevent the buildup of noxious gases. Open windows or use a fan to circulate air.
Clear the work area of any obstructions and potential hazards, such as tripping hazards. Secure the area to prevent unauthorized access.
Gather the necessary tools and materials before starting the repair. This may include a pipe cutter, sealant, glue, and replacement pipe sections.
By following these safety precautions, you can minimize the risks associated with pipe repair and work with confidence, knowing that you have taken the necessary steps to protect yourself and your surroundings.
Materials and Tools: Equipping for Pipe Repair Success
Embarking on a pipe repair mission requires an arsenal of essential materials and tools. These elements will serve as your trusty companions, empowering you to restore your plumbing system to its former glory. Foremost among them is sealant, your secret weapon against pesky leaks. Choose a sealant specifically designed for pipe repair and ensure it bonds effectively with the pipe material.
Next, you’ll need glue, an indispensable tool for securing pipe sections and ensuring a strong, watertight connection. Select a glue that is compatible with the type of pipe you’re repairing. It’s crucial to meticulously apply the glue, ensuring it reaches every nook and cranny for maximum adhesion.
Having the correct pipe sections on hand is equally important. Measure the damaged pipe segment accurately and procure a replacement that matches its diameter and material. Ensure the new section is free from defects and ready to integrate seamlessly into your plumbing system.
Finally, you’ll need an assortment of tools to facilitate the repair process. A hacksaw or pipe cutter will enable you to cleanly remove the damaged pipe portion. A wrench, meanwhile, will help you tighten the connections and secure the new pipe section in place. Other tools, such as a wire brush or sandpaper, may come in handy for cleaning or smoothing pipe surfaces before applying glue or sealant.
Step-by-Step Guide to Repairing Glass Pipes Safely and Effectively
If you encounter a broken glass pipe, don’t panic. With the right precautions and tools, you can repair it yourself. Here’s a detailed guide to help you do it safely and effectively:
Materials and Tools You’ll Need
- Sealant: Choose a sealant specifically designed for glass pipes.
- Glue: For added strength, consider using a glass glue.
- New pipe section: Measure and cut a new piece of pipe to replace the damaged section.
- Pipe cutter: Use a pipe cutter to make a clean cut.
- Sandpaper: Smooth out any rough edges on the cut surfaces.
- Safety glasses: Protect your eyes from flying glass shards.
- Gloves: Prevent cuts and punctures.
Step 1: Cut Off the Damaged Section
- Wear your safety glasses and gloves.
- Measure and mark the area where you want to cut the damaged pipe.
- Use a pipe cutter to make a clean, perpendicular cut.
- Smooth the cut edges with sandpaper.
Step 2: Apply Sealant
- Apply a generous amount of sealant around the cut end of the new pipe section.
- Spread the sealant evenly using a brush or your finger.
Step 3: Connect the New Pipe Section
- Align the new pipe section with the cut end of the existing pipe.
- Insert the new pipe section into the existing pipe.
- Slide the new pipe section over the sealant until it’s fully connected.
Step 4: Secure the Connection
- Once the new pipe section is in place, apply glue around the joint.
- Smooth the glue and allow it to dry completely.
Preventing Leaks and Ensuring Drainage
When repairing broken glass pipes, preventing leaks is paramount. To achieve this, it’s crucial to apply sealant meticulously. Carefully spread the sealant around the connection points, ensuring it fills any gaps or cracks. Do not skip this step, as a proper seal will prevent water from seeping through and causing further damage.
In addition to sealing, ensuring proper drainage is equally important. The repaired pipe should allow water to flow freely without any obstructions. Double-check the alignment of the pipe sections and ensure they are securely connected. If the pipe is not adequately drained, water buildup can exert pressure on the joints, potentially leading to leaks or even bursting.
To guarantee optimal drainage, consider the slope of the pipe during installation. A slight downward angle will facilitate the smooth flow of water. Regularly inspect the repaired area for any signs of leaks or drainage issues. Prompt attention will prevent potential problems from escalating.
Cleanup and Waste Disposal: Ensuring Safety and Hygiene
After successfully repairing the broken glass pipe, it is crucial to thoroughly clean the work area to mitigate any potential hazards.
Safe Disposal of Broken Glass
Broken glass shards can pose a severe threat to safety. To dispose of them safely:
- Wear heavy-duty gloves: Protect your hands from cuts and punctures.
- Use a sturdy box: Line a cardboard box with newspaper or a thick towel for cushioning.
- Place the shards carefully: Gently place the broken glass pieces into the box without pressing down.
- Seal the box: Close and seal the box securely using tape.
- Dispose of in a designated area: Check with your local waste management authorities for proper glass disposal procedures.
Cleaning the Work Area
To ensure a clean and hygienic work environment:
- Sweep up glass fragments: Use a broom and dustpan to collect any remaining shards.
- Wipe down surfaces: Use a damp cloth to wipe down all surfaces that came in contact with the broken glass.
- Vacuum the area: Thoroughly vacuum the floor and surrounding areas to remove any fine glass particles.
- Ventilate the space: Open windows or turn on a fan to air out the work area and dispel any lingering sealant fumes.
By following these disposal and cleaning protocols, you can effectively mitigate risks associated with broken glass pipes, ensuring the safety of yourself and others.
Additional Tips and Considerations for Handling Broken Glass Pipes
Repairing broken glass pipes can be a necessary but potentially hazardous task. Here are some crucial tips and considerations to ensure a safe and successful repair:
-
Ventilate the Area: Broken glass can create sharp shards that can easily become airborne. Always work in a well-ventilated area to minimize the risk of inhaling glass particles.
-
Avoid Eye Contact with Sealant: Sealants used to repair pipes contain chemicals that can irritate the eyes. Wear protective goggles or safety glasses to prevent any contact with your eyes.
-
Properly Dispose of Broken Glass: Never throw broken glass into regular trash cans. Instead, wrap it securely in thick paper or cardboard and dispose of it in a designated glass recycling bin or sharps container.
-
Wear Appropriate Clothing: When handling broken glass, always wear gloves and long sleeves to protect your skin from cuts and punctures.
-
Inspect the Area: Before starting repairs, carefully inspect the work area for any broken glass fragments. Remove any debris to prevent accidents.
-
Seek Professional Help: If the broken pipe is extensive or you are not comfortable repairing it yourself, don’t hesitate to seek professional assistance from a licensed plumber.
By following these tips and precautions, you can minimize the risks associated with handling broken glass pipes and ensure a safe and effective repair.
Mistakes to Avoid During Pipe Repair: A Cautionary Tale
When it comes to DIY plumbing, a little knowledge can go a long way. But even with the best intentions, mistakes can happen. To help you avoid costly repairs and potential hazards, here are some common pitfalls to watch out for:
1. Mismatched Materials
Not all pipe materials are created equal. Mixing different types of pipes or fittings can lead to leaks or even explosions. For example, connecting a plastic pipe to a metal pipe without a proper adapter is a recipe for disaster. Before starting your repair, make sure you have the right materials for the job.
2. Skipping Safety Precautions
Working with broken glass and sharp tools can be dangerous. Always wear protective gear, including gloves, goggles, and a mask. Ventilate the area well to prevent inhaling harmful fumes. And never attempt a repair if you’re not confident in your abilities. It’s better to call a professional than risk injury.
3. Improper Disposal of Broken Glass
Broken glass is a major hazard. Dispose of it properly in a designated sharps container or wrap it securely in cardboard before throwing it away. Leaving broken glass lying around can cause cuts and puncture wounds.
4. Overtightening Connections
While it’s important to ensure a tight seal, overtightening pipe connections can damage the threads and lead to leaks. Use a wrench or pliers to gently tighten the fittings, making sure not to apply excessive force.
5. Neglecting Proper Drainage
After repairing a pipe, make sure it drains properly to prevent backups and overflows. Check for leaks and ensure there are no obstructions in the drain line. If the pipe doesn’t drain well, you may need to call a plumber for further assistance.
6. Using Low-Quality Materials
Tempting as it may be to save money on materials, avoid using cheap or inferior pipe components. They’re more likely to break or leak, causing more problems down the road. Invest in high-quality materials that will stand the test of time.
7. Neglecting Regular Maintenance
Once your pipe repair is complete, don’t neglect regular maintenance. Inspect your pipes regularly for signs of wear and tear. Tighten any loose connections, repair any small leaks, and address any potential issues before they escalate into major problems.