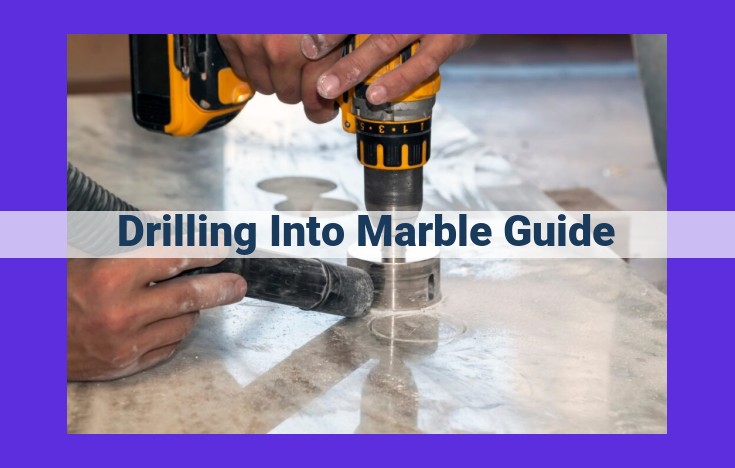
Ultimate Guide To Drilling Marble: Techniques, Tools, And Tips For Precision
This comprehensive guide to drilling into marble covers everything you need to know, from selecting the right drill bit to using the appropriate drilling technique. Understand diamond drill bits, core drilling, dry and wet drilling, hand and machine drilling. Learn essential tips for drilling speed, pressure, angle, and alignment, as well as dust control and drilling patterns. Create precise holes using templates and choose the optimal drill bit size for your project.
Understanding Diamond Drill Bits
- Types of diamond drill bits for various drilling methods
- Safety precautions and proper handling of diamond drill bits
Understanding Diamond Drill Bits: A Guide to Precision and Performance
Diamond drill bits are the unsung heroes of construction and renovation projects, enabling precision drilling through even the toughest materials like concrete and marble. These specialized tools elevate drilling tasks to new levels of accuracy and efficiency, making them indispensable for professionals and DIY enthusiasts alike.
Types of Diamond Drill Bits
- Segmented Drill Bits: Comprising multiple diamond segments bonded to a metal body, these bits excel in dry drilling applications.
- Core Drill Bits: Designed with a hollow cylindrical shape, these bits extract a core sample while drilling, making them ideal for material analysis or creating precision holes.
- Turbo Drill Bits: Featuring a unique cutting profile with diamond-impregnated segments, turbo bits provide exceptional speed and efficiency in concrete drilling.
- Sintered Drill Bits: Manufactured by fusing diamond particles under high pressure, these bits offer extended durability for demanding drilling projects.
Safety Precautions and Proper Handling
- Always wear eye protection and gloves.
- Inspect diamond drill bits before use for any damage or wear.
- Use the correct drill bit for the intended material and drilling method.
- Start drilling at a low speed and gradually increase it to avoid overheating or breakage.
- Apply lubrication or water during wet drilling to extend the bit’s lifespan and improve performance.
- Never force a diamond drill bit or apply excessive pressure.
By following these guidelines, you can ensure the longevity and effectiveness of your diamond drill bits, guaranteeing a safe and productive drilling experience.
Core Drilling: Precision Hole Creation
- Advantages and techniques of core drilling with diamond bits
- Safety measures and precautions for core drilling
Core Drilling: Precision and Efficiency in Hole Creation
In the realm of drilling, core drilling emerges as a highly specialized technique that delivers unparalleled precision and efficiency in hole creation. This method utilizes diamond drill bits to cut cylindrical cores of rock, soil, or concrete with remarkable accuracy.
Advantages of Core Drilling
- Precise Hole Creation: Core drilling produces perfectly round holes with smooth surfaces, making it ideal for applications that demand exact placement and dimensions.
- Minimum Material Waste: By extracting cylindrical cores, core drilling generates minimal waste compared to other drilling methods. This results in significant cost savings, especially for materials such as expensive granite or marble.
- Versatile Applications: Core drilling finds application in a wide range of industries, including construction, mining, geotechnical engineering, and environmental sampling.
Techniques of Core Drilling
- Bit Selection: Choosing the appropriate diamond drill bit is crucial. Consider factors such as hole size, material being drilled, and drilling conditions.
- Drill Setup: Mount the diamond drill bit on a core drill machine that provides ample power and stability. Ensure that the bit is securely fastened.
- Drilling Process: Start drilling at a slow speed and gradually increase it as the bit penetrates the material. Apply even pressure and maintain a steady hand to achieve clean and straight holes.
Safety Measures for Core Drilling
- Protective Gear: Always wear appropriate personal protective equipment (PPE), including safety glasses, gloves, and earplugs.
- Ventilation: Ensure adequate ventilation to disperse dust and fumes generated during drilling.
- Secure Work Area: Stabilize the workpiece and ensure a safe working environment free from tripping hazards.
- Avoid Overheating: Monitor the drill bit temperature and provide cooling as needed to prevent overheating and premature wear.
- Proper Handling: Store and transport diamond drill bits carefully to avoid damage and maintain their performance.
By embracing the precision and efficiency of core drilling, professionals can achieve exceptional results in hole creation applications, ensuring accuracy, minimizing waste, and prioritizing safety throughout the process.
Dry Drilling: A Versatile Method for Precision Hole Creation
In the realm of drilling, dry drilling stands out as a versatile and efficient method. Without the use of liquids or coolants, dry drilling offers a range of benefits and limitations that make it suitable for specific applications.
Benefits of Dry Drilling
- Increased Efficiency: Dry drilling eliminates the need for setting up and maintaining a coolant system, reducing setup time and increasing overall efficiency.
- Portability and Convenience: As no liquids are involved, dry drilling is highly portable and convenient, allowing for easy drilling in remote or confined spaces.
- Cost-Effective: Without the need for coolants or specialized equipment, dry drilling can be a cost-effective option for certain drilling tasks.
Limitations of Dry Drilling
- Heat Generation: The friction generated during dry drilling can lead to excessive heat buildup, which can damage the drill bit and the workpiece.
- Dust: Dry drilling produces a significant amount of dust, which can be hazardous to health if not properly controlled.
- Material Compatibility: Dry drilling is not suitable for all materials. Some materials, such as soft metals and plastics, are prone to melting or burning during dry drilling.
Safety Considerations for Dry Drilling
- Dust Control: Proper dust control measures are essential during dry drilling. Use dust extractors or wear a dust mask to minimize the inhalation of harmful dust particles.
- Bit Selection: Choose drill bits specifically designed for dry drilling to withstand the high temperatures and friction involved.
- Work Environment: Ensure adequate ventilation in the work area to prevent heat buildup and dust accumulation.
Applications of Dry Drilling
Dry drilling is commonly used in various industries, including:
- Construction: For drilling holes in concrete, masonry, and other building materials
- Automotive: For drilling holes in metal components, such as exhaust systems and brake rotors
- Manufacturing: For drilling holes in wood, plastic, and composite materials
- Home Improvement: For drilling holes in walls, floors, and other household surfaces
Wet Drilling: Enhanced Cooling and Durability for Precise Hole Creation
When it comes to drilling into hard materials like concrete or stone, diamond drill bits reign supreme. Among the various drilling methods, wet drilling stands out for its exceptional cooling capabilities and enhanced durability. Unlike dry drilling, which relies on friction to remove debris, wet drilling utilizes a constant flow of water to lubricate the bit and flush out the cuttings.
Advantages of Wet Drilling
Wet drilling offers significant advantages:
-
Enhanced Cooling: The constant flow of water effectively dissipates heat, preventing overheating and premature wear of the diamond bit. This is crucial for drilling through dense and hard materials where friction can quickly build up.
-
Extended Durability: By keeping the bit cool, wet drilling prolongs its lifespan, reducing the frequency of bit changes and costly downtime. The water lubrication minimizes friction, which in turn reduces wear on the diamond segments.
Safety Precautions for Wet Drilling
While wet drilling is generally safe, certain precautions should be taken:
-
Electrical Hazards: Ensure proper grounding of all electrical equipment to prevent electrical shocks. Water can conduct electricity, so extra caution is necessary.
-
Silica Dust: Drilling into concrete can generate silica dust, which is hazardous to health. Use a dust mask and provide adequate ventilation.
-
Water Contamination: The water used for wet drilling can become contaminated with debris and drilling fluids. Dispose of it properly to avoid environmental pollution.
Use Cases and Applications of Wet Drilling
Wet drilling is particularly suitable for applications where:
-
Precision is Paramount: Wet drilling enables accurate and clean cuts, making it ideal for tasks requiring high precision, such as drilling holes for electrical outlets or plumbing.
-
Hard Materials: Wet drilling excels in drilling through hard and abrasive materials, including concrete, stone, brick, and reinforced concrete.
-
Large Holes: The cooling effect of water allows for drilling larger holes with increased efficiency and reduced bit wear.
Wet drilling is a valuable drilling method that offers enhanced cooling and durability for precise hole creation. By utilizing a constant flow of water, wet drilling extends bit lifespan, improves drilling accuracy, and ensures safe and efficient drilling operations. When working with hard materials or requiring high precision, wet drilling is the preferred choice for professional drillers and DIY enthusiasts alike.
Hand Drilling: Manual Precision for Marble Drilling Mastery
In the world of marble drilling, hand drilling stands out as a technique that offers unparalleled precision and versatility. While machine drilling excels in efficiency and accuracy, hand drilling grants you the delicate touch and flexibility to navigate the intricacies of marble’s delicate surface.
Applications and Safety Guidelines for Hand Drilling
Hand drilling finds its niche in intricate projects such as tile installation, decorative carvings, and small-scale repairs. To ensure a safe and successful drilling experience, adhere to the following guidelines:
- Wear appropriate safety gear: Protective gloves, goggles, and a dust mask are essential to protect yourself from flying debris and dust.
- Secure the marble: Clamp the marble firmly in place to prevent slippage and ensure precise drilling.
- Use a sharp drill bit: Employ a sharp diamond drill bit specifically designed for marble to minimize the risk of chipping or damage.
Techniques for Effective Hand Drilling
Mastering the art of hand drilling involves the following techniques:
- Choose the right drill speed: Start with a low speed and gradually increase it as needed. Too high a speed can cause the drill bit to overheat and damage the marble.
- Apply even pressure: Maintain steady and consistent pressure throughout the drilling process. Excessive pressure can crack the marble, while too little pressure will not create a clean hole.
- Keep the drill bit cool: Use a water-based lubricant or cutting fluid to cool the drill bit and prevent premature wear. This will also minimize dust production.
- Drill at a slight angle: Hold the drill at a slight angle to the marble surface to reduce friction and improve chip removal.
- Drill slowly and carefully: Patience is key in hand drilling. Rushing the process can lead to errors and damage to the marble.
By following these guidelines and practicing the proper techniques, you can harness the precision and flexibility of hand drilling to create beautiful and precise holes in marble. Whether you’re a seasoned DIYer or a professional installer, embrace the artistry of hand drilling for your next marble project.
Machine Drilling: Unlocking Precision and Efficiency in Marble Drilling
When it comes to drilling through the elegant and delicate surface of marble, precision and accuracy are paramount. Machine drilling offers an unparalleled solution, providing effortless drilling with exceptional results. In this comprehensive guide, we will delve into the world of machine drilling, exploring its types, safety measures, benefits, and applications.
Types of Machine Drills and Safety Precautions
Machine drills come in various types, each designed for specific drilling tasks. Rotary drills are the most common, featuring a rotating motion that powers the drill bit. Hammer drills combine rotation with a hammering action, making them ideal for drilling through hard materials like concrete.
Safety precautions are crucial when operating machine drills. Always wear proper protective gear, including safety glasses, gloves, and earplugs. Secure the workpiece firmly to prevent movement during drilling. Ensure the drill bit is firmly secured in the chuck before operating the drill.
Benefits and Applications of Machine Drilling
Machine drilling offers numerous benefits:
- Precision: Machines provide unparalleled precision, allowing for precise hole placement and accurate angles.
- Efficiency: The mechanical action of the drill significantly speeds up the drilling process, saving time and effort.
- Versatility: Machine drills can accommodate a wide range of drill bit sizes and types, making them suitable for a variety of drilling tasks.
Machine drilling finds extensive application in various industries, including:
- Construction: Drilling holes for electrical wires, plumbing pipes, and HVAC systems.
- Renovation: Creating holes for new fixtures, cabinets, or shelves.
- Art and Design: Precision drilling for sculptures, mosaics, and intricate patterns.
Machine drilling is an essential technique for achieving precise and efficient holes in marble. By understanding the different types of machine drills, adhering to safety precautions, and leveraging their benefits, you can conquer any drilling challenge with confidence. Remember to select the appropriate drill bit size and type, secure the workpiece securely, and always prioritize safety. With these guidelines in place, you can harness the power of machine drilling to create stunning results in your marble drilling endeavors.
Marble Drilling Tips for Success
- Essential techniques, drilling speed, and pressure optimization
- Proper drilling angle and alignment
Marble Drilling: Unveiling the Secrets for Drilling Success
Drilling marble, a magnificent natural stone, requires precision and expertise. To help you achieve optimal results, we present a comprehensive guide to master the art of marble drilling. Embrace the following tips and techniques for a seamless drilling experience that will leave you with flawless holes.
Essential Drilling Techniques
- Slow and Steady Speed: Marble is a relatively soft stone, so avoid excessive force. Gradually increase the drilling speed as you feel the bit penetrating the material.
- Optimized Pressure: Apply firm yet controlled pressure to the drill. Too much pressure can chip or crack the marble, while too little will hinder progress.
- Lubrication: To minimize friction and heat buildup, use a water-based lubricant or drilling compound. This will also help clear away debris and prolong drill bit life.
- Maintain a Straight Angle: Hold the drill perpendicular to the surface of the marble. Even a slight deviation can result in misaligned or incomplete holes.
Drilling Angle and Alignment
- Measure and Mark: Before drilling, carefully measure and mark the desired hole location. Use a template or protractor to ensure accuracy.
- Proper Alignment: Position the drill bit precisely at the marked point. Check for plumb or level alignment, especially for deep holes.
- Stability: Use a drill stand or clamp to stabilize the drill and prevent wobbling or movement during the drilling process.
- Consistent Angle: Maintain a consistent angle throughout the drilling operation. This will prevent angled holes or uneven surfaces.
Marble Drilling Techniques: A Comprehensive Guide
Discover the art of marble drilling with this comprehensive guide that empowers you to tackle any project with confidence. We’ll delve into various drilling techniques, provide step-by-step instructions, and troubleshoot challenges to ensure your success.
Drilling Techniques for Marble
Marble, with its unique properties, requires specialized techniques to achieve precise and flawless results. From simple hole drilling to intricate patterns, we’ll cover it all.
Basic Hole Drilling: This fundamental technique involves choosing the right drill bit and maintaining proper speed and pressure. We’ll guide you through the process, ensuring accurate and efficient drilling.
Drilling Curves and Angles: Drilling curves and angles in marble requires precision and finesse. We’ll unveil techniques for maintaining the desired angle and executing complex curves with ease.
Drilling Patterns: Create stunning designs by following our comprehensive guide to drilling patterns. With step-by-step instructions, you’ll learn to execute intricate patterns and add a touch of elegance to your marble surfaces.
Template Drilling: Elevate your precision with template drilling. We’ll show you how to create templates and utilize them for accurate drilling, ensuring perfect alignment and consistent results.
Step-by-Step Instructions
To make the drilling process effortless, we provide detailed, step-by-step instructions for each technique. Follow our guidance and achieve professional-grade results even as a beginner.
Troubleshooting Challenges
Don’t let challenges deter you! Our guide includes a comprehensive troubleshooting section to help you overcome common hurdles and ensure a smooth drilling experience.
With this in-depth guide, you’ll master marble drilling techniques, creating beautiful and precise holes and designs. Whether you’re a seasoned pro or a novice, this comprehensive resource will empower you to transform your marble projects into masterpieces.
Drilling Speed and Pressure: Striking the Perfect Balance
Imagine stepping into the realm of marble artistry, where precision reigns supreme. As you wield your diamond drill, the dance between drilling speed and pressure becomes a delicate symphony, dictating the symphony of your masterpiece.
Factors Influencing the Harmony
Much like a conductor orchestrates a symphony, several factors harmonize to determine the optimal drilling speed and pressure:
- Drill Bit: The type, sharpness, and size of your drill bit significantly impact the necessary speed and pressure.
- Marble Characteristics: Different marble varieties possess unique hardness and density, demanding specific drilling parameters.
- Drilling Method: Whether drilling dry or wet affects the heat dissipation and thus the drilling speed and pressure.
- Desired Hole Quality: The desired hole finish and accuracy dictate a narrower range of speed and pressure settings.
The Impact on Marble
Striking the correct balance is crucial to avoid compromising the integrity of your marble.
- Excessive Speed: Rushing the drill can lead to chipping, burning, or cracking of the marble, marring the beauty of your creation.
- Insufficient Speed: Drilling too slowly can cause unnecessary friction and wear on the drill bit, reducing its lifespan.
- High Pressure: Applying excessive pressure can shatter the marble, rendering your efforts futile.
- Light Pressure: Insufficient pressure may result in inefficient drilling, prolonging the process and potentially damaging the drill bit.
Optimization Guidelines
To achieve an exquisite masterpiece, follow these optimization guidelines:
- Start with slower speeds and gradually increase them as needed.
- Apply moderate pressure, allowing the drill bit to do its work without undue force.
- Monitor the drill bit’s temperature to prevent overheating and damage.
- Adjust speed and pressure according to the marble’s hardness and the desired hole quality.
- Use a lubricant (such as water or oil) during wet drilling to dissipate heat and extend the drill bit’s lifespan.
Drilling Angle and Alignment: Precision Hole Placement
Maintaining the correct drilling angle and alignment is crucial for precise hole placement. Whether you’re working on delicate marble or sturdy concrete, accuracy is paramount.
Techniques for Maintaining Proper Angle and Alignment
- Use a level: Place a level against the surface to ensure that your drill is perpendicular or at the desired angle.
- Measure and mark: Mark the exact location of the hole and use a measuring tape to align the drill.
- Use a drill guide: Attach a drill guide to the drill to provide a stable and accurate path.
- Hold the drill steady: Grip the drill firmly and apply even pressure to avoid deviations.
Importance of Accuracy and Common Drilling Errors
Accuracy ensures:
- Holes are drilled in the intended location.
- Holes are consistent in depth and shape.
- Projects are completed successfully and professionally.
Common drilling errors:
- Insufficient alignment: Can lead to misaligned holes.
- Improper angle: Can result in slanted or tilted holes.
- Inconsistent depth: Can compromise the strength and integrity of the hole.
- Chipping or breaking: Occurs when the drill bit is misaligned or not sharp enough.
By carefully maintaining the correct drilling angle and alignment, you can achieve precision holes that enhance the quality and appearance of your projects.
Dust Control: Ensuring a Safe and Clean Work Environment
In the realm of marble drilling, dust control plays a crucial role in safeguarding the well-being of workers and maintaining a healthy work environment. Marble dust, when inhaled, poses significant health risks, including respiratory problems, silicosis, and even cancer.
Effective dust control measures are paramount to mitigate these hazards.
One key method is the use of water as a coolant. When drilling with diamond bits, a steady stream of water flushes away dust particles, preventing them from becoming airborne. Wet drilling not only suppresses dust but also prolongs the lifespan of diamond drill bits by reducing friction and heat buildup.
Another effective solution is the use of dust collection systems. These systems employ powerful vacuums to capture dust at the source, before it has a chance to spread. Regular maintenance of these systems, including filter cleaning, is essential for optimal performance.
Personal protective equipment (PPE) is indispensable for drillers’ safety. Wearing respirators with HEPA filters effectively blocks the inhalation of harmful dust particles. Additionally, gloves and eye protection minimize skin and eye irritation.
Regular ventilation is another vital aspect of dust control. Opening windows or using industrial fans ensures proper air circulation, diluting dust concentrations in the workspace. Keeping the work area clean by regularly sweeping or vacuuming further reduces dust buildup.
By adhering to these dust control measures, marble drilling operations can create a safe and healthy work environment, safeguarding the well-being of workers and ensuring their long-term health.
Drilling Patterns: Customizing Hole Arrangements
In the realm of marble drilling, precision and customization are paramount. Drilling patterns play a pivotal role in achieving intricate hole arrangements tailored to specific requirements.
Techniques for Creating Drilling Patterns
Crafting drilling patterns requires an understanding of various techniques. One method involves using a grid system, creating evenly spaced rows and columns of holes. For circular patterns, a compass or stencil can guide the drill bit, ensuring holes are consistently spaced around a central point. Freehand drilling allows for the creation of unique and organic patterns, but requires a keen eye and steady hand.
Planning and Execution of Complex Patterns
Complex drilling patterns demand meticulous planning and execution. Firstly, visualize the desired pattern and mark the drill points with a template or pencil. Use a laser level to ensure holes are aligned vertically or horizontally as required. Drill pilot holes first to guide the larger drill bit, preventing deviations. Patience and precision are key during this stage to ensure the accuracy and integrity of the pattern.
By mastering these techniques, you can customize marble surfaces with an array of drilling patterns, from simple grids to elaborate artistic designs. With careful planning and execution, these patterns transform ordinary marble into a canvas for creativity and precision.
Template Drilling: Precision Without Guesswork
In the world of marble drilling, precision is paramount. Template drilling offers a foolproof solution, providing you with the accuracy and efficiency you need to achieve flawless results.
Benefits of Template Drilling
Templates eliminate the guesswork and inconsistencies that can plague freehand drilling. They provide an exact guide, ensuring that every hole is drilled in the intended location, spacing, and angle. This precision is crucial for complex drilling patterns, intricate designs, and ensuring the seamless fit of fixtures and fittings.
How to Create and Use Templates
Creating a template is relatively straightforward. Start by drawing your desired drilling pattern on a piece of paper or cardboard. Cut out the shape and place it over the marble surface. Secure the template firmly using clamps or double-sided tape.
Tips for Accurate and Efficient Template Drilling
- Use sharp drill bits: Dull bits can slip and damage the template, leading to imprecise holes.
- Follow the template meticulously: Carefully align the drill bit with the template holes to avoid deviation.
- Apply consistent pressure: Maintain firm but gentle pressure on the drill to prevent the bit from wandering off course.
- Drill slowly and steadily: Rushing the process can result in chipped edges or damage to the marble.
- Check alignment regularly: Periodically lift the drill and check the bit’s position relative to the template to ensure accuracy.
By adhering to these guidelines, you can harness the power of template drilling to achieve precise and professional-looking results every time you drill into marble.
Marble Drill Bit Sizes: Selecting the Right Tool for the Job
When working with marble, selecting the right drill bit size is crucial to ensure a clean, precise, and successful outcome. Drill bit sizes vary greatly, and understanding the factors that influence their selection will empower you to make an informed choice that aligns with your specific requirements.
Factors to Consider:
When choosing a drill bit size, several key factors come into play:
- Hole Diameter: Determine the desired diameter of the hole you need to make. Drill bits are typically sized according to the hole diameter they produce.
- Material: Different materials require different drill bit materials and sizes. Marble, being a relatively soft material, requires special diamond or carbide-tipped drill bits.
- Drilling Method: Consider the drilling method you plan to use, whether it’s hand drilling, machine drilling, or dry or wet drilling. Different methods may necessitate different drill bit sizes.
- Depth of Cut: The depth of the hole you need to drill will also influence drill bit selection. Longer holes may require longer drill bits or special extension bits.
Guidelines for Selection:
To select the appropriate drill bit size, follow these guidelines:
- Precise Measurement: Measure the desired hole diameter with accuracy using a measuring tape or caliper.
- Match Diameter: Choose a drill bit that produces a hole slightly larger than your measurement to account for any irregularities or variations in the drilling process.
- Correct Drill Type: Select a diamond or carbide-tipped drill bit specifically designed for drilling marble.
- Consider Drilling Method: If using a hand drill, choose a smaller drill bit, typically ranging from 6mm to 12mm. For machine drilling, larger bits can be used, up to 25mm or more.
- Shallow vs. Deep Holes: For shallow holes, shorter drill bits are suitable. For deep holes, use longer drill bits or extension rods.
Remember, the right drill bit size can significantly impact the quality and efficiency of your drilling project. By carefully considering the factors discussed above and following the recommended guidelines, you’ll be able to select the optimal drill bit size for your specific marble drilling needs.