Comprehensive Guide To Adding Transmission Fluid: Step-By-Step For Vehicle Maintenance
This guide provides a step-by-step process for adding transmission fluid. It includes essential tools, safety precautions, locating the dipstick, checking the level, adding fluid, and checking for leaks. Each step is described with clear instructions and safety measures to ensure proper handling and maintenance of your vehicle’s transmission system.
Essential Tools and Materials for Adding Transmission Fluid
Maintaining optimal transmission fluid levels is crucial for the smooth functioning of your vehicle. Whether you’re an experienced mechanic or a first-time DIYer, having the right tools and materials on hand is essential. Here’s a comprehensive list to ensure you’re well-equipped for this task:
Wrenches
- Combination wrench: A versatile tool that combines open-end and box-end attachments, providing both grip and leverage.
- Socket wrench: Provides more torque and precision when tightening or loosening bolts in confined spaces.
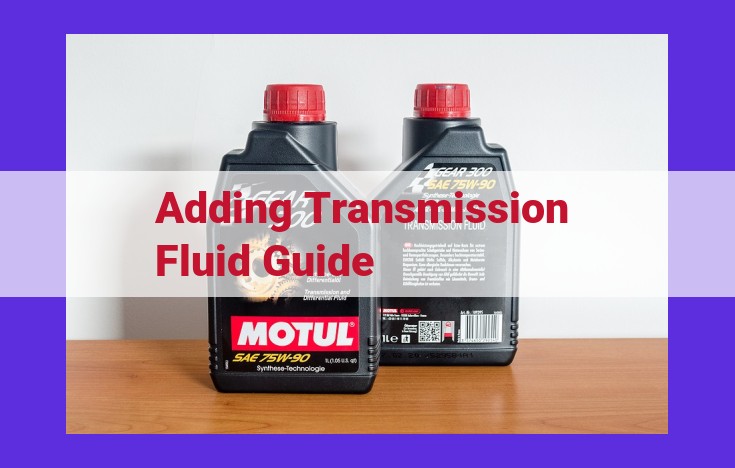
Transmission Fluid
- Type and viscosity: Consult your vehicle’s owner’s manual for the recommended transmission fluid type and viscosity.
- Quantity: Estimate the amount needed by checking the transmission fluid dipstick and noting the difference between the current level and the “Add” mark.
Funnel
- Long-necked funnel: A narrow, elongated funnel that allows for precise fluid pouring into the transmission.
Gloves
- Nitrile gloves: Protect your hands from contact with the transmission fluid, which can be harmful to skin.
Safety First: Essential Precautions When Handling Transmission Fluid
When dealing with transmission fluid, prioritizing safety is paramount. This amber-colored liquid plays a crucial role in the smooth operation of your vehicle, providing lubrication and cooling for the transmission gears. However, mishandling this fluid can pose risks to your health and safety.
Protective Gear: Eye Protection and Gloves
Transmission fluid can irritate the eyes upon contact. Always wear safety glasses when working near the transmission or engine compartment to prevent any potential splashes. Additionally, chemical-resistant gloves are recommended to protect your hands from skin irritation.
Ventilation: Keep it Airy
Transmission fluid carries a distinct odor that can be overpowering and even toxic if inhaled in large quantities. Ensure adequate ventilation in the area where you’re working. Open windows, turn on fans, or use a ventilation system to circulate fresh air and minimize exposure to fumes.
Chemical Handling: Respect the Fluid
Transmission fluid contains chemicals that can be harmful if not handled properly. Avoid direct skin contact and do not ingest the fluid. If any spillage occurs, promptly wipe it up with a cloth and dispose of the waste responsibly. Always refer to the vehicle’s owner’s manual for specific guidelines on safe handling and disposal.
Remember, safety should always be your top priority. By following these precautions, you can safely and effectively maintain your vehicle’s transmission, ensuring optimal performance and longevity.
Locating the Transmission Dipstick: A Guide for Every DIYer
Finding the transmission dipstick is crucial for checking and adding transmission fluid, ensuring your vehicle’s smooth operation. Here’s a detailed guide to help you locate it with ease:
Under the Vehicle
- Step 1: Park your vehicle on a level surface.
- Step 2: Locate the transmission pan under the vehicle. It’s typically a metal pan located near the rear of the engine.
- Step 3: Inspect the transmission pan for an extension or tube. This is where the dipstick is usually attached.
In the Engine Compartment
- Step 4: Open the hood of your vehicle.
- Step 5: Look for a bright-colored handle or pull with a transmission fluid label near the engine.
- Step 6: The handle or pull is attached to the dipstick. Gently pull it out of its tube.
Identification
Once you have the dipstick in your hand, check its end. It will have markings or a crosshatched area that indicates the fluid level.
Now you have successfully located the transmission dipstick! Remember to consult your vehicle’s user manual for specific instructions for your make and model.
Checking the Transmission Fluid Level:
Maintaining the proper transmission fluid level is crucial for ensuring the smooth operation and longevity of your vehicle. Here’s a step-by-step guide on how to check it accurately:
Locate the Transmission Dipstick:
- Park your vehicle on a flat surface and turn off the engine.
- Open the hood and identify the transmission dipstick. It’s usually located near the back of the engine compartment and has a brightly colored handle or cap.
Extract and Inspect the Dipstick:
- Pull out the dipstick and wipe it clean with a rag.
- Reinsert the dipstick fully into the transmission fluid reservoir.
- Pull it out again and inspect the fluid level.
Reading the Dipstick:
The dipstick will have two marks: “Full” and “Add”. The fluid level should be between these marks. If it’s below the “Add” mark, you need to add more fluid. Never overfill the transmission.
Inspecting Fluid Condition:
- Check the color of the fluid. New transmission fluid is typically red or pink. As it ages, it may turn brown or black. If the fluid is very dark or discolored, it may indicate a problem and should be replaced.
- Smell the fluid. If it has a burnt smell, it may indicate overheating or internal transmission issues.
- Look for debris. If you see metal shavings or other particles on the dipstick, it could suggest a more serious problem requiring professional attention.
Maintaining Proper Fluid Level:
If the transmission fluid is low, add the specified type of fluid slowly using a funnel. Avoid overfilling, as this can damage the transmission. Check the fluid level again after adding it and ensure it’s within the correct range.
Adding Transmission Fluid:
- Provide step-by-step instructions on how to add transmission fluid, including selecting the correct viscosity and avoiding overfilling.
How to Add Transmission Fluid: A Step-by-Step Guide
Maintaining optimal transmission fluid levels is crucial for your vehicle’s smooth operation and longevity. If you notice any signs of low transmission fluid, such as slipping gears, delayed shifting, or strange noises, it’s time to add some more. Here’s a step-by-step guide to help you add transmission fluid safely and effectively:
Step 1: Gather Essential Tools
Before you begin, gather the necessary tools:
- Wrenches
- Transmission fluid (check your vehicle’s manual for the recommended type and viscosity)
- Funnel
- Gloves
Step 2: Safety Precautions
- Wear eye protection and gloves.
- Ensure adequate ventilation in your workspace.
- Handle transmission fluid carefully, as it can cause irritation or harm if ingested or inhaled.
Step 3: Locate the Transmission Dipstick
- Park your vehicle on a level surface.
- Locate the transmission under the vehicle.
- Find the dipstick in the engine compartment, usually attached to the side of the transmission.
Step 4: Check the Transmission Fluid Level
- Pull out the dipstick and wipe it clean.
- Reinsert the dipstick fully into the tube.
- Pull it out again and check the fluid level. It should be between the “Full” and “Add” marks. If it’s below the “Add” mark, you need to add fluid.
Step 5: Add Transmission Fluid
- Select the correct transmission fluid viscosity for your vehicle.
- Use a funnel to carefully pour the fluid into the transmission dipstick tube.
- Avoid overfilling. Check the fluid level regularly as you add fluid.
Step 6: Check for Leaks
- After adding fluid, start the engine and let it idle for a few minutes.
- Park the vehicle on a level surface and inspect the transmission pan gasket and the transmission itself for any signs of leaks or fluid residue. If you notice any leaks, have them repaired immediately.
By following these steps, you can confidently add transmission fluid to your vehicle and ensure its smooth and efficient operation. Remember to check the transmission fluid level regularly and inspect for leaks to maintain optimal performance.
Checking for Leaks: Detecting Transmission Issues
After adding transmission fluid, it’s crucial to check for leaks to ensure the system is functioning optimally. Leaks can lead to fluid loss and potential transmission damage, so early detection is essential.
Inspecting the Transmission Pan Gasket
The transmission pan gasket seals the junction between the pan and the transmission. A damaged or worn-out gasket can allow fluid to seep out. To check the gasket, locate the transmission pan beneath the vehicle and look for signs of fluid residue or leaks around its edges.
Examining the Transmission
Oltre the transmission pan, inspect the entire transmission for any leaks or fluid residue. Look for darkened areas or drips on the casing or surrounding components. Use a flashlight to illuminate dimly lit areas and check for any signs of fluid seepage.
Identifying Leaks
Transmission fluid leaks are typically red or brown in color. If you observe any fluid residue or drips, it’s essential to determine the source of the leak accurately. Clean the affected area and monitor it for further leaks. Note the location and severity of the leak to help a mechanic diagnose and repair the issue promptly.