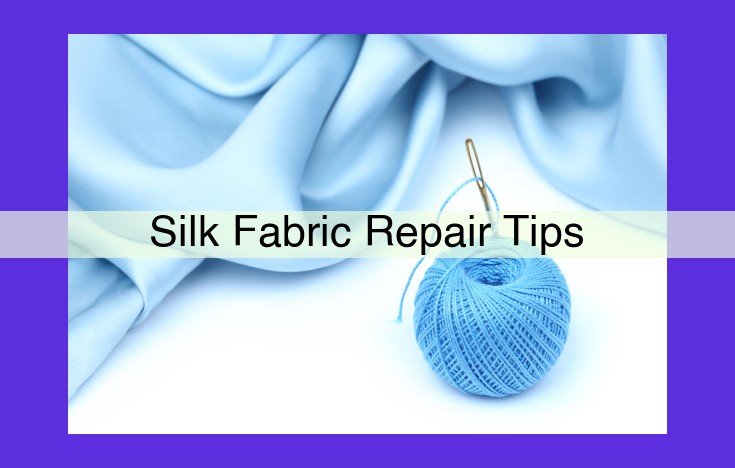
Ultimate Guide To Repairing Delicate Silk Fabrics: Step-By-Step Instructions
To repair delicate silk fabrics effectively, assess damage, gather mending supplies, and clean the fabric. Choose appropriate adhesives, needles, and threads for specific repairs. Utilize stitching techniques for secure mending. Reinforce and patch for strength and seamless blending. Test repairs for durability. Store silk fabrics properly to maintain their longevity.
Assessing Damage: Identify and Classify Repair Needs
- Explain the importance of carefully inspecting the silk fabric to determine the extent and nature of the damage.
- Guide readers on how to identify different types of damage, such as tears, snags, and stains.
Assessing Silk’s Delicate Embrace: Unveiling and Categorizing Damage
In the realm of textiles, silk stands apart with its unparalleled beauty and luxurious drape. However, its delicate nature necessitates meticulous care to preserve its pristine condition. Should your beloved silk garment suffer damage, it’s crucial to embark on a voyage of assessment and classification to determine the best course of action.
Identifying the Wounds
Before you embark on the journey of repair, a thorough inspection is paramount. Carefully scrutinize the silk fabric, paying close attention to its texture, color, and any visible imperfections. Tears, snags, and stains are the most common types of damage you may encounter.
Tears: A Rude Disruption
Tears, those sudden partings of fabric, disrupt the delicate balance of silk’s structure. They may occur due to accidental snags or excessive tension.
Snags: An Unwelcome Hitch
Snags, caused by catching on rough surfaces, leave behind loose threads that compromise the fabric’s integrity. They can be subtle or conspicuous, marring the silk’s smooth surface.
Stains: Unwanted Guests
Stains, the unwelcome blemishes on silk, can arise from spills, food, or bodily fluids. Their composition and severity vary, posing a unique challenge for removal and repair.
Classifying Silk’s Woes
Once you have identified the types of damage, it’s time to classify their extent and location. Minor tears, for instance, require less intricate mending than extensive rips. Similarly, superficial snags can be easily concealed, while deep snags may need more involved stitching. Understanding the severity of the damage will guide your choice of repair techniques and materials.
Essential Materials: Gathering Supplies for Silk Repair
When it comes to mending delicate silk fabrics, having the right tools and materials at hand is crucial for a successful and long-lasting repair. Here’s a comprehensive guide to the essential supplies you’ll need, along with their specific features and purposes.
Adhesives: The Glue of Silk Repairs
Adhesives are essential for mending torn or ripped silk fabrics. Choose an adhesive specifically designed for silk, as these are formulated to bond strongly without damaging the delicate fibers. Silk glue is a popular choice, offering flexibility and a clear, invisible finish. Alternatively, fabric glue can be used, but it’s important to test it on a small, inconspicuous area first to ensure it doesn’t stain or discolor the silk.
Patches: Reinforcement and Concealment
For larger tears or holes in silk, patches are a great option for both reinforcing the repair and concealing it seamlessly. Silk patches are specifically designed to match the texture and weight of silk fabrics, ensuring a smooth and subtle blend. You can also use sheer fabric patches for a more lightweight and invisible repair.
Thread and Needles: The Precision Tools
Fine silk thread is indispensable for stitching silk repairs. Choose a thread that matches the color and thickness of the fabric to make the mend less noticeable. Sharp needles are also essential, as they minimize the risk of snagging or tearing the delicate silk fibers. Look for silk needles with a fine point and a small eye to easily pass through the fabric without causing damage.
Miscellaneous Tools: The Helping Hands
In addition to the main materials, a few miscellaneous tools can make the repair process easier and more efficient. Tweezers are helpful for handling small patches or threads, while scissors with sharp, fine blades are essential for precise cutting. A seam ripper can be useful for removing old stitches or excess adhesive. And don’t forget a magnifying glass or headlamp for close-up work, especially on intricate repairs.
Silk Cleaning: Preparing the Fabric for Pristine Repairs
When it comes to restoring your beloved silk garments, thorough preparation is paramount. Cleaning the fabric before any repairs is crucial to ensure optimal results and prevent further damage.
Choosing the Right Cleaning Agents
Silk’s delicate nature demands gentle treatment. Use only mild, pH-neutral detergents specifically designed for silk. Avoid using harsh chemicals, such as chlorine or bleach, which can weaken or discolor the fibers.
Handwashing vs. Dry Cleaning
Handwashing is the preferred method for cleaning silk. Fill a basin with lukewarm water and add a small amount of detergent. Gently agitate the fabric for a few minutes, avoiding wringing or twisting. Rinse thoroughly with cold water until the water runs clear.
For dry cleaning, choose a reputable cleaner who specializes in delicate fabrics. Ensure they use a gentle solvent and understand the specific care requirements for silk.
Silk’s Sensitivity to Heat
Heat can damage silk, so handle it with care during the cleaning process. Wash in cold water and avoid using hot water or high heat in the dryer. If ironing is necessary, use a low heat setting with a silk press cloth.
Additional Care Tips
- Test the cleaning solution on an inconspicuous area of the garment to ensure it does not cause discoloration.
- Always pat the fabric dry with a clean towel to avoid stretching.
- Hang silk garments to air dry away from direct sunlight, as UV rays can damage the fabric.
- Store silk in a cool, dry place protected from light and moisture.
Mending Adhesives: The Key to Effective Silk Repairs
When it comes to repairing delicate fabrics like silk, choosing the right adhesive is crucial for a successful and long-lasting mend. In this comprehensive guide, we’ll delve into the world of mending adhesives, empowering you to make well-informed decisions and achieve professional-quality repairs.
Types of Mending Adhesives for Silk
There’s a wide range of mending adhesives available, each designed for specific damage types and silk fabrics. Here’s a closer look at the most common options:
- Fabric Glue (Liquid Adhesive): Ideal for tears, rips, and bonding patches. Choose adhesives specifically formulated for delicate fabrics like silk.
- Hem Tape (Iron-On Adhesive): Perfect for hemming and reinforcing seams. Heat-activated adhesives create a durable bond that withstands repeated wear and tear.
- Fabric Webbing (Adhesive Strip): This strong, flexible material is great for reinforcing and mending large areas of damage.
- Seaming Tape (Water-Soluble Adhesive): A temporary adhesive that holds fabric pieces in place while you sew or machine-stitch. Removes easily with water.
Choosing the Right Adhesive for the Job
Matching the adhesive to the damage type is essential. Consider the size, location, and severity of the tear or repair. For small tears and ripped seams, a liquid adhesive or hem tape is often sufficient. For larger areas of damage, fabric webbing provides stronger reinforcement. Seaming tape is a great option for temporary bonding while stitching.
Step-by-Step Guide to Applying Mending Adhesives
- Clean the Fabric: Before applying adhesive, gently clean the affected area to remove dirt and debris.
- Apply the Adhesive: Use a small brush or needle to apply the adhesive to the damaged area. Be precise and follow the manufacturer’s instructions for coverage and drying time.
- Hold or Press: Firmly hold the repaired area together for the recommended bonding time. Use weights or clips if necessary.
- Flatten and Smooth: Once the adhesive is bonded, flatten and smooth the repaired area with a warm iron or fingertip. This helps to set the adhesive and create a seamless finish.
Tips for Flawless Silk Repairs
- Always test the adhesive on a small, inconspicuous area first to ensure compatibility and colorfastness.
- Use small amounts of adhesive and allow it to dry completely before adding pressure.
- If the adhesive dries too quickly, apply a small amount of water or heat to soften it.
- For invisible repairs, choose adhesives that match the color and texture of the fabric.
- Handle the repaired silk with care during drying and storage to avoid disturbing the mend.
Needles and Threads: The Art of Mending Silk
When it comes to mending delicate silk fabrics, choosing the right needles and threads is paramount. Fine needles designed specifically for silk ensure you can work with precision without damaging the fabric. Similarly, silk threads that match the color and texture of your garment will blend seamlessly with the repair, making it virtually invisible.
Stitch to Perfection
Once you’ve selected the appropriate tools, it’s time to master the art of stitching techniques. Backstitching involves retracing your stitches, creating a strong and secure seam that won’t unravel easily. Whip stitching is another versatile technique used to sew on patches or reinforce torn edges, providing a neat and professional finish.
Patience and Precision
Mending silk requires patience and precision. Take your time, carefully following the contours of the fabric to ensure the repair is both durable and aesthetically pleasing. Don’t be afraid to experiment with different stitch lengths and tensions until you find the perfect combination for your project.
Tips for Success
- Always use a sharp needle to avoid snagging or tearing the fabric.
- Knot your thread securely before and after stitching to prevent unraveling.
- If the damage is extensive, consider using a patch or darning technique to reinforce the area and conceal the mend.
- Once the repair is complete, test its strength by gently tugging on the fabric. If it feels secure, you’ve done an excellent job!
Reinforcement and Patchwork: Strengthening and Blending Repairs
In the delicate art of silk mending, reinforcement and patchwork play a pivotal role in ensuring the sturdiness and aesthetic appeal of restored fabrics. After meticulously assessing the damage and executing the initial repair, it’s crucial to take the extra step of reinforcing the mended area. This not only enhances the durability of the repair but also provides a seamless transition between the mended and undamaged sections.
There are several techniques for reinforcing silk repairs. One effective method is to apply a layer of adhesive or interfacing to the reverse side of the mended area. This provides a sturdy foundation that supports the repair and prevents it from weakening over time. Another reinforcement technique involves stitching the mended area to an adjacent area of the fabric. This creates a stronger bond and distributes the stress away from the repair.
Patchwork is another essential technique in the realm of silk mending. It involves the use of a patch of silk fabric to cover and blend the repaired area. Invisible mending is a masterful patching technique that involves using a patch of fabric similar to the original silk. The patch is carefully sewn in place, and the stitches are concealed within the existing weave of the fabric. This technique produces a virtually invisible repair that restores the fabric’s original appearance.
Darning is another patching technique that can be employed to mend silk fabrics. This involves using a needle and thread to weave a web of stitches over the damaged area. The resulting repair is both durable and aesthetically pleasing, creating a subtle yet effective blend with the surrounding fabric.
By incorporating reinforcement and patchwork techniques into your silk mending repertoire, you can elevate the durability and beauty of your restored fabrics. These techniques ensure that your mended silks will stand the test of time while maintaining their original charm.
Repair Testing and Evaluation: Ensuring Strength and Durability
- Guide readers on how to test the durability of the repair by applying stress or tension to the mended area.
- Encourage inspection for any signs of weakness or unraveling to ensure the repair is robust and long-lasting.
Repair Testing and Evaluation: Ensuring Strength and Durability
After meticulously completing your silk repair, it’s essential to evaluate its resilience. Silk is renowned for its delicate nature, so ensuring a robust and durable repair is crucial.
Begin by applying gentle stress or tension to the mended area. Stretch the fabric slightly in different directions to check for any signs of weakness or unraveling. If the repair holds strong, you’re on the right track.
Next, inspect the repair thoroughly. Look for any loose threads or imperfections. These minor issues can weaken the overall repair over time. It’s better to address them now than to face unexpected tears or snags in the future.
By conducting thorough testing and evaluation, you can ensure that your silk repair will withstand the test of time. A well-executed repair will restore your silk fabric to its former glory, allowing you to cherish it for many years to come.
**Silk Storage: Preserving the Beauty of Repaired Silk Fabrics**
After meticulously mending your precious silk garment or accessory, it’s essential to ensure its longevity and maintain its pristine beauty. Proper storage plays a pivotal role in preserving the integrity of your repaired silk masterpieces.
Choosing the Ideal Storage Environment
Silk fabrics thrive in a cool and dry atmosphere. Extreme temperatures and humidity can wreak havoc on the delicate fibers. Opt for a well-ventilated area away from direct sunlight, as UV rays can fade and damage the fabric.
Protective Measures for Delicate Silks
To protect your silk from dust and other environmental factors, consider using acid-free paper or tissue to wrap the garments or accessories. These materials are designed to prevent acid migration and preserve the delicate fibers.
Folding and Packing Techniques
When folding silk fabrics, avoid sharp creases or tight folds as they can damage the fibers. Instead, gently roll the items or store them flat in a drawer lined with acid-free paper.
Essential Precautions
To further safeguard your precious silks, consider the following precautions:
- Keep them away from moths and other insects that may damage the fabric.
- Avoid using wire hangers as they can rust and stain the silk.
- If you need to wash the fabrics again, always use specialized silk detergents and hand-wash them gently.
By following these simple storage tips, you’ll ensure that your repaired silk treasures remain vibrant and pristine for generations to come, preserving the memories and beauty they hold.